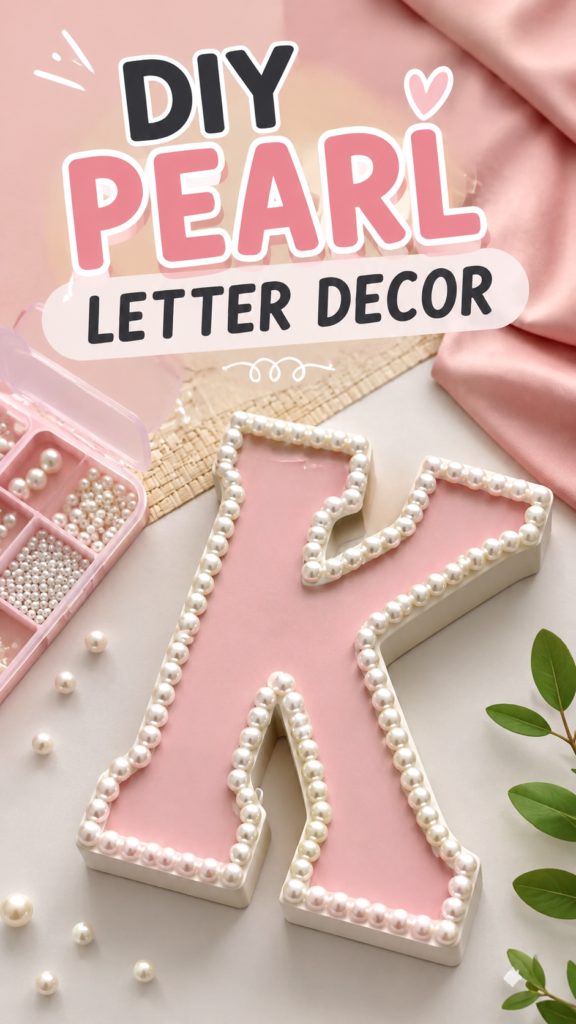
Cute DIY room decor can transform an ordinary space into something personal, cozy, and completely your own. One of the sweetest ideas is a decorative letter covered with pearl beads and finished with a soft pastel pattern. This kind of project combines simple craft materials with a polished aesthetic, making it an easy way to decorate a bedroom, vanity, desk, shelf, or cozy corner without needing complicated crafting skills.
The soft pink-and-white palette, glossy pearl details, and oversized letter shape create a charming look that feels feminine, playful, and elegant at the same time. Whether you want to personalize your room with an initial, create a thoughtful handmade gift, or simply try a fun weekend craft, DIY pearl letter decor is an idea worth saving.
Key Takeaways
- A decorative letter can become a beautiful focal point for a bedroom or desk.
- Pearl beads add texture, shine, and an elegant handmade finish.
- Pastel paper or cardstock creates a soft and cozy aesthetic.
- The design can be personalized with initials, names, colors, and patterns.
- This DIY room decor idea works well for shelves, vanities, desks, and bedside areas.
- Small decorative details can make a room feel much more intentional and personal.
Why DIY Pearl Letter Decor Works So Well
The appeal of this project comes from its simplicity. Instead of filling a room with numerous decorations, one personalized piece can communicate style while also adding visual interest. A large letter immediately catches the eye, while the pearl border gives it a finished appearance that feels more decorative than an ordinary paper craft.
The combination of pastel stripes and pearl embellishments is particularly effective because the two elements balance each other. The striped surface provides color and pattern, while the rounded beads create dimension around the edges. Together, they turn a flat letter shape into a statement piece.
This is also a flexible idea for cute DIY room decor because it does not depend on one particular interior style. It can fit into a pastel bedroom, a soft minimalist space, a creative craft corner, or a playful vanity setup. Changing the base color and embellishments can completely alter the final appearance.
Important: The most successful personalized room decor does not have to be complicated. A simple letter, a coordinated color palette, and carefully placed embellishments can create a polished result while keeping the project approachable for beginners.
Materials for a Cute DIY Room Decor Project
You can adapt the materials to whatever supplies you already have. The basic concept only requires a sturdy letter shape, a decorative surface, pearl beads, and an adhesive suitable for craft projects.
- A large cardboard, foam board, or lightweight wooden letter
- Pastel patterned paper or cardstock
- Small pearl beads or faux pearl embellishments
- Craft glue or another suitable adhesive
- Scissors or a craft knife for trimming paper
- A ruler for measuring and creating clean edges
- A pencil for marking placement
- A clean work surface for assembling the project
The image-inspired approach uses pale pink and white tones, but you do not need to copy that palette. Cream, lavender, baby blue, sage green, peach, or neutral beige can work beautifully too. The key is choosing colors that complement the room where the finished piece will be displayed.
Choosing the Right Letter
Start by selecting a letter that has a shape you enjoy working with. Initials are an obvious choice, but you can also create several letters to spell a short word or name. A larger letter gives you more space for decorative details, while a smaller version can work nicely on a shelf, desk, or vanity.
Look for a sturdy base that will remain reasonably flat during the decorating process. A strong structure makes it easier to attach the paper and position the beads around the edges without the letter bending or losing its shape.
Picking a Decorative Color Palette
A coordinated color palette can make even a simple craft look professionally styled. Soft pink and white create the delicate appearance seen in the inspiration, while neutral shades can produce a more understated version. If your room already has a strong color scheme, use one or two existing colors so the finished letter feels naturally connected to the space.
How to Make a Pearl-Trimmed Decorative Letter
The project is easiest when you work in layers. First prepare the letter, then add the patterned surface, and finally finish the edges with pearl beads. Taking your time with each stage will give you cleaner lines and a more balanced result.
1. Prepare the Letter Base
Place the letter on a clean surface and check that the edges are smooth enough to decorate. If the base has rough sections, gently tidy them before continuing. A clean foundation makes every later step easier.
Before applying anything permanently, place your decorative paper over the letter to understand how much material you need. This simple test can help you avoid unnecessary trimming and lets you see how the pattern will sit across curves, corners, and openings.
2. Add the Patterned Surface
Cut the pastel paper slightly larger than the surface of the letter. Apply it carefully, smoothing from one area to another so the finished surface stays neat. If the letter has a complicated shape, work gradually rather than trying to cover every section at once.
For a striped look, vertical lines create a clean visual rhythm and can make the letter appear taller. Horizontal stripes, tiny checks, polka dots, florals, or solid pastel colors can produce completely different styles while maintaining the same basic craft concept.
3. Plan the Pearl Border
Before gluing the beads, arrange a few along the outer edge of the letter. This gives you an idea of spacing and helps you determine whether the beads are the right size. A consistent bead size usually creates the cleanest border.
Pay special attention to corners and narrow sections. These areas may require slightly more careful placement because the beads need to follow the shape without looking crowded.
4. Attach the Pearl Beads
Apply adhesive in small sections rather than covering the entire letter at once. Place the beads one by one along the border, keeping the spacing as consistent as possible. Working slowly is worthwhile because the border is one of the most noticeable details of the finished piece.
Once the outer edge is complete, inspect the letter from different angles. Replace any beads that appear uneven and allow the adhesive to set according to its instructions before moving the decoration.
Pro Tip: Keep a small group of extra pearl beads nearby while decorating. Having extras makes it easier to maintain a consistent border if you need to replace a bead or adjust spacing around a difficult corner.
Ways to Personalize Your DIY Room Decor
The beauty of handmade room decor is that personalization is built into the project. Your letter does not have to look exactly like another craft. In fact, changing just a few details can make it feel much more connected to your personality and room.
Try Different Bead Styles
Classic white pearl beads create an elegant effect, but you can experiment with translucent beads, pastel beads, small rhinestones, or mixed embellishments. For a subtle appearance, choose decorations close to the base color. For more contrast, select beads that stand out clearly against the paper.
Change the Pattern
Stripes are only one possibility. A floral print can create a romantic look, while tiny dots can make the letter feel playful. A marbled pattern works well for a modern room, and a plain pastel surface can keep the design minimal.
Create a Matching Set
Instead of decorating just one letter, consider creating a small collection. Several initials can be arranged across a shelf or desk, while matching letters can be combined with other handmade decorations. Keeping the same paper palette and pearl trim across multiple pieces creates a cohesive display.
Why This Matters
Personalized decor works best when it reflects the person and the room. Rather than adding decoration simply to fill an empty space, choose a letter, pattern, or color that has a purpose. This makes the final display feel intentional instead of cluttered.
Where to Display a Pearl Letter
A decorative letter can be surprisingly versatile. Its size and shape make it suitable for several areas around the home, especially spaces where small personalized details add warmth.
- Bedroom shelf: Use the letter as a soft focal point among books, small accessories, or framed artwork.
- Desk area: Place it beside stationery, storage boxes, or other creative supplies.
- Vanity: A pearl-trimmed initial can complement a soft, feminine vanity setup.
- Bedside table: A smaller letter can add personality without taking up much space.
- Craft corner: Display the finished project alongside other handmade decorations.
- Open shelving: Combine the letter with neutral objects for a layered decorative arrangement.
When arranging the finished piece, avoid surrounding it with too many competing patterns. Because the pearls already provide texture and the paper may include stripes or another print, a few simple supporting objects can help the letter remain the star of the display.
How to Make the Finished Display Look Polished
A polished room decor arrangement is often less about expensive materials and more about repetition. Repeat one or two colors from the letter in nearby objects. If the letter uses pink, introduce a small amount of pink through fabric, stationery, a tray, or another accessory rather than adding many unrelated colors.
Texture is another useful design tool. The smooth paper contrasts with rounded pearls, while soft fabric can introduce another tactile layer. This creates a visually rich display without requiring a large number of decorative objects.
You can also use height to make the arrangement more interesting. Place the letter beside objects of different sizes, but keep enough open space around it so the shape remains easy to recognize.
Keep the Color Palette Consistent
Soft colors are especially effective for cute DIY room decor because they create a calm, approachable appearance. However, the same principle works with bolder shades. Choose a small palette and repeat those colors throughout the display for a coordinated result.
Simple Tips for Better Craft Results
Small details can make a major difference when creating personalized decorations. A little preparation before gluing anything can save time and help the finished piece look much cleaner.
- Test the paper placement before applying adhesive.
- Use a ruler when you need clean, even cuts.
- Lay out several beads before gluing to check spacing.
- Work around curves slowly so the border follows the letter naturally.
- Keep the work surface clean so dust does not interfere with the adhesive.
- Allow the finished decoration to dry fully before placing it on display.
- Take a step back occasionally to check the overall balance instead of focusing only on individual details.
Remember that handmade projects do not need to be perfectly uniform to look beautiful. The charm comes from the fact that you created the piece yourself. Aim for a neat overall appearance while allowing a little handmade character to remain.
Cute DIY Room Decor Ideas to Try Next
Once you have tried a pearl-trimmed letter, the same design concept can inspire many other crafts. You can decorate initials, small frames, storage boxes, trays, photo displays, or simple wall accents using the same combination of paper, beads, and coordinated colors.
For a cohesive bedroom theme, repeat the same pearl detail on several small objects rather than creating one oversized statement piece. A matching set can make the room feel thoughtfully decorated while keeping the overall look light and comfortable.
You can also adapt the idea for seasonal room updates. Swap pastel paper for warm autumn tones, winter neutrals, bright spring shades, or summery colors while keeping the pearl border as the consistent decorative feature.
Quick Points
- Personalize the letter with your favorite initial or color scheme.
- Use pearl beads to create an elegant raised border.
- Pair soft patterns with simple surrounding decor.
- Display the finished piece on a shelf, desk, vanity, or bedside table.
- Repeat colors and textures to create a cohesive room aesthetic.
Conclusion: Create Decor That Feels Like You
Cute DIY room decor does not have to involve complicated techniques or a long list of supplies. A simple decorative letter can become a memorable room accent when you combine a meaningful shape with colors, patterns, and textures you genuinely enjoy.
The pearl-trimmed letter concept is a perfect example of how small handmade details can elevate a space. The soft patterned surface adds personality, while the pearl border provides dimension and a refined finish. Best of all, the project can be customized to suit almost any room or aesthetic.
Whether you are refreshing a bedroom, decorating a desk, creating a personalized gift, or simply looking for a relaxing craft project, this idea offers plenty of room for creativity. Choose your favorite letter, select a palette that works with your space, and make the design your own.
The best DIY decor is personal. Start with one simple idea, add details that reflect your style, and let the finished piece become part of the story of your space.