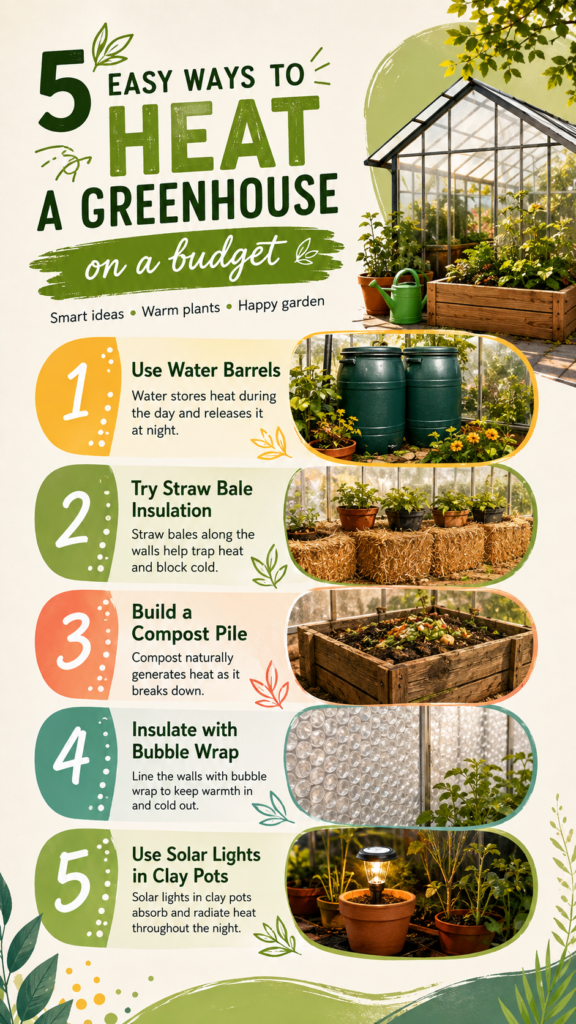
Growing plants in a greenhouse can extend your gardening season, protect tender crops, and create a productive growing space even when outdoor temperatures begin to drop. The good news is that keeping a greenhouse warm does not always require an expensive heating system. With a few simple materials and thoughtful placement, you can capture daytime warmth, reduce heat loss, and create a more stable environment for your plants.
The most useful DIY greenhouse heating ideas focus on three things: storing heat, generating gentle warmth, and preventing that warmth from escaping. Water barrels, straw bales, compost, bubble wrap, and solar lights can all play a role. These inexpensive methods are especially appealing to home gardeners who want practical greenhouse solutions without making a large investment.
Key Takeaways
- Use water barrels to absorb heat during sunny days and release it gradually after dark.
- Place straw bales along suitable greenhouse walls to add an insulating layer.
- A compost pile can provide gentle natural heat while creating useful garden compost.
- Bubble wrap can help reduce drafts and slow heat loss through greenhouse surfaces.
- Solar lights placed in suitable clay pots can provide a small source of warmth overnight.
- Combining heat storage with insulation is often more effective than relying on one idea alone.
Why Heat Matters in a DIY Greenhouse
A greenhouse can collect plenty of warmth during the day, but temperatures may fall quickly once the sun disappears. Plants experience that temperature change along with everything around them. Even when the daytime conditions seem comfortable, a cold night can slow growth and make the growing environment less consistent.
That is why DIY greenhouse heating is not simply about producing more heat. It is also about holding onto the heat you already have. Materials that absorb warmth during the day can act as simple thermal storage, while insulation helps prevent cold air and chilly surfaces from pulling warmth away.
Important: The most practical low-cost greenhouse strategy is to combine heat retention with insulation. Before adding a heat source, look for places where warmth is escaping and make the greenhouse more efficient.
1. Use Water Barrels to Store Heat
Water is one of the simplest materials you can use for passive greenhouse heating. Large containers or barrels filled with water can absorb warmth when sunlight enters the greenhouse. As temperatures fall later in the day, that stored warmth can gradually be released back into the surrounding space.
The idea is straightforward. During daylight hours, sunlight warms the greenhouse and the water inside the barrels. After sunset, the barrels remain warmer than the surrounding air for a period of time. Their stored thermal energy can help moderate the temperature rather than allowing the greenhouse to cool as quickly.
Where Should You Put the Barrels?
Place water containers where they can receive useful sunlight without blocking access to your plants. Along a sunny wall or another suitable open area can work well. Dark-colored containers are often favored by gardeners because they can absorb sunlight efficiently, but the most important factor is having enough water volume exposed to the greenhouse’s daytime warmth.
Use sturdy, leak-free containers and make sure their weight is appropriate for the greenhouse floor or supporting surface. Keep walkways clear so the thermal storage does not turn into an obstacle.
2. Try Straw Bale Insulation
Straw bales can provide a simple additional layer between your greenhouse interior and the colder conditions outside. The image highlights placing straw bales along the inside walls, where they can help reduce the effect of cold surfaces and drafts.
Besides their insulating qualities, straw bales can be useful because they are relatively simple to arrange and can later have another purpose in the garden. Depending on how you use them, they may eventually become part of a composting or garden soil-building system.
Use Straw Strategically
You do not necessarily need to fill every available space with straw. Focus on areas where the greenhouse loses heat or where additional insulation would be most helpful. Leave enough room for ventilation, plant care, watering, and movement.
Keep straw dry and avoid placing it where moisture can accumulate. A damp insulating material can create its own problems, so good housekeeping is essential.
Expert Insight
Think of your greenhouse as a system rather than a single heating project. Water barrels store heat, straw and bubble wrap slow heat loss, compost can generate warmth, and small solar lights may add gentle radiant heat. Combining several modest improvements can create a more stable growing environment.
3. Build a Compost Pile
A compost pile can become more than a source of nutrient-rich material for your garden. As organic materials break down, the composting process naturally produces heat. The image shows a compost container inside the greenhouse, making it part of a broader strategy for creating a warmer growing environment.
Composting inside or near a greenhouse can be especially appealing because it combines two useful gardening activities. You can turn suitable organic materials into compost while taking advantage of the warmth generated during decomposition.
Keep the Compost Balanced
A productive compost pile needs a suitable balance of organic materials, moisture, and air. Gardeners commonly combine nitrogen-rich materials with carbon-rich materials and turn or aerate the pile as needed. The goal is a healthy decomposition process rather than simply piling up waste.
Choose the location carefully. The compost pile should not interfere with plant care, create excessive moisture around delicate crops, or block greenhouse ventilation.
Pro Tip: Compost heat is naturally variable, so treat a greenhouse compost pile as a supplemental warming method rather than a guaranteed replacement for a dedicated heating system when plants require precise temperatures.
4. Insulate With Bubble Wrap
Bubble wrap is another accessible material for improving greenhouse insulation. The basic concept is to create an extra air-filled layer between the greenhouse interior and the colder outside environment. When installed carefully, it can reduce drafts and slow the rate at which heat escapes.
The image shows bubble wrap attached along the greenhouse walls. This approach is particularly useful for gardeners looking for a lightweight and inexpensive seasonal insulation solution.
Install It Carefully
Use greenhouse-friendly methods for securing the bubble wrap so that it stays in place without damaging the structure. Covering suitable wall areas can help create a more insulated interior, while leaving appropriate ventilation areas accessible.
It is also worth checking the greenhouse regularly after installation. Look for loose sections, gaps, moisture buildup, or areas where the material interferes with doors and vents. Good insulation should make the greenhouse more efficient without preventing you from managing airflow.
5. Use Solar Lights in Clay Pots
Small solar lights can be incorporated into a greenhouse as a simple decorative and functional warming idea. The image shows solar lights positioned inside clay pots, using the pots as a surrounding mass that can absorb and radiate some warmth.
Solar-powered garden lights collect energy during daylight and use it after sunset. When positioned inside or around a suitable clay container, they may provide a small amount of radiant warmth while also adding a pleasant glow to the greenhouse.
Think of This as Supplemental Heat
Solar lights are unlikely to provide the same heating capacity as a dedicated greenhouse heater. Their value in a DIY setup comes from combining small amounts of warmth with other passive strategies.
Choose lights designed for outdoor conditions and keep electrical components protected from water. Position them where they will receive enough daylight to recharge and where they will not create a hazard for plants, people, or greenhouse materials.
How to Combine These DIY Greenhouse Heating Ideas
The strongest approach is to combine several methods instead of expecting one material to solve every temperature challenge. For example, water barrels can store daytime heat, bubble wrap can reduce heat loss, and straw bales can provide another insulating layer.
A compost pile can contribute natural warmth while also producing a useful garden amendment. Solar lights can then provide a small supplemental source of radiant warmth after dark.
This layered approach makes sense because each method addresses a different part of the problem. Heat storage captures warmth. Insulation keeps it from escaping too quickly. Supplemental sources add a little more warmth when needed.
Start With the Simplest Improvements
If you are building a DIY greenhouse heating strategy from scratch, start with the changes that require the least effort. Check for drafts, improve insulation, and add thermal mass such as water containers. Once those steps are in place, consider compost and other supplemental ideas.
This approach can also make it easier to understand what is actually helping. Change one or two things at a time and observe how the greenhouse behaves during sunny days and colder nights.
Monitor Your Greenhouse Temperature
A thermometer is one of the most useful tools for any greenhouse gardener. Instead of relying only on how the air feels, monitor temperatures at different times of the day. Check the greenhouse during the afternoon, after sunset, and early in the morning when temperatures are often at their lowest.
Temperature monitoring helps you determine whether your DIY greenhouse heating methods are making a meaningful difference. It can also reveal problems that are easy to overlook, such as excessive heat on sunny days or poor ventilation.
Important: Different plants have different temperature preferences. Use these budget-friendly methods to improve the overall environment, but pay attention to the needs of the specific crops you are growing and provide additional protection when conditions become too cold.
Common Mistakes to Avoid
Low-cost greenhouse heating works best when the basic setup is managed properly. Adding more materials is not always better. Excessive insulation can interfere with light and airflow, while poorly positioned containers can make the greenhouse difficult to use.
- Do not block doors, vents, or essential walking areas with insulation materials.
- Keep straw dry and inspect it regularly for moisture or deterioration.
- Do not depend entirely on passive methods when temperatures are unsuitable for the plants you are growing.
- Keep compost managed properly rather than allowing it to become excessively wet or poorly aerated.
- Protect solar lights and other equipment from unnecessary exposure to water.
- Monitor temperature instead of assuming that one heating method will work equally well every night.
Make Your Greenhouse More Efficient
Heating a greenhouse cheaply starts with efficiency. Before buying equipment, look at the structure itself. Are there obvious drafts? Are doors closing properly? Are there gaps around openings? Is the greenhouse receiving enough sunlight during the day?
Once those questions are addressed, add thermal mass and insulation. A few large water containers can be more useful than many small objects because they provide a greater volume of material capable of storing warmth. Similarly, carefully placed insulation can be more effective than covering every surface without a plan.
Use Daylight to Your Advantage
Sunlight is the foundation of many passive greenhouse heating strategies. Keep thermal storage materials in positions where they can benefit from daytime warmth while ensuring plants still receive the light they need.
During sunny periods, allow the greenhouse to collect warmth while maintaining appropriate ventilation. At night, the goal shifts toward retaining the heat that has already accumulated.
At a Glance
- Store heat: Add water barrels where sunlight can warm them.
- Insulate: Use straw bales and bubble wrap to reduce heat loss.
- Generate warmth: Maintain a healthy compost pile for natural heat.
- Supplement: Try solar lights in suitable clay pots for gentle nighttime warmth.
- Monitor: Use a thermometer to understand how your greenhouse responds.
Conclusion
A warm greenhouse does not have to depend on an expensive heating system. Simple DIY greenhouse heating methods can help you make better use of the warmth already available while reducing unnecessary heat loss. Water barrels, straw bale insulation, compost, bubble wrap, and solar lights each offer a practical way to improve the growing environment.
The key is to use these ideas as parts of one system. Store warmth during the day, insulate the greenhouse so that warmth lasts longer, and use supplemental methods when appropriate. With regular temperature checks and sensible greenhouse management, even a modest backyard structure can become a more comfortable space for plants during cooler weather.
Whether you are starting your first greenhouse or improving an established one, these budget-friendly ideas are a useful place to begin. Small changes can make the space more efficient, easier to manage, and better prepared for chilly nights. Start with insulation and heat storage, observe the results, and gradually build the setup that works best for your garden.
Tags
DIY Greenhouse Greenhouse Ideas Greenhouse Heating Budget Gardening Greenhouse Insulation Gardening Tips Backyard Gardening span style=”display:inline-block;background:#edf4e7;color:#3e6339;border:1px solid #d4e2cc;border-radius:20px;padding:7px 13px;margin:4px;font-size:14px;”>Passive Greenhouse Heating