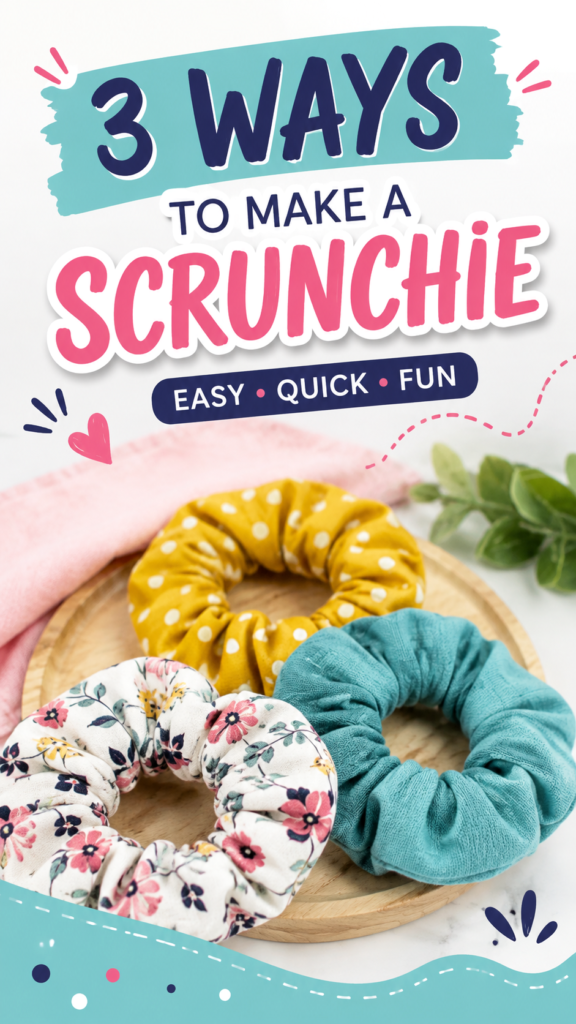
Making your own scrunchies is one of those simple sewing projects that feels both practical and creative. A small piece of fabric can quickly become a cute hair accessory that adds color, texture, and personality to an everyday hairstyle. Whether you love playful patterns, soft pastels, bold colors, or classic prints, DIY scrunchies give you plenty of room to experiment.
The beauty of a scrunchies DIY project is that it does not require a complicated design to look impressive. The featured styles show how different fabrics can create completely different results, from a cheerful patterned scrunchie to a soft solid-color version. With a few basic supplies and some patience, you can build a collection of handmade hair accessories that coordinate with your wardrobe or make thoughtful little gifts.
Key Takeaways
- DIY scrunchies are an approachable sewing project for beginners.
- Different fabrics can completely change the look and feel of the finished accessory.
- Fabric scraps can be transformed into useful handmade hair accessories.
- Mixing prints, colors, and textures makes every scrunchie more personal.
- A small collection of handmade scrunchies can become an easy gift idea.
Why Make Your Own Scrunchies?
Store-bought hair accessories are easy to find, but handmade scrunchies offer something different. You get to choose the fabric, color, pattern, and overall personality of each piece. That makes a DIY scrunchie more than just a practical accessory. It becomes a small expression of your personal style.
Scrunchies are also an excellent way to use smaller pieces of fabric. Instead of letting attractive leftovers sit unused in a craft box, you can turn them into something you will actually wear. Florals, checks, polka dots, stripes, denim-inspired fabrics, and soft solids can all create distinctive results.
Important: The fabric you choose has a major effect on the finished scrunchie. Lightweight woven fabrics create a soft, gathered appearance, while thicker materials can produce a fuller and more structured accessory.
A Fun Project for Beginners
If you are new to sewing, a scrunchie is a satisfying place to start. The project involves relatively simple shapes and repetitive construction, so it gives you an opportunity to practice straight stitching, turning fabric, inserting elastic, and finishing seams.
You can also make the project as simple or decorative as you like. A plain cotton scrunchie can be completed with minimal embellishment, while a more creative version can feature contrasting fabrics, decorative stitching, or carefully selected patterns.
What You Need for a DIY Scrunchie
The supplies for a basic scrunchies DIY project are straightforward. Having everything prepared before you begin makes the sewing process easier and helps you concentrate on creating a neat finish.
- Fabric suitable for a hair accessory
- Elastic
- Thread that complements the fabric
- Fabric scissors or sharp craft scissors
- Sewing machine or hand-sewing supplies
- Sewing pins or fabric clips
- A measuring tool
- A safety pin or similar tool for guiding elastic
You do not need a large amount of fabric for each scrunchie, which makes this project especially useful for remnants from previous sewing projects. If you have several fabrics that look good together, consider creating a small coordinated set.
Choosing the Right Fabric
Fabric selection is one of the most enjoyable parts of making handmade scrunchies. Look through your stash and consider both appearance and practicality. A small floral print can create a delicate, feminine look, while a bold geometric pattern can make the accessory feel more playful.
Solid fabrics are equally useful. The soft lavender, aqua, and other cheerful tones commonly associated with handmade accessories can create a clean look that works with many outfits. If you prefer something more eye-catching, combine a bright color with a patterned fabric.
Before cutting, consider how the print will look when the fabric becomes gathered around the elastic. Large designs may become partially hidden by the folds, while smaller prints often remain visible throughout the finished scrunchie.
How to Make a Scrunchie Step by Step
The exact measurements can be adjusted depending on the fabric, desired fullness, and size of the finished accessory. The general construction, however, follows a simple sequence that can be repeated for different fabrics.
1. Prepare Your Fabric
Begin by selecting a clean, flat piece of fabric. Pressing the material first can make cutting and sewing much easier. Remove loose threads and make sure the fabric lies smoothly on your work surface.
Measure and cut a long rectangular strip. The dimensions can vary depending on how wide and full you want your scrunchie to be. A wider strip generally creates a fuller gathered appearance, while a narrower strip produces a more streamlined accessory.
2. Fold and Sew the Fabric
Place the fabric with the appropriate sides together and fold the long strip lengthwise. Align the long edges carefully, then sew along the edge to create a fabric tube.
Keep the seam consistent and avoid rushing around the fabric. A neat seam at this stage helps the finished scrunchie look more polished. If you are sewing by hand, small, even stitches can help create a secure result.
3. Turn the Fabric Right Side Out
Once the long seam is sewn, carefully turn the fabric tube so the correct side of the fabric faces outward. This step can take a little patience, especially when working with a narrow tube.
Use a suitable turning tool if necessary, but work gently to avoid damaging the fabric or stretching the seam. Once turned, press the tube lightly if needed so it lies neatly.
4. Add the Elastic
Cut a comfortable length of elastic based on the size and stretch you want. Attach a safety pin to one end and guide it through the fabric tube. Keep hold of the opposite end so the elastic does not disappear inside the tube.
When the elastic has passed through the entire tube, overlap the ends securely. The connection should be strong enough to withstand repeated stretching as the scrunchie is used.
5. Close the Opening
Bring the fabric ends together and close the remaining opening neatly. Depending on your preferred technique, you can use a careful hand stitch or another suitable finishing method.
Take a moment to inspect the finished scrunchie. Check that the elastic is secure, the seam is closed, and the fabric gathers evenly around the circle.
Pro Tip: Do not stretch the elastic more than necessary while assembling the scrunchie. A balanced amount of stretch helps the finished accessory feel comfortable while still holding hair securely.
Three Scrunchie Styles to Try
One of the most appealing things about this project is how easily the same basic idea can produce completely different results. The featured collection demonstrates how color, texture, and pattern can each become part of the design.
Patterned Scrunchies
Patterned fabrics are perfect when you want an accessory that immediately catches attention. Polka dots, florals, checks, and small geometric prints can all work beautifully. A patterned scrunchie is also a great way to introduce a little color into a simple hairstyle.
When choosing a print, think about scale. Small repeating motifs can remain visible even after the fabric gathers, while larger motifs may create a more abstract look once wrapped around the elastic.
Solid-Color Scrunchies
A solid-color scrunchie has a timeless appeal. Soft lavender, aqua, cream, mustard, and other shades can create a polished accessory without requiring a complicated pattern.
Solid fabrics are particularly useful when you want something versatile. You can make several colors and choose one based on your outfit, or create a matching set for a coordinated collection.
Mixed Fabric Collections
For a more creative approach, make several scrunchies from different fabrics. The visual effect becomes much more interesting when contrasting textures and colors are displayed together.
Try combining one floral print, one geometric or checked fabric, and one solid shade. The result can feel like a thoughtfully curated collection rather than a group of unrelated accessories.
Why This Matters
Small design choices make handmade accessories feel intentional.
- Coordinate colors to create a matching set.
- Use fabric scraps to experiment without committing to a large project.
- Choose prints that remain visually interesting after gathering.
Creative Ways to Customize DIY Scrunchies
Once you are comfortable with the basic construction, there are plenty of ways to make your scrunchies feel more personal. The simplest approach is to build a collection around a color palette.
For example, you could create a set using soft pastels, bright summer colors, earthy neutrals, or classic black and white. Another option is to make scrunchies around a particular fabric theme, such as florals, checks, stripes, or playful prints.
Create Seasonal Color Collections
Changing your fabric choices throughout the year is an easy way to keep the project fresh. Light florals and cheerful colors can suit spring and summer, while deeper tones and cozy-looking fabrics can create an autumn-inspired collection.
For holidays or special occasions, choose colors that complement the event without needing complicated decorations. Handmade accessories can be subtle, useful, and personal.
Make Thoughtful Handmade Gifts
DIY scrunchies can also make charming small gifts. Because each one uses relatively little fabric, you can create several coordinated pieces for friends, family members, classmates, or anyone who enjoys handmade accessories.
Consider pairing a few scrunchies in complementary colors rather than giving just one. A simple fabric collection can make the gift feel especially intentional.
Tips for Better Sewing Results
Good results often come down to small details. Take your time when cutting the fabric and keep your stitching as even as possible. If you are using a sewing machine, test the stitch on a scrap piece of fabric before beginning the actual scrunchie.
- Press the fabric before cutting for cleaner measurements.
- Use sharp scissors to create smooth, accurate edges.
- Keep the seam allowance consistent.
- Secure the elastic carefully so it does not pull apart during use.
- Close the final opening neatly for a professional-looking finish.
- Make a test scrunchie before cutting into a favorite fabric.
It is also worth remembering that handmade does not have to mean perfectly identical. Small differences in gathering or fabric placement can give each scrunchie its own character. Focus on strong construction and a finish you are happy to wear.
How to Build a Coordinated Scrunchie Collection
If one DIY scrunchie leads to another, consider organizing your projects into a small collection. Choose a main color, a complementary color, and one patterned fabric. This gives you a simple design framework while still leaving plenty of room for creativity.
You can also vary the visual weight of each piece. Make one scrunchie from a bold print, another from a quiet solid, and a third from a subtle pattern. Displayed together, the combination can look balanced and intentional.
For fabric lovers, this approach is particularly satisfying because it turns a few small remnants into a useful group of accessories. It is a practical way to explore color combinations without taking on a large sewing project.
Quick Points: DIY Scrunchies at a Glance
- Simple project: A manageable way to practice basic sewing skills.
- Custom style: Choose colors, prints, and textures that match your personality.
- Fabric-friendly: Great for using smaller leftover pieces.
- Gift-ready: Make coordinated sets for a thoughtful handmade present.
- Endless variety: Repeat the basic process with different fabrics for a new look every time.
Conclusion
DIY scrunchies are a small sewing project with plenty of creative potential. With a simple fabric strip, elastic, and a few basic sewing supplies, you can turn leftover material into colorful accessories that are both useful and stylish.
The most exciting part is experimenting. Try a cheerful polka-dot print, a delicate floral, a soft solid shade, or a completely different fabric from your stash. Once you understand the basic construction, you can create scrunchies in colors and patterns that fit your wardrobe, your season, or your gifting plans.
Whether you are looking for an easy beginner sewing project, a creative way to use fabric scraps, or a fun DIY hair accessory idea, handmade scrunchies are a rewarding place to start. Pick a favorite fabric, gather your supplies, and make a piece that feels uniquely yours.