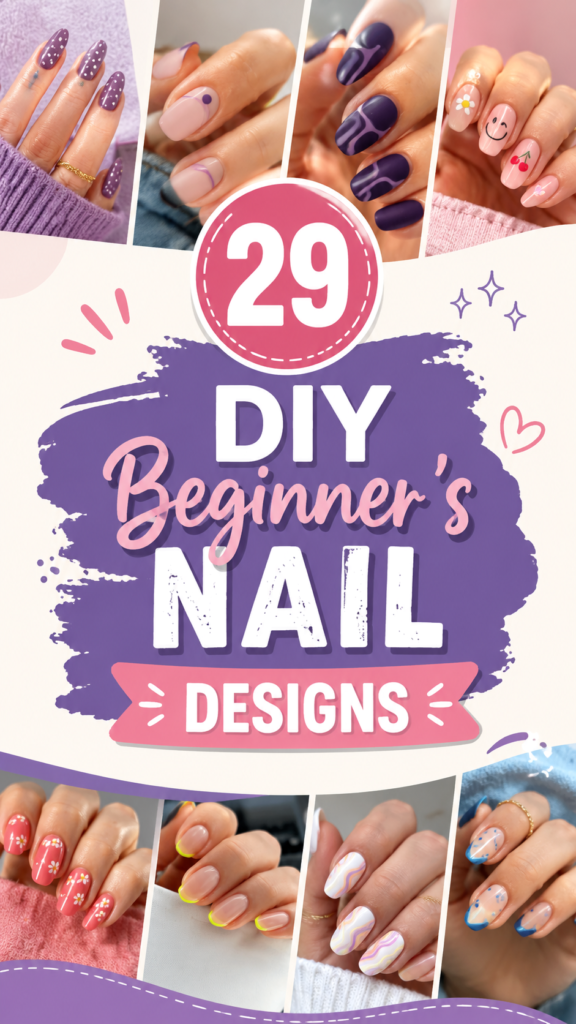
Creating your own manicure can be much easier than it looks. With a few basic supplies, a little patience, and the right beginner-friendly ideas, you can turn simple nails into something colorful, polished, and completely personal. From tiny dots and delicate flowers to playful French tips, pastel waves, and simple line art, there are countless ways to make DIY nails feel fresh without requiring advanced nail-art skills.
The most appealing beginner nail designs are often the ones that use simple shapes and small details. You do not need to recreate an elaborate salon manicure to get a beautiful result. A clean base, two complementary colors, and one easy accent can be enough to create nails that look intentional and stylish.
Key Takeaways
- Simple nail art is ideal for beginners who are practicing at home.
- Dots, curves, flowers, French tips, and tiny patterns are easy starting points.
- A neat base coat and thin layers can make DIY nails look more polished.
- Pastel, pink, purple, coral, blue, and neutral shades offer plenty of creative combinations.
- You can customize nearly every design by changing the colors, placement, or finish.
Why DIY Nails Are Perfect for Beginners
DIY nails are a fun way to experiment with beauty and creativity without committing to one complicated style. Beginner nail art works especially well because many attractive designs are based on techniques that are surprisingly simple. Instead of trying to paint detailed illustrations immediately, you can start with dots, lines, small flowers, curved shapes, and color-blocked tips.
Another advantage is flexibility. If you like soft and feminine manicures, try blush pink, lavender, cream, or peach. If you prefer something brighter, coral, red, electric blue, or neon accents can transform a simple manicure. The same basic design can look completely different simply by switching the color palette.
Important: The goal of beginner nail art is not perfect symmetry. A clean application, consistent shapes, and a design that suits your personal style will usually create a more appealing manicure than an overly complicated pattern that feels difficult to control.
29 DIY Nail Design Ideas to Try at Home
There is no need to choose just one style. A collection of beginner nail designs gives you the opportunity to practice different techniques and discover which ones feel easiest. The ideas below focus on approachable patterns that can be adapted to short, medium, or longer nails.
1. Minimal Dot Nails
Start with a nude, pink, or pale lavender base and add one small contrasting dot near the cuticle or side of each nail. This is one of the simplest ways to introduce nail art because you only need to control one small shape at a time.
2. Double-Dot Accents
Take the basic dot manicure a step further by placing two dots together. Use different sizes or colors to create a playful effect. Keeping the dots small makes the finished manicure look delicate rather than crowded.
3. Simple French Tips
A French tip does not have to be traditional white. Try pink, purple, blue, coral, or even a bright neon shade. For a beginner-friendly approach, keep the tip narrow and use a rounded curve that follows the natural shape of the nail.
4. Neon Micro Tips
For something brighter, add a thin neon line to the edge of a sheer or neutral nail. Yellow, green, pink, or orange can create a cheerful accent while leaving most of the nail natural-looking.
5. Pastel Wave Nails
Curved pastel lines are another excellent beginner option. Choose two or three soft colors and paint thin, flowing waves across the nail. The lines do not need to match perfectly. Slight variations can actually make the design feel more handmade and artistic.
6. Tiny Flower Nails
Flowers can be created using a few small dots arranged around a center dot. Use white petals with a yellow center for a classic look, or experiment with pink, purple, or blue flowers against a neutral base.
7. Cherry Accent Nails
Small cherry motifs add a playful touch to a pink or nude manicure. Keep the fruit simple by using two small red dots and a tiny green stem. You can place the design on one or two accent nails rather than decorating every nail.
8. Smiley Face Nails
A tiny smiley face is an easy way to turn a basic manicure into something cheerful. Use a pale pink or nude base, then add two tiny eyes and a curved smile. A single accent nail can be enough to make the design stand out.
9. Tiny Heart Details
Small hearts work beautifully with romantic pinks, soft lavender, or creamy neutral shades. Rather than filling every nail with hearts, place one small heart near the tip or cuticle for a subtle finish.
10. Speckled Nails
A speckled manicure can create visual interest without requiring detailed painting. Start with a solid base and add small contrasting dots in random positions. Use a restrained color combination for a more sophisticated result.
11. Purple Abstract Lines
Abstract line art is forgiving because the design does not have to follow a precise pattern. Paint a few curved purple lines over a lighter base and vary their direction or thickness for a modern manicure.
12. Two-Tone Curves
Use two shades from the same color family to create curved accents. Lavender and deep purple, blush and coral, or pale blue and bright blue can create a coordinated look without complicated techniques.
13. Minimal Floral Details
If full floral nails feel too difficult, paint only one or two tiny flowers. The remaining nails can stay solid or feature a simple dot. This creates balance and keeps the manicure manageable for beginners.
14. Red Floral Nails
A bright red manicure can become softer and more playful when decorated with tiny flowers. Use small white or pale accents to break up the solid color while keeping the overall look vibrant.
15. Blush Pink Nails
Blush pink is an easy base for almost any beginner nail-art idea. It works particularly well with white flowers, tiny black lines, colorful dots, or delicate French tips.
16. Soft Rainbow Waves
Instead of painting an entire rainbow, use narrow pastel curves across each nail. Keep the colors soft and let the natural-looking base remain visible between the lines.
17. Blue Accent Tips
Blue is especially effective when used as a small accent. Try blue French tips, tiny blue dots, or curved blue lines over a nude base for a fresh everyday manicure.
18. Abstract Blue Patterns
Combine a few blue curves and dots to create an abstract design. This style is useful for beginners because small imperfections can blend naturally into the overall pattern.
19. Pink and White Details
Pair pink with white for a clean and versatile manicure. Small flowers, dots, curved lines, and French tips all work beautifully with this combination.
20. Accent Nail Art
You do not have to decorate every nail. Choose one or two nails for detailed designs and keep the others simple. This is one of the easiest ways to make beginner nail art look polished.
21. Colorful Dot Flowers
Combine several dots around a center point to make simple flowers. Using multiple colors gives the manicure a cheerful feel while keeping the actual technique straightforward.
22. Tiny Black Line Art
For a minimalist look, use a fine brush to create small black curves, dots, or simple motifs over a pale base. The contrast makes even tiny details visible.
23. Nude Nails With Color
A nude base gives colorful details plenty of room to stand out. Add one bright dot, curved line, flower, or tip to create an understated manicure with a playful twist.
24. Playful Mixed Designs
Mix different simple motifs across your nails. One nail can have dots, another a French tip, another a flower, and another a curved line. Keep the colors consistent so the variety still feels coordinated.
25. Glossy Minimal Nails
Sometimes the best DIY nail design is a clean base with one tiny accent. A glossy finish can make a simple manicure feel finished and elegant without additional decoration.
26. Colorful French Variations
Experiment with different tip colors on each nail while keeping the shape consistent. This creates a colorful manicure without requiring detailed artwork.
27. Soft Purple Nails
Purple shades can range from delicate lavender to deeper violet. Use a pale purple base with darker details for contrast, or reverse the combination for a bolder manicure.
28. Simple Seasonal Accents
Change your nail-art details according to the season. Flowers, cherries, pastel colors, and bright tips can work beautifully for warmer months, while deeper shades and simple geometric accents can create a different mood.
29. Your Own Signature Design
Once you have practiced a few techniques, combine your favorites into a custom manicure. Try a French tip with dots, a flower with a curved line, or a pastel base with one bold accent. Your own combination can become the most personal design in your collection.
Expert Insight
Beginner nail art becomes much easier when you treat each design as a collection of small shapes. Instead of thinking about an entire picture, focus on one dot, one curve, or one flower at a time. This approach gives you more control and makes experimentation less intimidating.
Basic Supplies for DIY Nail Art
You can create many beginner nail designs with a surprisingly small collection of tools. The exact products are less important than having tools that allow you to apply polish in controlled, thin layers.
- A base coat to create a smooth foundation.
- Your favorite nail polish colors for the base and artwork.
- A fine nail-art brush for thin lines and curves.
- A dotting tool or another small rounded tool for dots and flowers.
- A clean-up brush for tidying the edges.
- A top coat to finish the manicure and add shine.
- Cotton swabs or a small cleanup tool for correcting mistakes.
You do not need dozens of colors to get started. A neutral base, one dark shade, one bright accent, and one light shade can create many different combinations. As your confidence grows, you can gradually expand your collection.
How to Create a Beginner Nail Design
Step 1: Prepare Your Nails
Begin with clean, dry nails. Shape them into a length and style that feels comfortable, then gently tidy the surrounding area. A clean canvas makes even simple nail art look more polished.
Step 2: Apply the Base
Apply a thin base coat, followed by your chosen color. If the polish looks uneven after one layer, allow it to dry and add another thin layer rather than applying one very thick coat.
Step 3: Add Your Design
Once the base is sufficiently dry, add your chosen detail. Beginners may want to start with dots or simple French tips before moving toward more detailed flowers and line art.
Step 4: Let the Details Set
Give the artwork enough time to settle before applying your top coat. Rushing this stage can drag delicate lines or dots across the nail.
Step 5: Finish With Top Coat
A top coat can help unify the manicure and give the design a glossy, finished appearance. Apply it carefully so that the brush glides over the artwork rather than pressing heavily into it.
Pro Tip: Practice the design on a nail-art practice surface, old nail tips, or a small piece of paper before applying it directly to your nails. A few practice attempts can make curved lines and tiny details much easier to control.
How to Make Beginner Nail Designs Look Cleaner
The difference between a messy manicure and a polished one is often not artistic ability. It is consistency. Try to keep your dots similar in size, leave comparable spacing between patterns, and use a restrained color palette.
Another useful technique is to work slowly. Nail art rewards patience. If a line does not look right, allow it to dry before deciding whether it needs to be corrected. Trying to fix wet polish immediately can make the design harder to control.
- Use thin layers rather than thick coats.
- Keep your dominant hand supported while painting.
- Rest your wrist on a stable surface for better control.
- Load only a small amount of polish onto your detail brush.
- Choose simple designs while learning a new technique.
- Clean the edges after the manicure rather than trying to make every stroke perfect.
Choosing Colors for DIY Nails
Color selection can completely change the personality of a manicure. Soft pink and lavender create a delicate appearance, while coral and red feel energetic and playful. Blue can give a fresh modern effect, and neutral shades provide an understated backdrop for more colorful details.
For an easy coordinated manicure, choose one main shade, one supporting color, and one accent. For example, a pale pink base can be paired with white details and a small coral accent. Alternatively, a neutral base can support purple lines and tiny blue or pink details.
When using several colors, repeat at least one shade throughout the manicure. This small detail helps different patterns feel like part of the same overall design.
DIY Nail Art for Different Skill Levels
Absolute Beginners
Start with solid colors, single dots, tiny hearts, or simple French tips. These designs require minimal precision and let you become comfortable with your tools.
Growing Confidence
Once basic shapes feel comfortable, experiment with flowers, waves, two-tone curves, and mixed accent nails. These techniques build coordination while still leaving room for natural variations.
Ready to Experiment
More confident nail artists can combine several techniques. Try abstract patterns with dots, colorful French tips with tiny flowers, or a different accent design on every nail while keeping the palette consistent.
At a Glance
- Best starting techniques: dots, tips, waves, and tiny flowers.
- Easy color families: pink, purple, pastel, coral, blue, and neutral.
- Best beginner strategy: decorate one or two accent nails first.
- Key finishing step: allow layers to dry before adding the next detail.
- Most important ingredient: patience and practice.
Conclusion: Make DIY Nails Your Own
DIY nails are less about creating a flawless salon replica and more about finding designs you genuinely enjoy wearing. A simple dot, colorful French tip, tiny flower, abstract curve, or playful accent can transform an ordinary manicure into something that feels personal.
The collection of beginner-friendly ideas offers plenty of ways to start small and build your skills. Choose one design that looks approachable, gather a few complementary colors, and practice the basic shapes before moving on to more detailed patterns. As your confidence grows, you can mix techniques and create combinations that reflect your own style.
Remember: Great DIY nail art does not require perfection. Clean preparation, thin layers, thoughtful color choices, and a little practice can take a simple manicure a long way. Save your favorite ideas, try them one at a time, and let each manicure become another opportunity to experiment.