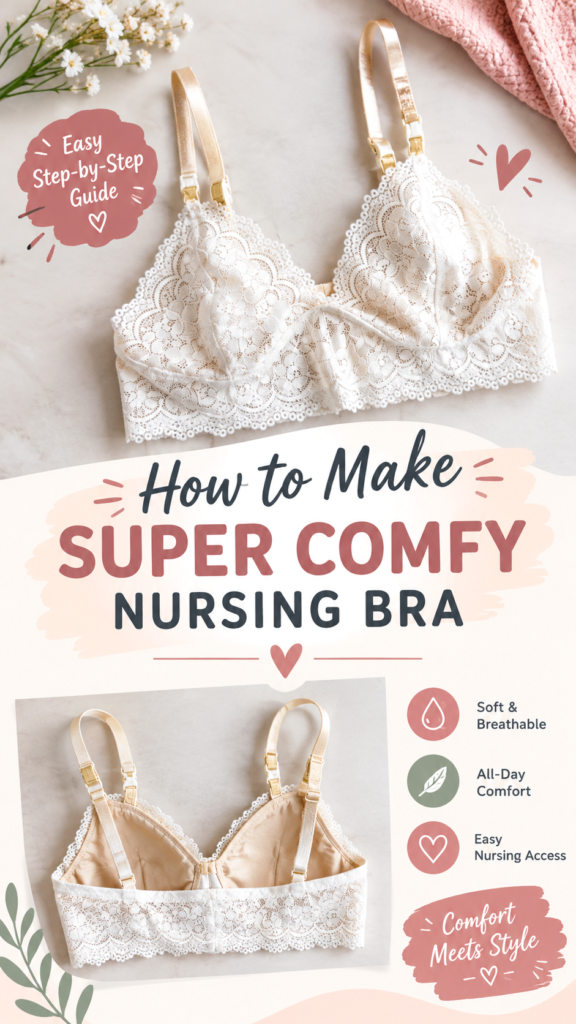
This crochet lace bralette is an original interpretation of a delicate, soft-cup lingerie silhouette, combining simple triangular crochet cups with a comfortable underband, slim straps, and a decorative scalloped edge. The finished look is feminine and lightweight, with an open lace-inspired border that gives the piece a similar delicate character while keeping the actual crochet construction practical for confident beginners.
The design uses a straightforward construction: two triangular cups are worked from the point upward, a stretchy ribbed underband is crocheted separately, and the components are joined before the straps and decorative edging are added. Because crochet lingerie needs different support characteristics from sewn lingerie, this pattern is designed as a light-support bralette rather than a structured bra.
Key Takeaways
- Original crochet lace bralette with two triangular cups and a stretchy underband.
- Designed with sport-weight yarn and a suggested 2.75 mm crochet hook.
- Uses basic double crochet, single crochet, slip stitch, and simple shell edging.
- Best suited to confident beginners who are comfortable adjusting garment measurements.
- The pattern is designed for light support and can be lined for additional coverage.
- Cup width, band length, and strap length can all be customized.
A Delicate Crochet Bralette With a Lace-Inspired Finish
The main visual character of this crochet lace bralette comes from its triangular cups and delicate decorative edge. Rather than trying to reproduce an unseen original construction, this pattern uses those visible design ideas as inspiration and translates them into an original crochet garment.
The cups are worked as simple expanding triangles. Starting at the lower point makes the shaping easy to understand because each row adds stitches at both sides. The result is a symmetrical cup that can be made wider or narrower simply by changing the number of increase rows.
A narrow ribbed band sits beneath the cups. Working this section in single crochet through the back loop creates subtle vertical ridges and gives the fabric more flexibility than a flat double crochet band. The band is intentionally simple because the decorative detail is concentrated around the cups.
For a more lingerie-inspired appearance, a shell edging is worked around the sloping cup edges. Small shells create a scalloped outline without requiring complicated lace motifs. The same edging can also be added around the neckline if you prefer a more decorative finish.
Important sizing note: Crochet fabric can stretch differently depending on yarn, hook size, tension, and fiber content. Measure the wearer and compare the finished measurements before joining the cups to the band. This design is intended for light support rather than the firm support of a structured bra.
Crochet Construction and Stitch Analysis
The practical construction is deliberately uncomplicated. Each cup begins with a tiny point and grows outward by two stitches per row. This creates a triangular silhouette without requiring separate darts or complicated shaping.
The body of each cup uses double crochet. Double crochet is useful for this design because it grows quickly, creates a flexible fabric, and leaves enough space between stitches for a soft, lace-like appearance. The cups are not intended to be completely opaque, so a lightweight lining can be added if more coverage is desired.
The band uses single crochet through the back loop only. This produces a ribbed texture that runs across the width of the band. Since the band is worked as a long rectangle, you can easily adjust its length to match the wearer’s underbust measurement.
The decorative edge uses a simple five-double-crochet shell. Shells are spaced with single crochet stitches, producing rounded scallops along the cup edge. This gives the finished project a handmade lace effect while keeping the stitch pattern accessible.
Free Crochet Lace Bralette Pattern
Free Crochet Lace Bralette Pattern
Pattern interpretation: This original pattern is inspired by the delicate triangular-cup silhouette and lace detailing of a soft lingerie bralette. The exact original construction, yarn, gauge, and measurements cannot be determined visually, so the materials and dimensions below are suggested starting specifications.
| Project | Lace-Inspired Crochet Bralette |
| Skill Level | Confident beginner |
| Base Size | Approx. 34 to 36 inch / 86 to 91 cm underbust |
| Finished Band | Approx. 33 x 3 inches / 84 x 7.5 cm before stretch |
| Approx. Cup Size | Approx. 7.5 x 7.5 inches / 19 x 19 cm each |
| Yarn | Sport-weight, smooth cotton or cotton blend |
| Yarn Quantity | Approx. 350 to 450 yd / 320 to 410 m |
| Hook | 2.75 mm / US C-2 |
| Gauge | Approx. 18 dc x 9 rows = 4 x 4 inches / 10 x 10 cm |
| Terminology | US crochet terms |
Materials
- 350 to 450 yards / 320 to 410 meters of sport-weight yarn
- 2.75 mm / US C-2 crochet hook
- Yarn needle
- Scissors
- Several stitch markers
- Optional soft lingerie elastic, approximately 1/2 inch / 1.25 cm wide
- Optional bra strap sliders and rings for adjustable straps
- Optional lightweight lining fabric
Terminology and Abbreviations
- ch: chain
- sc: single crochet
- hdc: half double crochet
- dc: double crochet
- sl st: slip stitch
- st: stitch
- sts: stitches
- sk: skip
- sc2tog: single crochet two together
- BLO: back loop only
- RS: right side
- WS: wrong side
UK terminology note: US single crochet is UK double crochet, US half double crochet is UK half treble crochet, and US double crochet is UK treble crochet. The instructions throughout this pattern use US terminology.
Special Stitch
Shell: Work 5 dc into the same stitch. The shell counts as 5 stitches and is used only for the decorative edging.
Double crochet increase: Work 2 dc into the same stitch. Each cup row uses one increase at the beginning and one at the end, adding 2 stitches per row.
Construction Notes
The bralette is made from two identical triangular cups, one long ribbed underband, two straps, and decorative edging. The cups are worked from the point upward. The band is worked as a rectangle and then joined into a loop. The lower edge of each cup is sewn or crocheted directly to the upper edge of the band.
The turning chain of 2 at the beginning of each cup row does not count as a stitch. The turning chain of 1 on the band also does not count as a stitch. Slip stitches used to join the band do not count as stitches.
Cup 1 and Cup 2
Make 2 identical cups.
- Row 1: Ch 2, 3 dc into the second chain from the hook. Turn. 3 sts.
- Row 2: Ch 2, 2 dc in the first st, dc in the next st, 2 dc in the last st. Turn. 5 sts.
- Row 3: Ch 2, 2 dc in the first st, dc across to the last st, 2 dc in the last st. Turn. 7 sts.
- Rows 4 to 15: Repeat Row 3 twelve times. Each completed row increases by 2 stitches. Row 4 has 9 sts and Row 15 has 31 sts.
At the end of Row 15, fasten off. The finished triangular cup should measure approximately 7.5 inches / 19 cm wide across the base and approximately 7.5 inches / 19 cm from the point to the center of the base, depending on gauge.
Cup Edging
Join yarn at the lower outside corner of the cup. Work along one sloping edge toward the top point, across the opposite sloping edge, and back toward the lower inside corner. Leave the straight bottom edge unworked because it will be attached to the band.
- Ch 1. Sc evenly along the first sloping edge, placing approximately 2 sc around each dc post.
- At the top point, work 3 sc into the point stitch.
- Continue with sc evenly down the second sloping edge.
- Turn your work so the decorative shell edging can be worked along the newly created sc border.
- Edging row: Ch 1, sc in the first 2 sts, skip 2 sts, work 5 dc in the next st, skip 2 sts. Repeat from * to * along the edge, adjusting the final single crochet spacing slightly if necessary so the row ends at the cup base.
- Fasten off and weave in the end.
Because the number of edge stitches can vary slightly with individual tension, the shell spacing is intentionally based on the actual edge rather than a fixed stitch count. Keep the shells evenly distributed and avoid pulling the edge tightly.
Underband
The suggested base size uses a band that measures approximately 33 inches / 84 cm before stretching. If your measured underbust is different, use the adjustment section below before starting the band.
- Chain 150. Do not twist the chain.
- Row 1: Sc in the second chain from the hook and in each chain across. 149 sts.
- Rows 2 to 10: Ch 1, turn, sc in BLO across. 149 sts each row.
- At the end of Row 10, bring the two short ends together with the ridges aligned.
- Join the ends with 149 sl sts through both layers, or sew them together with a yarn needle for a flatter seam.
- Fasten off and weave in the end.
The finished band should form a continuous loop approximately 3 inches / 7.5 cm tall. The exact circumference depends on yarn stretch and tension.
Joining the Cups to the Band
- Lay the band flat with the joining seam centered at the back.
- Place the first cup on the front of the band so its 31-stitch base is centered approximately 1 inch / 2.5 cm away from the center front.
- Place the second cup symmetrically on the opposite side.
- Pin or temporarily clip the cups in place before joining.
- Using yarn and a yarn needle, sew each cup base to the upper edge of the band using small whip stitches or mattress-style stitches.
- For a stronger join, work a row of slip stitches through the cup base and the top edge of the band, taking care not to pull the fabric tightly.
- Leave approximately 1 inch / 2.5 cm between the inner cup edges to create a small center bridge.
The exact cup placement can be adjusted before final sewing. This is especially useful because the band and cups can stretch differently.
Center Bridge
To stabilize the small space between the cups, attach yarn at the inner lower edge of one cup.
- Ch 1.
- Sc evenly across the small gap, connecting the inner edge of the first cup to the inner edge of the second cup.
- Work 2 additional rows of sc across this bridge, turning after each row.
- Fasten off and weave in the ends.
The bridge should remain flexible rather than tight. If the cups pull toward the center, add one or two additional rows before fastening off.
Shoulder Straps
Make 2 straps. The suggested finished strap length is approximately 15 inches / 38 cm, but straps should always be adjusted to the wearer.
- Chain 61.
- Row 1: Sc in the second chain from the hook and in each chain across. 60 sts.
- Row 2: Ch 1, turn, sc in BLO across. 60 sts.
- Fasten off, leaving a yarn tail approximately 10 inches / 25 cm long for sewing.
- Repeat for the second strap.
Fold each strap lengthwise only if you want a narrower appearance, or use the flat two-row strap as written for a simple handmade look. For adjustable straps, the strap can be attached through a slider and ring arrangement rather than being permanently sewn at its final length.
Attach the Straps
- Try the bralette on over a fitted camisole or another layer while positioning the straps.
- Place each strap at the upper outer third of the corresponding cup.
- Bring the strap over the shoulder and position its back end approximately 2 to 3 inches / 5 to 7.5 cm inward from the side seam.
- Pin both ends temporarily.
- Check that the cups remain centered and that the straps do not pull the cup edges upward.
- Sew each strap securely using several passes through the crochet fabric.
- Weave in all remaining yarn ends.
Optional Lower Edge Finish
For an even more decorative silhouette, add a narrow shell border along the lower edge of the band. This is optional because the ribbed band already provides a clean finish.
- Join yarn at one side of the lower band edge.
- Ch 1 and sc evenly across the edge.
- Skip 2 sts, work 5 dc into the next st, skip 2 sts, sc in the next st.
- Repeat the shell sequence around the band.
- Join with a sl st to the first sc.
- Fasten off and weave in the end.
If the edge begins to ripple excessively, reduce the number of shell groups by increasing the number of skipped stitches between shells. If the edge cups inward, use fewer skipped stitches.
How to Adjust the Crochet Bralette Size
For a wearable garment, body measurements are more important than choosing a standard size from the start. Measure around the rib cage directly beneath the bust while standing naturally. Record the measurement without pulling the tape tightly.
Adjusting the Underband
The band is the easiest part to customize. Because the base pattern begins with 150 chains and produces 149 sc stitches, change the starting chain to alter the circumference.
- For a shorter band, remove chains in multiples of 2 where possible.
- For a longer band, add chains in multiples of 2.
- Work the same 10 rows regardless of the band length.
- Measure the band around the body before joining the ends.
A slightly smaller unstretched band can provide a more secure fit, but it should never feel restrictive. Crochet fabric should sit comfortably against the body without digging into the skin.
Adjusting Cup Width and Height
Each cup gains exactly 2 stitches per increase row. The written pattern has 15 rows and finishes with 31 stitches.
- For a smaller or narrower cup, stop after fewer increase rows.
- For a wider cup, continue the increase sequence beyond Row 15.
- Each additional increase row adds 2 stitches to the final cup width.
- To make the cup taller without making it substantially wider, use a slightly smaller hook and adjust the number of rows after checking gauge.
For a larger cup, it is usually better to increase both width and height gradually rather than simply making the cup much wider. Make one test cup first, measure it, and compare it with the wearer’s bust measurements.
Customization Tip
- Use a solid neutral yarn for a minimalist everyday bralette.
- Choose contrasting yarn for the shell edging to emphasize the lace effect.
- Add a second layer of crochet inside each cup if additional opacity is desired.
- For greater coverage, make the final 3 to 4 cup rows in hdc instead of dc after establishing the desired width.
Common Crochet Bralette Mistakes and Troubleshooting
The Cup Is Curving or Ruffling
If the cup edge becomes wavy, your tension may be loose or you may be adding stitches unintentionally. Count the stitches after every increase row. The written cup should increase from 3 stitches to 5, 7, 9, and so on until it reaches 31 stitches.
If the cup becomes too stiff or flat, your hook may be too small for your yarn. Make a gauge swatch before changing the hook throughout the project.
The Band Feels Too Loose
First, check the relaxed measurement of the band. If it is substantially larger than the underbust measurement, remove chains from the foundation before starting over. If the yarn itself has very little stretch, adding a narrow length of lingerie elastic inside the top or bottom edge can improve stability.
The Straps Pull the Cups Upward
This usually means the straps are positioned too far toward the center or are too short. Temporarily pin them in place and check the garment before permanently sewing them. Moving the attachment point slightly outward can distribute tension more comfortably.
The Shell Border Looks Uneven
Decorative crochet edging is sensitive to tension. Avoid pulling the single crochet foundation edge tightly. When working around the cup, keep the spacing between shells visually consistent rather than forcing an exact number of shells into a curved edge.
Finishing, Blocking, and Care
Before finishing, check every seam and strap attachment. Trim loose ends only after they have been woven securely through several stitches. Because this is a wearable item, avoid leaving long unsecured tails inside areas that rub against the skin.
Blocking can improve the appearance of the cups and make the shell edging more symmetrical. Lightly dampen the crochet pieces, place them on a clean towel, and gently shape the triangles to the intended measurements. Allow them to dry completely before assembling if you prefer to block the cups separately.
Do not stretch the cups aggressively while blocking. Excessive stretching can distort the triangular shape and permanently change the fabric dimensions.
For washing, follow the yarn manufacturer’s care instructions. Hand washing in cool or lukewarm water is a gentle option for many handmade lingerie projects. Press out excess water without twisting, reshape the garment, and dry it flat.
Important: If you add lining, elastic, clips, rings, sliders, or other components, check every attachment point before wearing. The crochet fabric should not be treated as equivalent to engineered bra support. This pattern is intended for a light-support handmade garment.
Adding a Lining
A lightweight fabric lining can make the bralette more comfortable and provide additional coverage. Trace each finished cup onto soft, breathable fabric, adding a small seam allowance. Cut two pieces and hand stitch them to the inside of the crochet cups around the outer edges.
Keep the lining slightly smaller than the crochet cup so it does not extend beyond the decorative border. Avoid using stiff fabric because it can change the drape of the crochet.
At a Glance
- Best yarn: Smooth sport-weight cotton or a soft cotton blend.
- Skill level: Confident beginner with basic garment-making skills.
- Key technique: Triangular cup increases combined with BLO single crochet ribbing.
- Size adjustment: Change band chain length and cup increase rows to customize the fit.
- Finishing: Sew the cups to the band, attach adjustable or fixed straps, then add the optional shell edging.
Create Your Own Crochet Lace Bralette
This crochet lace bralette offers a simple way to explore handmade lingerie without relying on complicated shaping. The triangular cups are built from a clear increase sequence, while the ribbed band provides a comfortable foundation and the shell edging adds the decorative detail that makes the finished piece feel special.
Before beginning, choose a soft yarn, measure the wearer carefully, and make a small gauge swatch. Read the complete pattern once so you understand how the cups, band, straps, and edging fit together. For the most reliable fit, make one cup first and compare its width and height with the intended measurements before completing the second cup.
Once the basic construction is comfortable, personalize the project with your favorite yarn color, a contrasting lace border, longer straps, additional cup coverage, or a soft lining. The simple stitch structure makes this an approachable free crochet pattern for experimenting with handmade garment design while still leaving plenty of room for creative adjustments.
Take your time with the measurements, keep your stitch counts consistent, and remember that the best crochet garments are shaped around the person who will wear them. With those details in place, this handmade crochet bralette can become a delicate, customizable addition to a handmade wardrobe.
Tags
Crochet Bralette
Crochet Lace
Free Crochet Pattern
Crochet Garment
Handmade Lingerie
Easy Crochet Project
Crochet Clothing
DIY Crochet