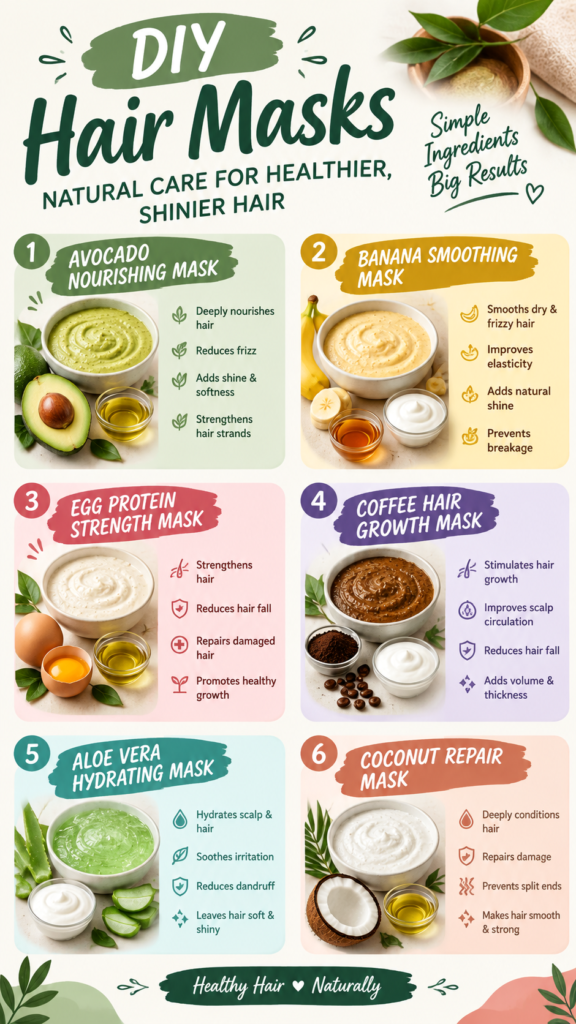
Hair care and handmade crochet make a surprisingly useful pairing with this crochet spa headband, designed for keeping hair comfortably away from the face during a DIY hair mask, cleansing routine, skincare session, or relaxed self-care day. The finished headband has a simple wide shape, soft texture, and adjustable button closure that makes it practical as well as pretty.
This original interpretation uses a straightforward rectangle worked in rows of half double crochet through the back loop. The result has subtle horizontal ridges, gentle stretch, and enough width to hold hair away from the forehead without requiring complicated shaping. Suggested cotton yarn makes the project washable and suitable for repeated hair-care routines.
Key Takeaways
- A practical crochet spa headband for hair masks, skincare, makeup, and everyday routines.
- Worked flat in simple rows using half double crochet through the back loop.
- Suggested worsted-weight cotton gives the headband softness, structure, and easy-care durability.
- The approximate finished base measures 20 x 3.5 inches, or 51 x 9 cm.
- A button-and-loop closure allows the fit to be adjusted without complicated shaping.
- Confident beginners can customize the width, length, color, and edging.
A Handmade Crochet Hair Care Accessory
The theme behind this project is simple: make your hair-care routine feel a little more special with something handmade. A wide crochet headband is useful when applying a hair mask because it helps keep loose strands away from the forehead and face. It can also be worn while washing your face, doing makeup, following a skincare routine, or enjoying a quiet morning at home.
The design is intentionally uncomplicated. Rather than using a complicated stitch pattern, the fabric relies on half double crochet through the back loop. This creates raised horizontal ridges that add visual interest while keeping the construction accessible. The fabric also has a little natural give, which helps the headband sit comfortably around the head.
For the closest hair-care aesthetic, soft shades such as sage, avocado green, cream, warm beige, or pale yellow work beautifully. You can also use one solid color for a clean minimalist accessory or combine two shades for a striped effect.
Project Description and Design Details
This crochet spa headband is a wide, rectangular accessory with a simple adjustable closure. The main band is worked flat from one long edge to the other. Each row contains the same number of stitches, so there is no complicated increasing or decreasing to manage.
The textured surface comes from working half double crochet stitches into the back loop only. This technique creates neat ridges running across the width of the band. The finished fabric is more interesting than plain single crochet while remaining flexible enough for comfortable wear.
The short ends are finished with a small crocheted closure tab and buttons. Instead of relying on a precise stretch measurement, the button closure provides several fitting positions. This is particularly helpful because head sizes and preferred levels of snugness vary considerably.
Construction and Stitch Analysis
The main body is worked in turned rows. The starting chain establishes the headband length, while the number of rows determines its width. This is a practical construction for a beginner-friendly crochet accessory because the dimensions can be changed without redesigning the entire pattern.
The primary stitch is half double crochet worked through the back loop only. In US terminology, this is abbreviated as hdc BLO. The stitch creates a flexible ribbed appearance and gives the headband enough texture to look handmade without making the fabric excessively dense.
The suggested yarn is worsted-weight cotton. Cotton is a useful choice for a hair-care accessory because it is washable, breathable, and reasonably absorbent. A cotton blend can also be used if you prefer a softer or slightly stretchier fabric.
Free Crochet Pattern: Spa Day Hair Care Headband
Free Crochet Pattern
Pattern note: This is an original interpretation designed around the hair-care theme. The suggested materials, gauge, measurements, and construction are recommendations for creating a practical crochet spa headband rather than claims about an unseen original crochet pattern.
| Skill Level | Confident beginner |
| Finished Size | Approximately 20 x 3.5 inches, or 51 x 9 cm, before the closure adjustment |
| Suggested Yarn | Worsted-weight cotton, approximately 120 to 140 yards, or 110 to 128 meters |
| Recommended Hook | 5.0 mm, US H-8 crochet hook |
| Gauge | Approximately 16 hdc x 12 rows = 4 x 4 inches, or 10 x 10 cm |
| Terminology | US crochet terminology |
Materials
- 120 to 140 yards, or 110 to 128 meters, of worsted-weight cotton yarn
- 5.0 mm, US H-8 crochet hook
- 2 medium flat buttons, approximately 1/2 to 3/4 inch, or 1.3 to 1.9 cm in diameter
- Tapestry needle
- Scissors
- Stitch marker, optional
- Measuring tape
Abbreviations
- ch: chain
- hdc: half double crochet
- hdc BLO: half double crochet through the back loop only
- sc: single crochet
- sl st: slip stitch
- st: stitch
- sts: stitches
- RS: right side
- WS: wrong side
UK terminology note: US single crochet is called double crochet in UK terminology, and US half double crochet is called half treble crochet. The instructions below use US terminology only.
Special Stitch
Half Double Crochet Through the Back Loop Only: Yarn over, insert the hook through the back loop of the indicated stitch, yarn over and pull up a loop, yarn over again, then pull through all three loops on the hook. For this pattern, the stitch is always worked through the back loop unless another stitch is specifically stated.
Construction Notes
The headband is worked as one main rectangle, followed by a small closure tab. The turning chain does not count as a stitch. Each row of the main band contains exactly 80 hdc stitches. The closure tab is worked separately from one short edge and contains 10 stitches across its widest section.
The finished main rectangle is approximately 20 inches, or 51 cm, long and 3.5 inches, or 9 cm, wide. Individual tension can change these measurements, so use the gauge and a tape measure rather than relying only on row counts.
Main Headband
- Foundation: Chain 81. The chain itself does not count as a stitch.
- Row 1: Hdc in the second chain from the hook and in each chain across. You will have 80 hdc. Turn.
- Row 2: Ch 1, hdc BLO in each stitch across. You will have 80 hdc. Turn.
- Rows 3 to 13: Repeat Row 2 exactly 11 more times. Each row has 80 hdc. Turn after every row.
- Row 14: Ch 1, hdc BLO in each stitch across. You will have 80 hdc. Do not turn after completing this row.
At this point, the main rectangle contains 14 rows and 80 stitches per row. Fasten off and leave a yarn tail approximately 8 inches, or 20 cm, long for weaving in.
Closure Tab
The closure tab is worked from the center area of one short end. Count 7 row-end stitches upward from the lower corner and place a stitch marker. Count 10 row-end stitches from that marked point toward the opposite corner and place a second marker. These 10 row-end spaces form the attachment area for the tab.
- Join yarn with a slip stitch in the first marked row-end space.
- Tab Row 1: Ch 1, sc in the same row-end space and in each of the next 9 row-end spaces. You will have 10 sc. Turn.
- Tab Row 2: Ch 1, sc in each stitch across. You will have 10 sc. Turn.
- Tab Row 3: Ch 1, sc in the first 3 stitches, ch 2, skip the next 2 stitches, sc in the remaining 5 stitches. You will have 8 sc and one 2-chain buttonhole space. Turn.
- Tab Row 4: Ch 1, sc in each stitch across, working 2 sc into the 2-chain buttonhole space. You will have 10 sc. Turn.
- Tab Row 5: Ch 1, sc in each stitch across. You will have 10 sc. Turn.
- Tab Row 6: Ch 1, sc in the first 3 stitches, ch 2, skip the next 2 stitches, sc in the remaining 5 stitches. You will have 8 sc and one 2-chain buttonhole space. Turn.
- Tab Row 7: Ch 1, sc in each stitch across, working 2 sc into the 2-chain buttonhole space. You will have 10 sc. Turn.
- Tab Row 8: Ch 1, sc in each stitch across. You will have 10 sc. Fasten off.
The two buttonholes are now approximately two rows apart. This provides two adjustment positions without requiring a long complicated strap.
Optional Neat Edge
If you want a more finished outline, attach yarn at any corner of the main rectangle and work one round of single crochet evenly around the entire outer edge. Place 1 sc in each stitch across the long edges and approximately 1 sc in each row-end space along the short edges. At each corner, work 2 sc in the corner space to prevent pulling.
Because row-end stitch placement can vary with personal tension, focus on keeping the edging flat rather than forcing an exact number of stitches. Fasten off with a slip stitch and weave in the end securely.
Button Placement and Assembly
- Lay the headband flat with the textured ridges facing upward.
- Wrap the headband around the intended wearer’s head to determine the most comfortable overlap.
- Place one button on the short edge opposite the closure tab so it aligns with the first buttonhole.
- Place the second button so it aligns with the second buttonhole.
- Sew each button firmly into place using matching yarn or strong sewing thread.
- Check that the buttons pass smoothly through the crocheted loops without stretching the fabric excessively.
- Weave all remaining yarn tails securely into the wrong side of the fabric.
Important: Test the headband around the head before sewing the buttons permanently. The most comfortable button position depends on your finished gauge, yarn elasticity, and preferred fit.
Color-Change Option
The basic pattern uses one color, but the ridged rows are particularly attractive with simple stripes. To create two-color stripes, work Rows 1 and 2 in Color A, Rows 3 and 4 in Color B, and continue alternating every two rows until Row 14 is complete.
For a softer spa-inspired palette, try cream with sage green, pale yellow with ivory, or muted green with natural beige. Fasten off each color only when the stripe section requires it. Otherwise, carry the unused color loosely up the side if the next color change occurs frequently enough to keep the edge tidy.
Crochet Gauge and Sizing Adjustments
The standard version is designed around approximately 16 hdc by 12 rows per 4 inches, or 10 by 10 cm. Because a headband needs to fit comfortably rather than precisely like a fitted garment, gauge is more important for controlling the final dimensions than for achieving an exact stitch count.
Measure around the head at the point where the headband will sit. For a comfortable fit, the crocheted body can be slightly shorter than the full head measurement because the cotton fabric has some flexibility. The adjustable buttons then provide additional fitting room.
Adjusting the Length
The foundation chain controls the approximate circumference. To make the band longer or shorter, change the starting chain by an even number. Remember that the number of foundation chains minus one becomes the number of hdc stitches in Row 1.
- For a slightly smaller band, try 77 chains for 76 hdc.
- For the standard version, use 81 chains for 80 hdc.
- For a larger band, try 85 chains for 84 hdc.
- For a substantially larger size, continue adding chains in increments of 2 until the desired length is reached.
Because individual tension differs, measure the foundation chain before completing the project. The chain should correspond to your desired relaxed headband length rather than the full circumference if you want the finished accessory to stretch slightly around the head.
Adjusting the Width
The number of rows controls the width. The standard version has 14 rows. For a narrower headband, work 10 to 12 rows. For a wider spa wrap, work 16 to 20 rows. Keep the same stitch pattern and simply stop once the desired width is reached.
Customization Tip
- Use 10 to 12 rows for a slim everyday headband.
- Use 14 rows for the balanced spa-headband proportions in this pattern.
- Use 16 to 20 rows for extra forehead coverage during hair-care routines.
Crochet Insight: Why the Back Loop Matters
Working half double crochet through the back loop only changes the direction of the visible stitch texture. Instead of producing a flat fabric, the technique creates raised horizontal ridges that resemble a subtle ribbed knit surface while remaining fully crocheted.
- Insert the hook only into the back loop of the stitch.
- Keep your tension consistent so the ridges remain even.
- Do not accidentally work through both loops, or the texture will become flatter.
The back-loop technique is also useful for beginners because it requires the same basic half double crochet motion used throughout the main body. Once the first few rows are established, the pattern becomes rhythmic and easy to follow.
Common Mistakes and Troubleshooting
The Headband Is Too Wide or Too Narrow
Check the number of completed rows rather than changing the hook size immediately. The standard width comes from 14 rows. If your fabric is much thicker than expected, remove one or two rows. If it is too narrow, add rows until the width feels comfortable.
The Long Edge Is Wavy
Uneven tension can cause the foundation edge to ripple. Make sure your starting chain is not significantly tighter than your first row. If necessary, use a slightly larger hook for the foundation chain and switch back to the recommended hook for Row 1.
The Stitch Count Keeps Changing
Place a stitch marker in the first and last stitch of each row. Since the turning chain does not count as a stitch, the first hdc of every row should go into the first actual stitch. Count the stitches at the end of a few early rows until the movement becomes automatic.
The Texture Looks Uneven
Make sure every main-body stitch is worked through the back loop only. Accidentally inserting the hook through both loops will create isolated flat stitches that interrupt the ridge pattern. If you spot one early, it is usually worth undoing the row and correcting it.
Expert Tip: Count stitches at the end of each row rather than waiting until several rows are finished. Correcting one misplaced stitch immediately is much easier than finding a missing stitch several inches later.
Finishing, Blocking, and Care
After the headband is assembled, weave all yarn tails securely into the wrong side of the fabric. For a durable finish, weave each end in several directions through nearby stitches before trimming the excess.
Blocking is optional for this project. If the edges look uneven, lightly dampen the finished headband and lay it flat on a clean towel. Gently smooth it into a rectangular shape and allow it to dry completely. Avoid stretching the fabric aggressively because the headband needs to retain its natural flexibility.
For cotton yarn, follow the washing instructions recommended for your particular yarn. In general, gentle washing and thorough air drying are useful approaches for a reusable hair-care accessory. Allow the headband to dry fully before storing it.
If the accessory is used with oily hair products, conditioner, or homemade hair masks, wash it regularly. Keeping a second headband available can make it easier to alternate between uses while one is being cleaned.
Ways to Personalize the Finished Headband
- Avocado-inspired: Combine sage green with creamy ivory for a fresh botanical palette.
- Aloe-inspired: Use pale green with white or natural cotton.
- Banana-inspired: Pair a soft golden yellow with cream.
- Minimalist: Use one neutral shade for an understated accessory.
- Striped: Alternate two colors every two rows.
- Textured: Add the optional single crochet border for extra definition.
- Gift idea: Pair the headband with handmade washcloths or other crochet spa accessories for a coordinated self-care set.
At a Glance
- Best yarn choice: Worsted-weight cotton or a soft cotton blend.
- Skill level: Confident beginner.
- Key technique: Half double crochet through the back loop only.
- Size adjustment: Change the foundation-chain length for circumference and the number of rows for width.
- Finishing method: Add a simple button-and-loop closure and optionally finish the outer edge with single crochet.
Final Thoughts on This Crochet Spa Headband
This crochet spa headband is a small project with plenty of practical uses. Its simple rectangular construction makes it approachable for confident beginners, while the back-loop texture gives the finished accessory enough character to feel special and handmade.
Before beginning, choose a comfortable cotton yarn, check your tension, and read the complete pattern from beginning to end. Measure the headband as you work rather than relying entirely on the suggested dimensions, especially if your crochet tension differs from the stated gauge.
The beauty of this crochet hair-care accessory is how easily it can be personalized. Change the colors, adjust the width, move the button positions, or add a simple border to create a version that fits your routine. Whether it is used during a DIY hair mask, skincare session, makeup application, or a quiet self-care evening, it is a useful little handmade project to keep close at hand.
Choose your favorite yarn, make a gauge swatch when needed, and keep the full pattern nearby as you crochet. With a few simple rows and thoughtful finishing details, you can create a reusable accessory that adds a handmade touch to everyday hair care.
Tags
Crochet Spa Headband
Crochet Hair Accessories
Free Crochet Pattern
Beginner Crochet Pattern
Crochet Hair Care
Cotton Crochet Project
Easy Crochet Project
Handmade Crochet Gift