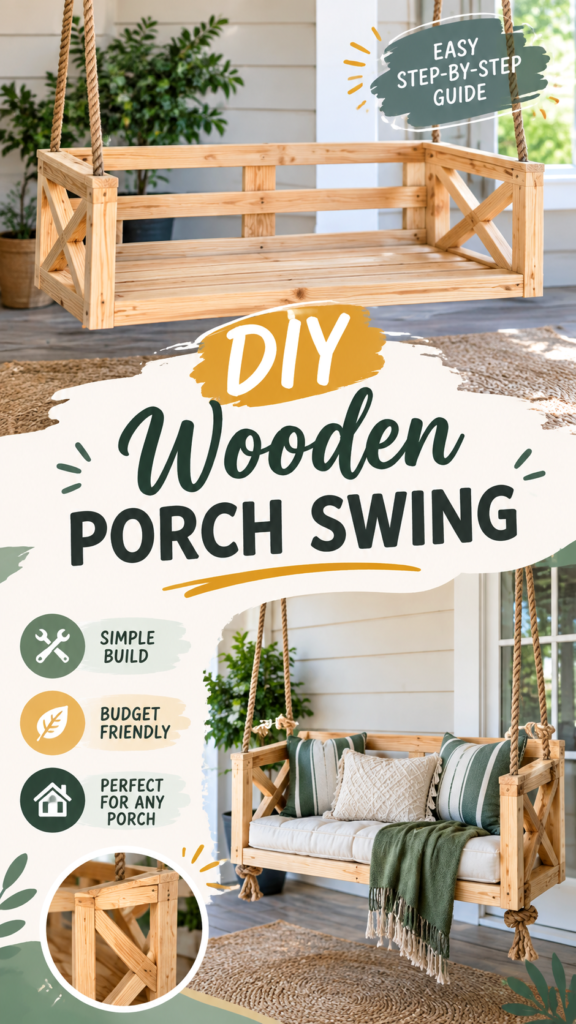
A cozy outdoor swing becomes even more inviting with the right handmade details, and this crochet pillow cover is designed to capture that relaxed, rustic look. The inspiration for this original pattern comes from the neutral, geometric cushion styling often used with wooden porch furniture. The finished cover features a simple textured fabric, horizontal color bands, and an envelope-style back that makes inserting and removing a cushion easy.
This is an original crochet interpretation rather than an attempt to reproduce an unseen pattern. The suggested construction uses worsted-weight yarn, a 5 mm crochet hook, and an easy combination of single crochet and double crochet. The result is a sturdy but comfortable decorative cover that works beautifully on a porch swing, reading chair, bench, sofa, or guest-room bed.
Key Takeaways
- Make a textured crochet pillow cover designed for an approximately 18-inch cushion.
- Use an easy lemon-peel-style texture made with alternating single crochet and double crochet.
- Suggested worsted-weight yarn gives the cover enough structure for everyday decorative use.
- Neutral stripes create a rustic, farmhouse, and boho-inspired appearance.
- The envelope back allows the cushion insert to be removed without sewing in a permanent closure.
- The dimensions can be adjusted easily by working more or fewer stitches and rows.
The Crochet Pillow Cover: Rustic Texture With a Modern Feel
The finished project is an approximately 18-inch square decorative crochet pillow cover with a softly textured front, coordinating back panels, and a simple single-crochet border. Its rectangular stitches create subtle visual interest without making the project overly complicated.
The color arrangement is intentionally inspired by neutral outdoor decor. A warm cream acts as the main background, while charcoal, muted taupe, and soft gray can be introduced as accent stripes. You can keep the entire cover neutral or substitute your favorite colors to coordinate with an existing porch swing cushion.
The project is especially useful when you want handmade crochet to complement wood furniture without making the space feel overly busy. The textured stitch pattern catches the light gently, while the horizontal stripes emphasize the square shape of the cushion.
Although the photographed furniture itself is not a crochet project, the visible decorative cushion provides a useful starting point for an original crochet interpretation. The pattern below turns that neutral, geometric cushion aesthetic into a practical removable crochet cover.
Who Will Enjoy This Crochet Project?
This is a good project for a confident beginner who understands basic crochet stitches and can maintain an even tension across rows. The stitch combination is straightforward, and there is no complicated shaping. The main skills are working single crochet, double crochet, changing colors, joining panels, and creating a neat border.
Because the project is made from flat rectangular panels, it is also a useful way to practice consistent stitch tension. If you are newer to crochet, making a small gauge swatch before starting the full pillow will make the finished measurements much more predictable.
Crochet Construction and Stitch Analysis
The original interpretation uses three flat pieces: one full-size front panel and two overlapping back panels. The front is worked back and forth in rows. The two back pieces use the same width but are shorter so they can overlap when assembled.
The main texture is a simple alternating stitch pattern sometimes called a lemon-peel-style texture. Each row combines single crochet and double crochet. On the following row, the stitch types are reversed. This creates a balanced surface with small raised areas that look more detailed than plain single crochet while remaining easy to work.
The front panel uses nine eight-row color blocks for a total of 72 rows. This creates subtle horizontal stripes without requiring complicated colorwork. The back panels are worked in one main color so the finished cover remains simple and practical.
For a porch or covered outdoor area, acrylic or acrylic-blend yarn is a practical choice because it is generally easy to wash and holds its shape well. If the cover will remain outdoors for long periods, choose a yarn specifically intended for outdoor use and follow its care instructions.
Important: This pattern uses suggested yarn, hook size, gauge, and measurements because those technical details cannot be determined precisely from the finished decorative styling. Make a gauge swatch before committing to the full pillow panels, especially if an exact cushion fit is important.
Suggested Color Arrangement
A four-color palette gives the pillow a relaxed rustic appearance. For the instructions below, use Cream as the dominant shade, with Charcoal, Taupe, and Soft Gray as accents.
- Rows 1 to 8: Cream
- Rows 9 to 16: Charcoal
- Rows 17 to 24: Cream
- Rows 25 to 32: Taupe
- Rows 33 to 40: Cream
- Rows 41 to 48: Soft Gray
- Rows 49 to 56: Cream
- Rows 57 to 64: Charcoal
- Rows 65 to 72: Cream
You can replace these colors with any combination that suits your room. Keeping the main shade between darker accent bands gives the project a similar visual rhythm without copying any unseen original design.
Free Crochet Pillow Cover Pattern
Project name: Rustic Textured Porch Pillow Cover
Project description: An approximately 18-inch square crochet pillow cover featuring a textured alternating single crochet and double crochet stitch, neutral horizontal color bands, a full front panel, and an envelope-style back.
| Skill Level | Confident beginner |
| Finished Size | Approximately 18 x 18 in / 46 x 46 cm before edging; approximately 18.5 x 18.5 in / 47 x 47 cm after edging |
| Yarn | Worsted-weight yarn, approximately 520 yards / 475 meters total |
| Hook | 5 mm, US H-8 |
| Gauge | 16 stitches x 16 rows = 4 x 4 in / 10 x 10 cm in the textured stitch |
| Terminology | US crochet terminology |
Materials
- Worsted-weight yarn, approximately 520 yards / 475 meters total
- 5 mm US H-8 crochet hook
- 18-inch / 46 cm square pillow insert
- Yarn needle
- Scissors
- Removable stitch marker, optional
- Tape measure
For a balanced four-color version, plan approximately 300 yards / 274 meters of the main cream shade and approximately 70 to 80 yards / 64 to 73 meters of each accent color. Exact usage will vary with yarn fiber, tension, and color arrangement.
Abbreviations
- ch: chain
- sc: single crochet
- dc: double crochet
- sl st: slip stitch
- st: stitch
- sts: stitches
- RS: right side
- WS: wrong side
- rep: repeat
UK equivalent note: US single crochet is UK double crochet, and US double crochet is UK treble crochet. The pattern instructions themselves use US terminology only.
Special Stitch and Construction Notes
Textured stitch: Work one single crochet and one double crochet alternately across the row. On the next row, work a single crochet into the previous row’s double crochet and a double crochet into the previous row’s single crochet. This alternating placement creates the textured surface.
Turning chain: Ch 1 at the beginning of each row. The turning chain does not count as a stitch.
Slip stitches: Slip stitches used during assembly and edging do not count as stitches unless specifically stated.
Rows: Turn after every completed row. Keep the right side and wrong side consistent when changing colors.
Front Panel
With Cream yarn, ch 73.
- Row 1: Sc in the 2nd ch from hook and in each ch across. 72 sts. Turn.
- Row 2: Ch 1, sc in first st, dc in next st; repeat across to the last two sts, sc in next st, dc in last st. 72 sts. Turn.
- Row 3: Ch 1, sc in first st, dc in next st; repeat the same stitch sequence across. 72 sts. Turn.
- Rows 4 to 8: Repeat Row 3. 72 sts. At the end of Row 8, fasten off Cream.
For each remaining eight-row color block, join the new color with a slip stitch in the first stitch of the row. Ch 1 and begin the row. The joining loop does not count as a stitch.
- Rows 9 to 16: With Charcoal, work the same textured stitch for 8 rows. 72 sts each row. Fasten off after Row 16.
- Rows 17 to 24: With Cream, work the same textured stitch for 8 rows. 72 sts each row. Fasten off after Row 24.
- Rows 25 to 32: With Taupe, work the same textured stitch for 8 rows. 72 sts each row. Fasten off after Row 32.
- Rows 33 to 40: With Cream, work the same textured stitch for 8 rows. 72 sts each row. Fasten off after Row 40.
- Rows 41 to 48: With Soft Gray, work the same textured stitch for 8 rows. 72 sts each row. Fasten off after Row 48.
- Rows 49 to 56: With Cream, work the same textured stitch for 8 rows. 72 sts each row. Fasten off after Row 56.
- Rows 57 to 64: With Charcoal, work the same textured stitch for 8 rows. 72 sts each row. Fasten off after Row 64.
- Rows 65 to 72: With Cream, work the same textured stitch for 8 rows. 72 sts each row. Fasten off after Row 72.
Weave in the ends on the wrong side. Do not trim the yarn tails extremely close until you have secured them through several stitches.
Back Panel A
Back Panel A is designed to extend from the top edge of the pillow toward the center of the envelope opening.
- Foundation: With Cream yarn, ch 73.
- Row 1: Sc in the 2nd ch from hook and in each ch across. 72 sts. Turn.
- Row 2: Ch 1, sc in first st, dc in next st; repeat across. 72 sts. Turn.
- Rows 3 to 46: Repeat Row 2 for a total of 46 rows. 72 sts. Fasten off.
Panel A measures approximately 11.5 inches / 29 cm long at the stated gauge.
Back Panel B
Back Panel B is identical to Back Panel A.
- Foundation: With Cream yarn, ch 73.
- Row 1: Sc in the 2nd ch from hook and in each ch across. 72 sts. Turn.
- Row 2: Ch 1, sc in first st, dc in next st; repeat across. 72 sts. Turn.
- Rows 3 to 46: Repeat Row 2 for a total of 46 rows. 72 sts. Fasten off.
Border
Place the front panel flat with the right side facing you. Join Cream yarn at any corner.
- Ch 1. Work 1 sc in each stitch across the top edge.
- At the corner, work 2 sc in the corner space or edge stitch.
- Work approximately 1 sc into the end of each row down the side.
- At the next corner, work 2 sc in the corner space.
- Work 1 sc in each stitch across the bottom edge.
- Work 2 sc in the next corner.
- Work approximately 1 sc into the end of each row up the final side.
- Work 2 sc in the last corner and join with a sl st to the first sc.
- Fasten off and weave in the end.
Because the side edge contains row ends rather than conventional stitches, spacing is more important than achieving a rigid stitch count. If the edge begins to ripple, remove a few stitches. If it pulls inward, add a few stitches evenly along the edge.
Assembly
Place the front panel right side down. Position Back Panel A on top with its right side facing the front panel. Align the outer edges. Position Back Panel B over the remaining opening, also with its right side facing the front panel. The two back pieces should overlap by approximately 5 inches / 13 cm.
Pin or clip the layers around all four sides. The overlap creates the envelope opening where the pillow insert will be placed.
- Join Cream yarn through all three layers at the lower-left corner.
- Work single crochet through the front and back layers together along the bottom edge.
- Continue up the first side, keeping the stitches aligned with the row ends.
- Work across the top edge, stitching through the front panel and the appropriate back panel layer.
- Continue down the opposite side.
- Finish with a slip stitch to the first border stitch.
- Fasten off securely.
- Turn the cover right side out through the envelope opening.
- Push the corners gently outward with your fingers.
- Insert the 18-inch / 46 cm pillow form.
Do not crochet across the overlapping opening. Leaving that section unworked is what allows the pillow insert to be removed later.
Finishing
Use a yarn needle to weave all remaining tails securely through the wrong side of the fabric. For extra durability, change direction through several stitches before trimming the yarn.
Check all four corners and gently square the cover by hand. If the fabric looks slightly uneven, lightly dampen it and lay it flat on a clean towel. Smooth the edges into a square and allow it to dry completely.
Do not aggressively stretch the cover. The goal is to relax the stitches and even the edges, not to force the crochet beyond its natural dimensions.
How to Customize the Crochet Pillow Cover
The construction makes this crochet pillow cover especially easy to resize. The most important measurement is the width of the front panel. Once you know the desired pillow width, adjust the starting chain to match your gauge.
Changing the Width
At the stated gauge of 16 stitches per 4 inches, approximately 4 stitches equal 1 inch. For a 20-inch pillow, for example, you would need approximately 80 stitches rather than 72. Because the texture alternates stitch types, an even stitch count is convenient for maintaining the pattern.
Always make a swatch before calculating a new foundation chain. Yarn thickness and personal tension can change the number of stitches needed for a particular measurement.
Changing the Height
At the suggested gauge, 16 rows measure approximately 4 inches. To make the pillow taller, add rows to the front panel. For the cleanest stripe arrangement, add or remove complete color blocks of 8 rows.
If you need a 16-inch cover, for example, 64 rows at the stated gauge would be approximately 16 inches. If you want a 20-inch cover, 80 rows would be approximately 20 inches.
Changing the Color Palette
For a farmhouse appearance, combine cream, warm beige, gray, and charcoal. For a more colorful porch cushion, substitute terracotta, mustard, sage, dusty blue, or another muted shade. A two-color version is also attractive and reduces the number of ends that need weaving.
You can also make the entire front panel one solid color and use a contrasting shade only for the border. This is a particularly simple option when matching an existing room palette.
Customization Tip
- Use wider color blocks for a bold striped pillow.
- Use two-row accent bands for a subtler geometric effect.
- Replace the envelope back with a buttoned or zipper closure if you prefer a different finish.
Common Crochet Mistakes and Troubleshooting
The Panel Is Wider or Narrower Than Expected
This is usually caused by gauge. If you have more than 16 stitches in 4 inches, your stitches are smaller than the suggested gauge. If you have fewer, your stitches are larger. Change your hook size or adjust the starting chain after making a new swatch.
The Edge Is Wavy
Uneven edge tension can happen when working double crochet stitches beside single crochet stitches. Count the stitches at the end of every row and make sure the final stitch is worked into the final stitch of the previous row.
The Texture Looks Different From Row to Row
Check that you are alternating the stitch placement consistently. In this pattern, the basic rhythm remains one single crochet followed by one double crochet. Avoid accidentally working two identical stitch types beside each other unless you are intentionally changing the design.
The Back Opening Is Too Small
The two back panels should overlap by approximately 5 inches / 13 cm. If you want a larger opening, reduce the overlap by shortening the back panels slightly. If you prefer a more secure opening, increase the overlap.
Construction Note: Measure the front panel before joining the back. If your front measures 18 inches square but the back panels are noticeably wider or narrower, correct the difference before assembly rather than relying on the border to pull everything into shape.
Finishing, Blocking, and Care
Once the cover has been assembled, inspect the seams for loose stitches and check that all yarn ends are secured. The envelope opening should remain flexible enough to remove the insert without stretching the crochet excessively.
For washing, follow the care instructions for the yarn you choose. Washable acrylic or acrylic-blend yarn is convenient for a decorative pillow that may need occasional cleaning. Remove the pillow insert before washing the crochet cover.
Reshape the cover while damp and allow it to dry flat when the yarn care instructions permit. Avoid high heat unless the yarn manufacturer specifically states that it is safe.
If you plan to use the pillow on an outdoor porch, remember that ordinary yarn is not automatically weatherproof. Keep the finished piece protected from prolonged rain, intense sunlight, and moisture unless the selected yarn is specifically designed for outdoor conditions.
Styling Your Handmade Crochet Pillow
This crochet pillow cover works naturally with rustic wood, farmhouse furniture, neutral upholstery, and relaxed porch decor. Place it against a larger solid-color cushion to make the texture stand out. Several pillows in related neutral shades can create a layered arrangement without overwhelming the space.
For an indoor setting, pair the cover with a wooden bench, accent chair, window seat, or sofa. The geometric texture also works well with woven baskets, natural wood tones, simple blankets, and other handmade accessories.
If you are making the cover as a gift, choose colors based on the recipient’s existing decor. Neutral combinations are versatile, while one or two carefully chosen accent shades can make the finished pillow feel more personalized.
At a Glance
- Best yarn: Worsted-weight washable acrylic or acrylic-blend yarn for a structured decorative cover.
- Skill level: Confident beginner, with basic single crochet, double crochet, color changes, and seaming.
- Key technique: Alternating single crochet and double crochet for a simple textured surface.
- Size adjustment: Change the foundation chain for width and add or remove rows in eight-row blocks for height.
- Finishing: Use an envelope-style back, single-crochet border, secure seams, and gentle shaping.
Final Thoughts on This Crochet Pillow Cover
This crochet pillow cover is a practical way to bring handmade texture into rustic, farmhouse, boho, or relaxed outdoor-inspired decor. Its rectangular construction keeps the pattern approachable, while the alternating stitch texture and neutral stripes give the finished piece enough detail to look thoughtfully designed.
Before beginning, choose your yarn carefully, check the gauge if the cover needs to fit a specific insert, and read through the complete pattern so the color changes and construction make sense. The simple panel design also leaves plenty of room for personalization.
Try different neutral combinations, adjust the stripe widths, or make a solid-color version with a contrasting border. Whether placed on a porch swing, bench, chair, or sofa, this handmade crochet project can add a comfortable finishing touch while giving you useful practice with texture, color changes, flat panels, and envelope-style construction.
Tags
Crochet Pillow Cover
Free Crochet Pattern
Easy Crochet Project
Crochet Home Decor
Textured Crochet
Crochet Cushion Cover
Farmhouse Crochet
Handmade Home Decor