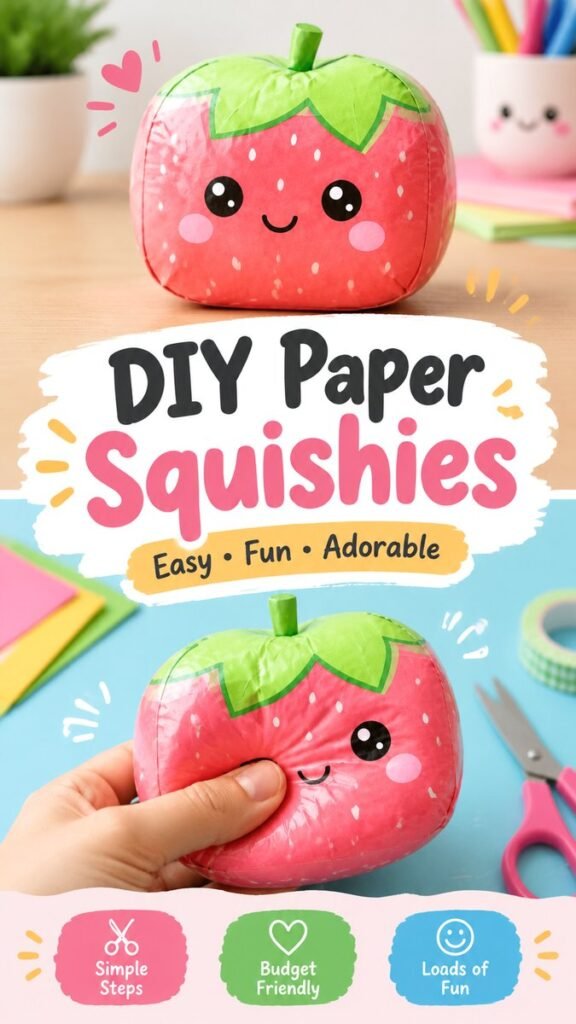
Creating adorable crafts at home has never been more fun with a kawaii paper squishy DIY project. These charming handmade creations combine bright colors, cute expressions, and simple materials to create playful toys that are perfect for craft lovers of all ages. Inspired by the growing love for kawaii crafts, paper squishies are a creative way to enjoy relaxing DIY time while making something unique and cheerful.
Whether you are searching for an easy weekend craft, a fun activity for kids, or a cute handmade decoration, DIY squishies offer endless possibilities. With colorful paper designs, soft stuffing, and imaginative characters, you can transform simple supplies into lovable creations that bring a smile every time you squeeze them.
Key Takeaways
- Learn how to create cute kawaii-inspired paper squishies at home.
- Explore simple craft techniques using everyday materials.
- Discover design ideas for colorful and playful squishy characters.
- Create relaxing DIY projects suitable for beginners.
- Use creativity to personalize your own handmade squishy collection.
What Makes Squishies Kawaii DIY Crafts So Popular?
Kawaii paper squishies have become a favorite craft trend because they combine creativity, cuteness, and simplicity. The word “kawaii” represents a style that celebrates charming designs, friendly faces, soft colors, and playful details. A paper squishy captures this feeling through adorable shapes like fruits, animals, desserts, and fantasy characters.
The appeal of these crafts comes from how approachable they are. Unlike complicated projects that require advanced skills, making a DIY paper squishy can be enjoyable even for beginners. A few basic materials and a little imagination are enough to create something personalized.
Important: The best kawaii crafts are not about perfection. Small details like hand-drawn faces, unique colors, and creative decorations make each squishy feel special and handmade.
Understanding the Kawaii Paper Squishy Design
The featured style focuses on a cute fruit-inspired character with a rounded shape, bright colors, and a friendly face. This type of design works especially well for paper squishies because simple shapes are easier to cut, decorate, and assemble.
A successful kawaii squishy design usually includes a few recognizable elements:
- A soft-looking rounded silhouette.
- Large expressive eyes that create a cute personality.
- A small smiling mouth for a cheerful appearance.
- Bright color combinations that attract attention.
- Simple patterns or accents that add character.
Fruit designs are especially popular because they naturally include fun colors and easy shapes. Strawberries, apples, peaches, and other sweet designs can quickly become adorable characters with just a few creative touches.
Materials Needed for a DIY Paper Squishy
One reason paper squishies are loved by craft enthusiasts is that they do not require expensive supplies. Many materials can already be found around the home or in a basic craft collection.
- Colored paper or printed templates.
- Markers, pencils, or colored pens.
- Scissors for cutting shapes.
- Tape or glue for sealing edges.
- Soft filling material such as tissue paper, cotton, or lightweight stuffing.
- Clear tape or plastic covering for a smooth finish.
The exact materials can be adjusted depending on the style you want to create. Some crafters prefer a glossy finish, while others enjoy a handmade paper texture.
How to Make a Kawaii Paper Squishy Step by Step
Step 1: Choose Your Squishy Character Design
Start by deciding what type of kawaii squishy you want to create. A fruit character is a great beginner option because it uses simple shapes and allows plenty of creativity. Sketch the outline first and think about the colors, facial expression, and decorative details.
Step 2: Create and Decorate the Front Design
Draw your character on paper or use a printed design as inspiration. Add large eyes, a cute smile, rosy cheeks, tiny patterns, or other details that match the kawaii style. This is the stage where your squishy begins to develop its personality.
Step 3: Prepare the Squishy Shape
Cut out two matching pieces for the front and back of your design. Carefully align the edges so the final squishy has a neat appearance. Keeping the shape symmetrical helps create a more polished result.
Step 4: Add the Soft Filling
Place lightweight filling between the two paper pieces before sealing the edges. Add enough material to create a soft, puffy appearance while keeping the squishy flexible.
Step 5: Seal and Finish Your Creation
Close the remaining opening carefully and add any final decorations. A protective layer of clear tape can help strengthen the paper and create a smoother surface.
Expert Insight
Small creative choices make a big difference in kawaii crafts. Experiment with facial expressions, color combinations, and tiny decorative details to turn a simple paper squishy into a character with its own style.
- Try pastel colors for a soft kawaii aesthetic.
- Add tiny patterns like dots, hearts, or stars for extra charm.
- Create themed collections with matching characters.
Creative Ideas for Personalizing Your Squishies
One of the most enjoyable parts of making kawaii paper squishies is customizing them. Every creator can develop a different style by changing colors, shapes, and expressions.
Here are some fun ideas to try:
- Create seasonal squishies with holiday-inspired colors.
- Design matching fruit or dessert characters.
- Add funny expressions for a playful personality.
- Make mini versions for decorations or gifts.
- Combine different kawaii themes into a unique collection.
Why DIY Paper Squishies Are Great Creative Activities
Crafting paper squishies is more than just making a cute object. It is an activity that encourages imagination, patience, and artistic expression. The process of designing, cutting, decorating, and assembling helps makers slow down and enjoy the creative process.
For children, these crafts can support creativity and fine motor skills. For adults, they can become a relaxing hobby that provides a break from everyday routines.
Pro Tip: Keep a small craft box with colorful paper, markers, tape, and scissors ready. Having supplies available makes it easier to start creative projects whenever inspiration appears.
Displaying and Sharing Your Kawaii Squishy Creations
Once your DIY squishies are finished, there are many ways to enjoy them. They can be displayed on shelves, added to craft collections, used as handmade gifts, or shared with friends who love cute creations.
Many craft enthusiasts also enjoy creating themed collections. A group of matching fruit characters, pastel designs, or seasonal squishies can create a fun visual display and inspire future projects.
At a Glance
- Easy beginner-friendly kawaii craft idea.
- Uses simple and affordable materials.
- Perfect for creative customization.
- Great activity for kids and adults.
- Fun way to create handmade cute characters.
Conclusion
Kawaii paper squishy DIY projects are a wonderful way to combine creativity, color, and playful design. With simple supplies and a little imagination, anyone can create charming handmade characters that feel unique and personal.
From fruit-inspired designs to completely original creations, these crafts offer endless opportunities to explore new ideas. Whether you are making your first squishy or building a full collection, the process is just as enjoyable as the finished result.
Start experimenting with shapes, colors, and cute details to create your own adorable paper squishy world. Save this idea for your next craft day and enjoy making something fun, colorful, and completely yours.