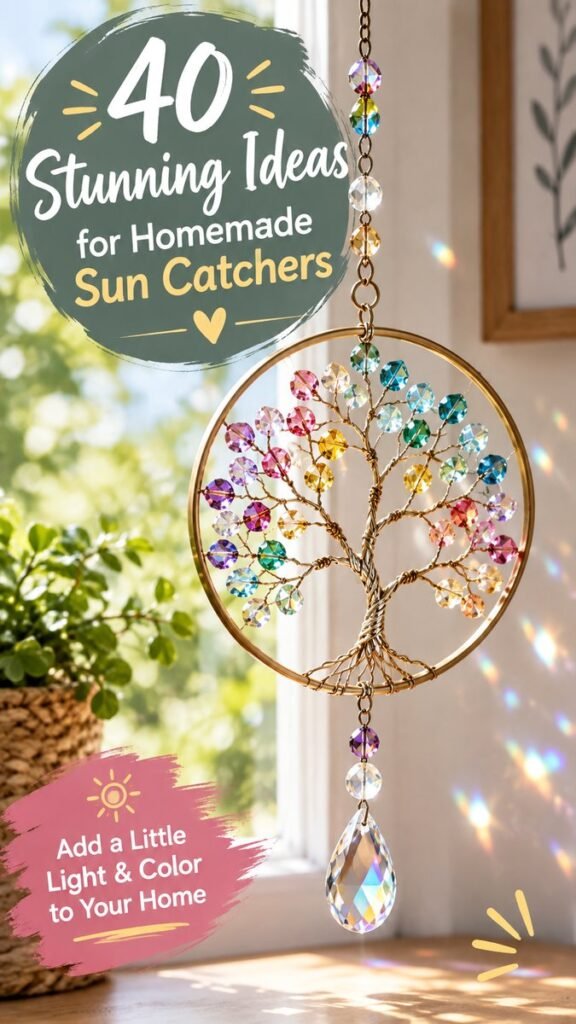
Bring a little extra color and sparkle into your home with a beautiful suncatcher DIY project. A handmade suncatcher can turn an ordinary sunny window into a cheerful display of light, crystals, beads, and color. The featured design combines a circular metal frame, delicate wire branches, colorful flower-like crystal pieces, and faceted hanging prisms for a layered look that feels artistic without being overly complicated.
Whether you love handmade home decor, relaxing weekend crafts, or colorful window decorations, suncatchers offer plenty of room for creativity. You can experiment with different shapes, beads, crystals, wire colors, and hanging arrangements to create something that feels completely personal.
Key Takeaways
- A DIY suncatcher is an easy way to add color and sparkle near a sunny window.
- Wire, beads, crystals, hoops, and prisms can create a layered handmade design.
- Combining several sizes and shapes gives a suncatcher more visual depth.
- Color placement can make the finished piece playful, elegant, or nature inspired.
- Hanging the finished craft where natural light reaches it helps reveal its reflective details.
Why Make a Suncatcher DIY?
A suncatcher is more than a simple decoration. It brings attention to natural light and gives a room a small point of visual interest throughout the day. When sunlight passes through faceted crystals or reflective beads, the changing light can create beautiful highlights across nearby surfaces.
Making your own also gives you complete control over the design. Instead of searching for a particular color combination or shape, you can build one around your existing decor. Soft pastels can create a delicate appearance, while jewel tones can make the piece feel vibrant and playful.
The circular design shown here is especially inspiring because it uses several visual layers. A large round frame creates the foundation, while smaller circular sections and delicate wire details add dimension. Colorful pieces are distributed throughout the frame rather than concentrated in one area, keeping the composition balanced.
Important: The most appealing handmade suncatchers do not need to be perfectly symmetrical. A balanced mix of color, texture, reflective elements, and open space can make a finished piece feel more natural and handcrafted.
Materials for a Colorful Window Suncatcher
You can adapt the materials to suit your preferred crafting style and the design you have in mind. The reference-inspired project uses a combination of metal, wire, colorful decorative pieces, and faceted elements.
- Metal hoop or circular frame: This creates the main structure of the suncatcher.
- Craft wire: Use it to form branches, secure decorative pieces, and connect elements.
- Colorful beads: Choose several complementary shades for visual variety.
- Faceted crystals or acrylic prisms: These add reflective sparkle and catch natural light.
- Small decorative charms: Flower-shaped or geometric pieces can add personality.
- Jump rings: These are useful for connecting hanging components.
- Chain or strong hanging cord: This allows the finished piece to be suspended securely.
- Wire cutters and round-nose pliers: Helpful for shaping and securing craft wire.
There is no need to match every material exactly. A suncatcher DIY project is flexible by nature. If you have leftover beads from another craft, small charms from a jewelry project, or decorative pieces sitting in your craft box, they can often become part of the design.
Choosing Your Color Palette
Color is one of the easiest ways to change the personality of a homemade suncatcher. The featured inspiration uses a cheerful collection of pink, blue, green, yellow, purple, and clear reflective elements. This creates a lively rainbow-like effect while maintaining a cohesive handmade appearance.
For a softer design, try blush pink, pale blue, lavender, clear, and champagne tones. If you prefer something more energetic, combine turquoise, coral, yellow, violet, and emerald shades. A neutral palette of clear, amber, silver, and soft gold can create a more understated look.
A useful approach is to select three to five main colors and repeat them throughout the piece. Repetition helps the design feel intentional even when the individual beads or decorative components have different shapes.
How to Plan Your Suncatcher DIY Design
Before attaching anything permanently, lay your materials out on a flat surface. Place the large frame in the center and arrange your colorful beads, wire branches, crystals, and hanging pieces around it.
Think about where the eye naturally travels. A strong central feature can anchor the design, while smaller decorative elements can fill the surrounding space. The example uses a prominent circular frame with an organic branching pattern, creating a focal point that remains visually open.
1. Start With the Main Frame
Begin with a sturdy circular hoop or another frame shape. A round hoop works especially well because it provides a simple outline while leaving plenty of room for decorative details inside.
Inspect the frame before decorating it and make sure it has no sharp areas that could interfere with handling. If necessary, cover rough ends or reshape them carefully with pliers.
2. Create the Decorative Wire Structure
Cut manageable lengths of craft wire and begin forming loose branches or curved lines inside the hoop. The goal is not to create perfectly identical sections. Slight variations can make the design look more organic.
Twist the wire securely around the frame at several points. Keep the structure firm enough to support the beads and decorative pieces without making the design look crowded.
3. Add Colorful Beads and Decorative Shapes
Once the basic wire structure is secure, start attaching your colorful elements. Flower-like beads are particularly effective because they introduce a playful botanical feeling without requiring a complicated pattern.
Spread similar colors around the composition instead of placing every piece of one color together. This creates a more balanced appearance and helps the eye move naturally around the frame.
4. Add Faceted Crystals and Prisms
Reflective elements are the feature that gives a suncatcher its signature sparkle. Attach faceted pieces to the center, lower edge, or selected points around the frame. Different sizes can create a more layered effect.
A large teardrop-shaped prism makes an especially strong focal element when positioned near the bottom. Smaller crystals can be suspended from interior rings or branches to create additional points of reflection.
Expert Insight
The secret to a visually rich suncatcher is contrast. Pair large reflective pieces with smaller beads, leave some open space between clusters, and repeat colors across different sections instead of filling every available area.
- Use larger crystals as focal points.
- Repeat colors to connect separate areas of the design.
- Leave breathing room so the window light remains part of the composition.
Creating the Layered Circular Effect
One of the most interesting features of this style of suncatcher is the layered circular construction. Rather than relying on a single hoop, smaller rings can be placed within or around the primary frame. Each layer creates another visual boundary and gives the piece greater depth.
To recreate this idea in your own way, experiment with two or three hoops in different sizes. Suspend the smaller rings from the larger frame using wire or connecting rings. Add a few crystals between the layers so the reflective elements appear at different depths.
Keep the spacing deliberate. If the rings are too close together, the design may look crowded. If they are too far apart, the connection between the layers may become visually weak.
Add a Statement Drop
A hanging crystal at the bottom of a suncatcher provides a natural finishing point. Choose one larger faceted piece and position it below the main frame. The drop can act like a visual punctuation mark, drawing attention to the entire design.
You can also add smaller beads above the main crystal. This creates a graduated arrangement that moves from the main structure toward the statement piece.
Where to Hang a Homemade Suncatcher
Placement has a major effect on how your DIY suncatcher looks. A bright window is the obvious choice because natural light can highlight transparent and faceted materials.
Consider a kitchen window, bedroom window, living room window, enclosed porch, or another bright area where the decoration can be appreciated throughout the day. A location with a clear view of the craft can also turn it into a decorative focal point.
Before hanging the finished piece, consider how much sunlight reaches the selected location and whether the attachment point can safely support the decoration. A secure hanging method is important, particularly when using heavier glass or crystal components.
Pro Tip: Try moving the suncatcher a little higher or lower before deciding on its final position. Small changes in height can alter the way light interacts with the reflective pieces and can improve the overall visual balance.
Suncatcher DIY Variations to Try
Once you understand the basic construction, there are countless ways to create a new version. The circular wire-and-crystal concept can become a starting point rather than a fixed pattern.
- Floral suncatcher: Use flower-shaped beads and soft colors for a garden-inspired appearance.
- Rainbow suncatcher: Arrange beads gradually from warm colors to cool colors.
- Minimalist suncatcher: Use a simple metal hoop with a few clear crystals and very little wire decoration.
- Boho-inspired suncatcher: Combine natural-toned beads with textured materials and warm metallic accents.
- Layered crystal design: Use multiple hoops and hanging prisms to create a dimensional arrangement.
- Monochrome version: Choose different shades of one color for a calm, coordinated look.
Make It Your Own
The most enjoyable part of a suncatcher DIY project is personalizing the details. You can change the frame size, swap the colors, alter the shape of the wire branches, or use different reflective elements.
Do not worry about reproducing a design exactly. Use the overall concept as inspiration and create a composition that fits your own space. Handmade decor often looks more interesting when it contains small variations and personal touches.
Tips for a Polished Finished Piece
Take a little extra time with the final details. Trim excess wire neatly and check every connection before hanging the finished decoration. Loose pieces can change the balance of the design or become detached over time.
Step back from the project occasionally while you work. Looking at the suncatcher from a distance makes it easier to notice areas that need another bead, more open space, or a slight adjustment in color distribution.
- Keep wire twists secure and tidy.
- Balance bright colors across the entire frame.
- Combine small and large decorative elements.
- Avoid filling every open space.
- Check the hanging point before displaying the finished craft.
Most importantly, let the natural light remain part of the design. The beauty of a suncatcher comes from the relationship between the handmade structure and the sunlight around it.
At a Glance
- Style: Colorful, layered, handmade window decor
- Main materials: Wire, hoops, beads, crystals, and hanging components
- Best feature: Reflective details that interact beautifully with natural light
- Design tip: Repeat colors while varying shapes and sizes
- Display idea: Hang near a bright window for maximum visual impact
Conclusion: Bring Colorful Light Into Your Home
A suncatcher DIY project is a creative way to turn simple craft supplies into eye-catching home decor. The combination of circular frames, delicate wirework, colorful beads, and faceted crystals creates a piece that can look beautiful even before sunlight reaches it.
The layered design offers plenty of inspiration for experimenting with size, color, texture, and placement. You can keep your version simple with one hoop and a few crystals, or build a more elaborate arrangement with multiple rings and colorful decorative branches.
Most of all, there is no single correct way to make a homemade suncatcher. Choose materials that make you happy, build a color palette that complements your room, and allow enough open space for the light to become part of the finished artwork.
With a little patience and creativity, a handful of beads and reflective pieces can become a cheerful window decoration that adds sparkle and personality to your home. Gather your favorite supplies, choose a sunny spot, and start creating a suncatcher that feels uniquely yours.