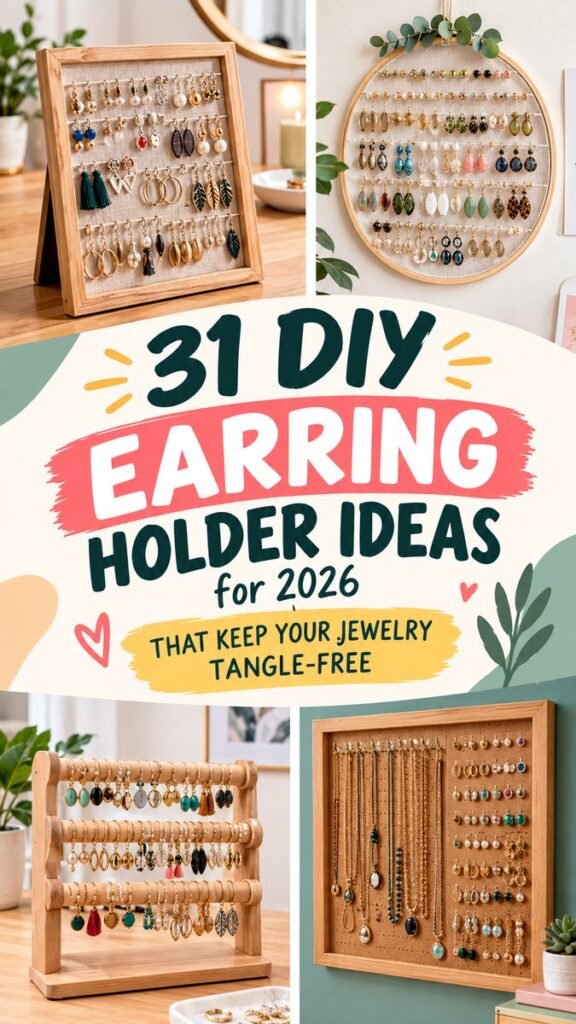
If your earrings are always getting tangled, misplaced, or hidden in a jewelry box, a DIY earring holder can make your daily routine much easier. A well-designed organizer keeps your favorite pairs visible while adding a decorative touch to your bedroom, dressing area, or craft space. The ideas featured here show how simple materials such as wooden frames, mesh, fabric, hoops, cork, and wire can become attractive jewelry displays.
What makes these DIY earring holder ideas especially appealing is their combination of function and style. Instead of hiding your collection away, you can turn it into part of your room decor. Whether you prefer a rustic wooden frame, a soft fabric organizer, a round hoop display, or a practical pegboard, there are plenty of ways to create storage that fits your space.
Key Takeaways
- DIY earring holders keep jewelry visible, organized, and easy to access.
- Frames, hoops, mesh, cork, and wooden pieces can all become useful organizers.
- Wall-mounted displays are excellent when you want to save counter or drawer space.
- Choose an organizer style that matches the size and type of your earring collection.
- Adding decorative materials can turn practical jewelry storage into attractive room decor.
Why Choose a DIY Earring Holder?
A DIY earring holder gives you more control than a standard jewelry box. You can decide how many rows you need, how much space should sit between earrings, and whether the organizer should stand on a dresser or hang on a wall. This flexibility is particularly useful when your collection includes studs, hoops, dangling earrings, and statement pieces.
Another advantage is visibility. When earrings are stored together in a small box, it is easy to forget what you own. An open display lets you see different colors, shapes, and finishes at a glance. That can make choosing accessories faster and encourage you to wear pieces that might otherwise stay tucked away.
Important: The best earring organizer is not necessarily the most complicated one. A simple display with clearly separated rows can be more useful than an elaborate storage system that makes your jewelry difficult to reach.
31 DIY Earring Holder Ideas to Try
1. Framed Mesh Earring Organizer
A framed mesh organizer is one of the easiest ways to create an attractive earring display. Start with a decorative or simple wooden frame and attach a suitable piece of mesh to the back. The openings allow many types of earrings to hang neatly while the frame gives the organizer a finished appearance.
This style works particularly well on a dresser because it can look like a piece of decorative art. Choose a natural wood frame for a warm, relaxed appearance or paint the frame to coordinate with your room.
2. Embroidery Hoop Earring Holder
An embroidery hoop creates a naturally round jewelry organizer with a charming handmade look. Stretch lace, fabric mesh, or another open material inside the hoop, secure it firmly, and use the surface to display earrings.
The circular shape is ideal for a wall-mounted display and can become a decorative focal point. Several hoops in different sizes can also be arranged together for a creative gallery-style jewelry wall.
3. Corkboard Jewelry Organizer
A corkboard offers a practical foundation for both earrings and other small jewelry pieces. Add a wooden frame around the corkboard for a more polished appearance, then arrange your accessories in rows or sections.
The benefit of cork is its simple, natural appearance. It also makes it easy to rearrange your jewelry display as your collection changes.
4. Wooden T-Bar Earring Stand
A freestanding wooden organizer can be especially convenient if you do not want to drill holes into a wall. A tiered T-bar design provides several horizontal levels for hanging earrings while keeping the collection accessible from both sides.
This option looks attractive on a vanity, dresser, or shelf. Natural wood also pairs beautifully with colorful jewelry, making the accessories stand out.
5. Framed Wire Display
Wire offers another flexible solution for DIY jewelry storage. Stretch several horizontal pieces of wire across a frame, leaving enough room between rows for different earring styles.
A wire display has a lightweight appearance and works particularly well for dangling earrings. You can also choose a frame with an interesting shape to make the organizer feel more decorative.
6. Lace Earring Display
Lace adds a soft, feminine detail to a handmade earring holder. Place a section of lace inside a frame or hoop and use its open pattern as a hanging surface. This approach is especially appealing if you want jewelry storage that feels decorative rather than purely practical.
7. Chicken Wire Frame Organizer
Chicken wire can create a rustic-inspired earring display when placed inside a simple wooden frame. Its open structure makes it easy to hang many pairs without taking up much visual space.
This idea pairs naturally with farmhouse, cottage, rustic, or casual bedroom decor. Add a stained wood frame for extra warmth and character.
8. Pegboard Earring Holder
A small pegboard can become a highly customizable jewelry organizer. Arrange hooks or small accessories across the board to create separate areas for earrings, necklaces, and other pieces.
The modular nature of pegboard storage means you can change the layout whenever your jewelry collection grows.
9. Minimalist Wood Frame Display
If you prefer simple decor, use a plain wooden frame with a neutral fabric or mesh interior. Keep the arrangement symmetrical and allow the jewelry to provide most of the visual interest.
10. Fabric-Backed Jewelry Holder
Fabric can soften the appearance of an earring organizer while providing a subtle background that makes jewelry easier to see. Linen, cotton, or another sturdy textile can work beautifully with a wooden frame.
11. Tiered Hanging Rack
A tiered rack gives you multiple horizontal levels for organizing earrings by color, size, or style. It is a useful choice when you own enough jewelry to need separate sections.
12. Decorative Picture Frame Organizer
Instead of buying a specialized jewelry display, repurpose an old picture frame. Remove the original backing and replace it with mesh, wire, or fabric. This gives an otherwise unused frame a practical second life.
13. Wall-Mounted Earring Board
A wall-mounted board is ideal for small bedrooms or compact dressing areas. Mounting jewelry vertically uses wall space instead of valuable drawer and countertop space.
Why This Matters
Good jewelry organization is about more than appearance. Separating earrings into visible rows reduces the need to search through piles of accessories and makes it easier to build a display around the pieces you actually wear.
- Group similar earrings together.
- Leave enough room between larger designs.
- Keep everyday favorites at eye level.
How to Make a DIY Earring Holder
Once you choose your preferred style, the construction can be surprisingly straightforward. The exact supplies will depend on the design, but many projects begin with a frame, hoop, board, or wooden structure.
Step 1: Choose the Right Base
Consider how many earrings you want to display before choosing your base. A small hoop may be perfect for a compact collection, while a larger framed organizer is better suited to an extensive assortment.
Step 2: Select the Hanging Material
Mesh, lace, wire, fabric, cork, and pegboard are all useful options. Think about the types of earrings you own. Open mesh and wire are particularly convenient for earrings that need to hang freely, while a board can offer more flexibility for different accessories.
Step 3: Create an Organized Layout
Before permanently attaching anything, plan your rows and spacing. Place your earrings approximately where you want them to hang and make sure larger pieces have enough clearance.
Pro Tip: Leave slightly more space than you think you need. An organizer that looks spacious when empty will remain easier to use as your jewelry collection grows.
Step 4: Secure the Materials
Attach the chosen material securely to the frame or base. The organizer should remain stable when earrings are added or removed. If you are creating a freestanding design, make sure the base is balanced and sturdy enough for the intended jewelry load.
Step 5: Add Decorative Details
Personalize your DIY earring holder with finishes that complement your space. Natural wood, painted frames, subtle fabric textures, or simple decorative accents can transform basic storage into a stylish room feature.
How to Organize Earrings on Your Holder
Once your DIY earring organizer is complete, the way you arrange the jewelry can make a big difference. One simple approach is to organize earrings by type. Keep studs in one section, hoops in another, and longer statement pieces toward the bottom.
You can also arrange your collection by color. A row of gold pieces, followed by silver, colorful designs, pearls, or darker finishes, can create a visually pleasing display. If you frequently wear certain pairs, keep them in the easiest-to-reach area.
- By style: Separate studs, hoops, drops, and statement earrings.
- By color: Arrange jewelry into coordinated color groups.
- By frequency: Place everyday favorites in the most accessible rows.
- By occasion: Keep special-event pieces together so they are easy to find.
Choosing the Best Earring Holder for Your Space
The best DIY earring holder should match both your jewelry collection and your room. If your dresser has plenty of open space, a freestanding wooden rack can be practical. For a smaller surface, a wall-mounted frame may be a better choice.
Consider the visual style of the room as well. Wood creates a warm and natural feeling, while white or neutral materials can produce a clean minimalist look. A colorful fabric backing can make the organizer feel playful and creative.
Think about accessibility, too. A beautiful organizer is most useful when you can easily reach every pair. Avoid overcrowding the rows, especially if you have larger earrings that need additional space.
Creative Ways to Display Your Jewelry
Your earring holder does not have to look like traditional storage. Treat it as part of your room decor. A large framed organizer can act as wall art, while a round hoop display can add a softer shape to a collection of rectangular furniture.
You can also create a coordinated jewelry corner by placing your organizer near a mirror, small tray, or decorative container. The result is a practical area where you can quickly choose accessories while getting ready.
Use Vertical Space
When countertop space is limited, look upward. A wall-mounted earring display can keep jewelry organized without taking over your dresser. It can also make a small dressing area feel more intentional.
Keep the Display Visually Balanced
Try not to place every piece in one crowded area. Leave breathing room between rows and use larger earrings as visual accents. A balanced arrangement makes both the organizer and the jewelry look more polished.
Refresh the Arrangement
Your organizer does not have to stay the same forever. Rotate seasonal pieces, move frequently worn earrings closer to the front, and rearrange colors whenever you want a fresh look.
At a Glance
- Choose a base that fits your jewelry collection.
- Use mesh, wire, lace, fabric, cork, or pegboard for flexible storage.
- Organize earrings by style, color, frequency, or occasion.
- Use wall space when dresser or vanity space is limited.
- Make the organizer decorative enough to complement your room.
Final Thoughts on DIY Earring Holders
A DIY earring holder is a small project that can make a noticeable difference in how your jewelry space looks and functions. The ideas shown through framed displays, hoops, wooden racks, cork surfaces, mesh, and wire prove that useful storage does not have to be boring.
The most successful design is one that makes your collection easy to see, simple to access, and enjoyable to maintain. Start with the materials you already have, choose a layout that fits your space, and personalize the finish to match your decor.
Important: A thoughtfully arranged jewelry display can turn everyday organization into part of your decor. When every pair has a visible place, getting ready becomes quicker, your favorite pieces are easier to rediscover, and your space feels more organized.
Whether you make a simple framed mesh holder or a larger multi-level display, these DIY earring holder ideas offer plenty of inspiration for creating storage that is both attractive and practical. Choose your favorite style, gather a few basic materials, and create a jewelry organizer that works beautifully for your collection.
Tags
DIY Earring Holder Earring Organizer DIY Jewelry Storage Jewelry Organization Earring Display DIY Storage Ideas Jewelry Display Ideas Bedroom Organization