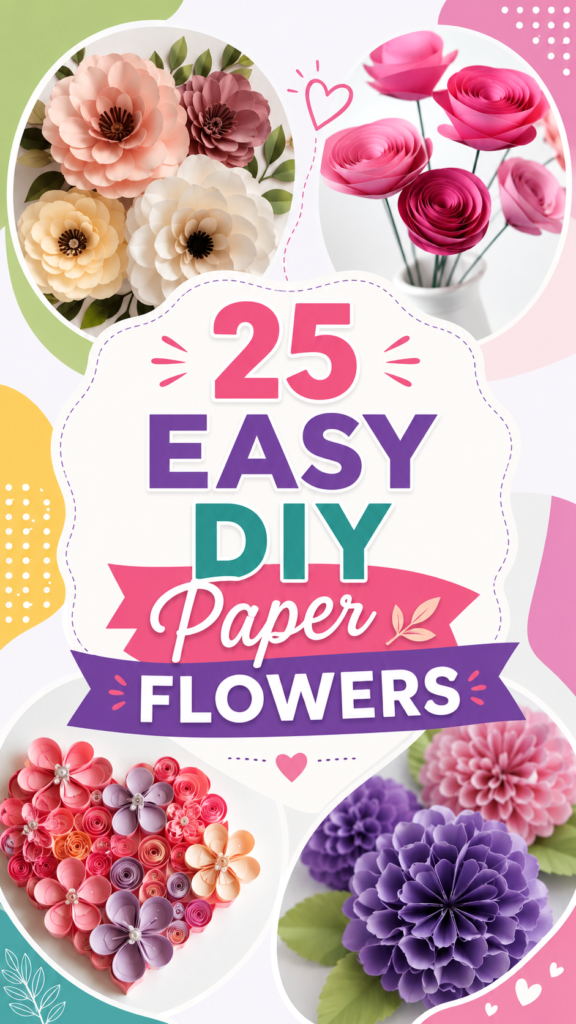
Paper flowers are one of those crafts that look far more complicated than they really are. With a few sheets of colorful paper, scissors, glue, and a little patience, you can create beautiful blooms that brighten a room, decorate a celebration, or become part of a thoughtful handmade gift. From rolled paper roses and layered blossoms to delicate quilled flowers and dramatic statement blooms, the possibilities are almost endless.
The ideas featured here showcase just how versatile DIY paper flowers can be. Some designs resemble classic roses, while others use repeated petals, spirals, curls, and layered shapes to create entirely different floral styles. The variety of colors, including pink, purple, cream, yellow, green, and white, also demonstrates how easily paper flowers can be customized for different seasons, occasions, and decorating styles.
Key Takeaways
- DIY paper flowers are simple to customize with different colors, shapes, and sizes.
- Rolled, layered, folded, and quilled techniques can create very different floral effects.
- Paper blooms work beautifully for bouquets, wall decor, gifts, parties, and seasonal displays.
- Mixing several flower styles can make handmade arrangements look fuller and more interesting.
- Beginners can start with simple rolled flowers before trying more detailed designs.
Why DIY Paper Flowers Are So Popular
There is something especially appealing about a flower that never wilts. Fresh flowers are beautiful, but paper flowers offer a creative alternative that can be enjoyed for weeks, months, or even years. They can be made in almost any color, shaped to suit a particular project, and arranged exactly the way you want.
Another reason paper flower crafts are so popular is their flexibility. You do not need to follow one exact pattern. A basic petal shape can be enlarged, reduced, rounded, pointed, curled, or layered to create a completely new look. This makes the craft suitable for both beginners who want an easy project and experienced crafters who enjoy experimenting.
Important: The beauty of paper flowers comes from customization. Instead of worrying about making every petal identical, focus on creating a balanced overall shape. Small variations can make handmade flowers feel more natural and dimensional.
Different Types of DIY Paper Flowers to Try
The designs shown in this collection suggest several exciting approaches to paper flower making. You can choose a technique based on the final look you want, the amount of time you have, and your comfort level with paper crafting.
Rolled Paper Roses
Rolled paper roses are among the most recognizable DIY paper flowers. They are created by curling a long strip of paper into a spiral and gradually shaping it into a flower. The technique can produce compact buds or larger open blooms depending on how tightly or loosely the strip is rolled.
Pink and red shades are classic choices for rolled roses, but there is no reason to stop there. Cream, lavender, yellow, coral, peach, and even mixed-color paper can produce beautiful results. Several different shades arranged together can create a cheerful handmade bouquet.
Layered Paper Flowers
Layered flowers use multiple petal shapes stacked on top of one another. Each layer can be slightly smaller than the previous one, creating depth as the petals move toward the center. This method works particularly well for large decorative blooms.
To make a layered flower look more realistic, gently curve the petals before gluing them together. Even a small amount of shaping can transform a flat paper cutout into a flower with noticeable dimension.
Quilled Paper Flowers
Quilling is another beautiful technique represented by the intricate curled shapes often associated with handmade paper flowers. Thin strips of paper are rolled, shaped, and arranged into petals, leaves, spirals, and decorative centers.
Quilled flowers can be especially effective when used for greeting cards, framed artwork, decorative panels, and small handmade gifts. The technique allows you to create detailed designs without needing a large amount of material.
Ruffled and Sculpted Blooms
Some paper flowers are designed with many closely packed petals to create a soft, ruffled appearance. These blooms can look wonderfully full and work well as focal points in bouquets or wall displays.
The key is layering. Start with larger outer petals and gradually work toward smaller pieces near the center. Varying the angle of each layer helps prevent the finished flower from looking too flat.
Basic Supplies for Making Paper Flowers
You do not need an extensive craft room to get started. Many paper flower projects can be made with a small collection of everyday craft supplies. Keeping your materials simple also makes it easier to experiment without feeling overwhelmed.
- Colored craft paper or cardstock
- Sharp scissors
- Craft glue or a glue gun
- Pencil for marking shapes
- Ruler for measuring strips
- Floral wire or thin craft stems for bouquets
- Green paper for leaves and foliage
- Optional decorative centers such as beads, buttons, or small paper circles
Paper choice can have a surprisingly large effect on the finished flower. Lightweight paper is easier to curl and fold, while cardstock provides more structure for large petals. If you are just learning, try a few different papers and see which one gives you the amount of flexibility and stability you prefer.
How to Make Simple DIY Paper Flowers
One of the easiest ways to begin is with a basic rolled flower. This project introduces the essential skills of cutting, shaping, rolling, and securing paper without requiring complicated patterns.
Step 1: Choose Your Paper
Select a color that matches your project. For a soft floral arrangement, cream, blush, peach, lavender, and pale yellow work beautifully. For something more vibrant, try hot pink, coral, purple, or contrasting combinations.
Step 2: Cut a Long Strip
Cut a long strip of paper with a width appropriate for the size of flower you want. A wider strip generally creates a larger flower, while a narrower strip is useful for smaller blooms.
Step 3: Shape the Edge
If desired, cut or shape one edge of the strip to create a petal effect. A scalloped or gently curved edge can give the finished flower more character than a completely straight strip.
Step 4: Roll the Paper
Begin rolling the strip from one end. Keep the center relatively tight, then gradually allow the outer layers to loosen slightly. This creates the spiral structure associated with many paper roses.
Step 5: Secure the Flower
Once the flower reaches the desired size, secure the end with a small amount of glue. Hold it briefly while the adhesive sets. Avoid using too much glue because excess adhesive can make the petals look stiff.
Step 6: Adjust the Petals
Gently spread or curl the outer layers until the flower has the shape you want. This final adjustment is where a simple paper spiral becomes a recognizable handmade bloom.
Expert Insight
A beautiful paper flower does not have to be perfectly symmetrical. Slightly varying petal angles, flower sizes, and centers creates a more natural arrangement. When making a bouquet, combine different shapes instead of repeating one design throughout.
Creative Ways to Use Paper Flowers
Once you have a collection of flowers, the fun really begins. Handmade blooms can become more than individual craft projects. They can be combined into larger decorations or used as small accents throughout your home and special events.
Create a Paper Flower Bouquet
Use floral wire or simple craft stems to turn individual blooms into a bouquet. Combine large focal flowers with smaller rolled flowers and paper leaves. A mixture of colors can create a playful arrangement, while different shades of one color can produce a more coordinated appearance.
Decorate a Wall
Large paper flowers are excellent for wall decor. Arrange several blooms in different sizes to create a garden-inspired display. This idea works especially well behind a party table, in a creative workspace, or as a decorative accent in a bedroom.
Make Handmade Cards
Small quilled flowers and miniature rolled blooms can turn a simple card into something personal. Choose a limited color palette and add a few paper leaves or curled details around the flowers for a polished finish.
Decorate Gifts and Celebrations
Paper flowers can be used as gift toppers, table decorations, party backdrops, or centerpiece accents. Because the colors can be matched to almost any theme, they are particularly useful when you want handmade decorations that feel coordinated.
How to Make Your Paper Flowers Look More Realistic
Realistic paper flowers are not only about copying the exact appearance of a natural flower. They are about creating layers, movement, and visual depth. A few simple details can make a major difference.
- Vary the petal sizes. Use larger petals around the outside and smaller petals closer to the center.
- Curve the paper. A gentle bend gives petals a more three-dimensional appearance.
- Build a detailed center. Rolled strips, small circles, beads, or layered paper can add visual interest.
- Add leaves. Green foliage helps frame the flowers and makes an arrangement feel more complete.
- Mix textures. Combine smooth paper with curled or folded elements to create contrast.
Pro Tip: Before gluing an entire flower together, arrange the petals loosely and look at the shape from different angles. It is much easier to adjust the design before the adhesive has set.
Choosing a Color Palette for Paper Flowers
Color is one of the easiest ways to change the personality of a paper flower arrangement. Soft cream and peach create an elegant look, while pink and coral feel bright and playful. Purple flowers can add a rich, decorative touch, and yellow blooms can make an arrangement feel cheerful and sunny.
You can also use a monochromatic palette. Choose one main color and create flowers in several shades of it. For example, combine pale pink, medium pink, and deep pink blooms. This creates visual variety while keeping the overall arrangement cohesive.
For a more energetic craft project, combine complementary or contrasting shades. Just remember that the flowers should work together rather than compete for attention. Keeping the leaves and background elements relatively simple can help colorful flowers remain the focus.
Beginner Tips for Better Paper Flower Crafts
If you are new to paper flowers, start small. Choose one simple flower style and make several versions of it. After you become comfortable with the basic technique, introduce additional shapes and techniques.
- Practice with inexpensive paper before using specialty cardstock.
- Keep your scissors sharp for cleaner petal edges.
- Use small amounts of glue to avoid visible adhesive marks.
- Make flowers in batches to save time when creating a larger arrangement.
- Keep finished flowers under light pressure while they set if their shape needs stabilizing.
- Experiment with scraps before committing to a full-size flower.
Most importantly, do not worry if your first few flowers look different from the examples you have in mind. Handmade crafts naturally have variation. With each flower, you will learn how much to curl the paper, how tightly to roll it, and how to position the petals for the look you prefer.
Easy Paper Flower Projects to Try Next
Once you have mastered a basic rolled flower, challenge yourself with a few variations. Make a cluster of tiny flowers for a card, create one oversized bloom for wall decor, or combine several techniques into one colorful bouquet.
You can also create themed arrangements for different seasons. Soft pastel flowers are ideal for spring-inspired decor, while rich pinks, purples, and warm tones can create a more dramatic display. Neutral flowers in white, cream, and beige can work particularly well for minimalist interiors.
Another fun idea is to create a paper flower color study. Choose three or four related colors and make several flower shapes using only that palette. The finished collection can then be arranged as a bouquet, wall display, or decorative centerpiece.
At a Glance
- Start with simple rolled or layered flowers.
- Use different paper weights to experiment with texture and structure.
- Mix flower sizes for fuller arrangements.
- Add paper leaves to frame colorful blooms.
- Personalize every project with your favorite colors and shapes.
Conclusion: Make Your Own Paper Flower Garden
DIY paper flowers are a creative way to turn simple sheets of paper into colorful handmade decorations. The range of styles is what makes this craft so enjoyable. You can create tightly rolled roses, layered blooms, delicate quilled flowers, fluffy ruffled designs, or your own combination of techniques.
The examples in this collection show that there is no single right way to make a paper flower. Experiment with petal shapes, colors, sizes, centers, and arrangements until you discover a style that feels like your own. Even a beginner can create something beautiful with a little practice.
Whether you are planning a handmade bouquet, decorating a room, preparing a celebration, or simply looking for a relaxing craft project, paper flowers offer plenty of creative possibilities. Gather your favorite colors, start with a simple bloom, and let each new flower become an opportunity to try something different.
Ready to start crafting? Save your favorite paper flower ideas, gather your supplies, and create a colorful collection of blooms that will never wilt.