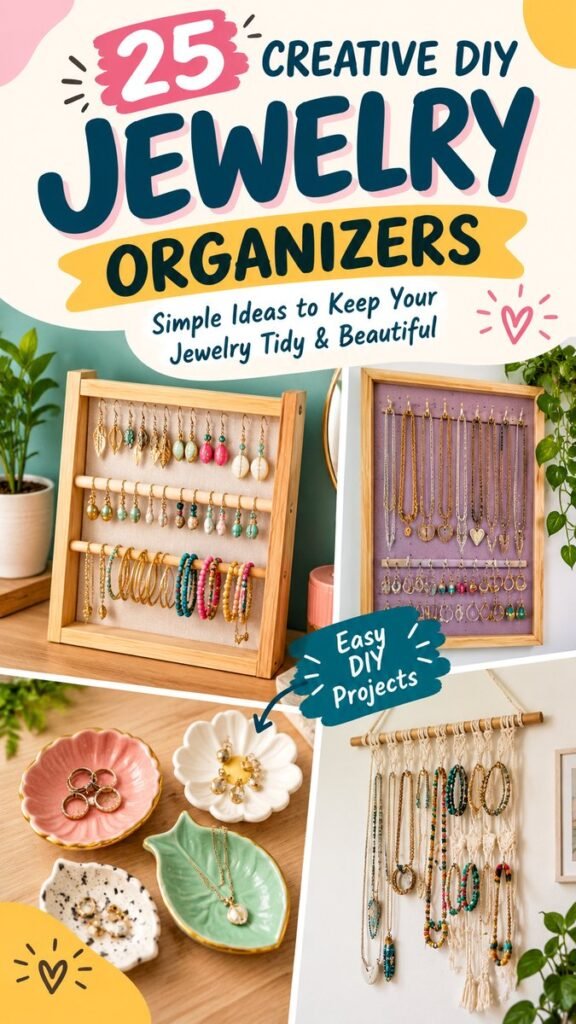
If your jewelry collection has grown into a tangled pile of necklaces, missing earrings, and rings scattered across drawers, a DIY jewelry organizer can make a surprisingly big difference. The right organizer does more than keep accessories tidy. It can turn everyday jewelry into part of your bedroom decor while making your favorite pieces easier to see, reach, and enjoy.
The ideas featured here show how simple materials and creative layouts can become attractive jewelry storage. Think framed displays, wooden racks, hanging organizers, decorative trays, and wall-mounted solutions. Whether you prefer a rustic handmade look, colorful accents, or clean modern storage, there are plenty of ways to create an organizer that works with your space.
Key Takeaways
- DIY jewelry organizers can make small spaces feel more organized and functional.
- Wall displays are useful for keeping necklaces and earrings visible and easy to access.
- Frames, wooden boards, hooks, rods, and small dishes can become practical jewelry storage.
- Separate different jewelry types to reduce tangling and make accessories easier to find.
- Choose an organizer style that complements your bedroom or dressing area.
Why DIY Jewelry Organizers Are Worth Making
A jewelry organizer does not need to be complicated to be useful. In fact, some of the most appealing ideas rely on basic shapes and straightforward storage methods. A framed board with hooks can display earrings beautifully, while a wooden rack can provide dedicated spaces for necklaces, bracelets, and other accessories.
DIY storage also gives you the flexibility to work with the amount of jewelry you actually own. Instead of buying a large organizer with sections you may never use, you can create a display around your collection. A compact tray may be enough for rings and small earrings, while a larger wall organizer can handle longer necklaces and multiple bracelets.
Important: The most effective jewelry organizer is one that keeps frequently worn pieces visible while giving each type of accessory a logical place. Good organization should make getting ready easier, not create another storage problem.
Creative DIY Jewelry Organizer Ideas
The visual collection combines several different approaches to jewelry storage. Some are designed for walls, others sit on furniture, and a few double as decorative features. These styles can be adapted to suit different rooms, collections, and personal tastes.
1. Framed Jewelry Display
One of the easiest ways to make jewelry storage look decorative is to place it inside a frame. A frame can give an organizer a finished appearance while helping it blend naturally with bedroom decor.
Use a decorative frame with a backing material that allows hooks or small holders to be attached. Open sections can provide convenient places for earrings, while hooks along the bottom or sides can hold necklaces and bracelets.
This approach is especially useful if you want your jewelry to become part of the room rather than being hidden inside a drawer. It can also turn an unused picture frame into something practical.
2. Wooden Jewelry Rack
A wooden rack offers a simple, versatile storage solution. Several horizontal rods or narrow boards can create different levels for hanging accessories. Small hooks can be added wherever additional storage is needed.
The natural appearance of wood works particularly well with casual, rustic, Scandinavian, or handmade interiors. You can leave the wood natural or customize it with paint, stain, or other decorative details.
Create Separate Storage Zones
Give each level a purpose. One row can hold necklaces, another can display bracelets, and a smaller section can be reserved for earrings. Creating zones makes the organizer easier to use and helps prevent different pieces from becoming mixed together.
3. Wall-Mounted Jewelry Organizer
Wall-mounted jewelry storage is particularly helpful when countertop and drawer space are limited. A vertical organizer uses otherwise unused wall space while keeping accessories within easy reach.
A simple board with hooks can become a functional jewelry station. Add hooks at different heights so longer necklaces have enough room to hang without overlapping shorter pieces.
For a more decorative effect, consider arranging the hooks in a balanced pattern. The organizer can then look intentional even when only a few pieces of jewelry are hanging from it.
4. Jewelry Organizer With Small Dishes
Not every piece of jewelry needs to hang. Small decorative dishes are excellent for rings, earrings, charms, and other compact accessories. They also make attractive additions to a dresser or bedside table.
Choose shallow dishes so small pieces remain easy to see. Grouping several dishes together can create a coordinated display while giving every accessory category its own space.
Leaf-shaped, flower-shaped, round, or handmade-looking dishes can add personality without requiring a complicated DIY project.
Why This Matters
Good jewelry storage combines visibility with separation. When necklaces, earrings, bracelets, and rings each have a dedicated location, it becomes easier to choose accessories quickly and return them to the correct place afterward.
How to Choose the Right DIY Jewelry Storage
Before starting a project, take a quick look at the jewelry you need to organize. The shape and quantity of your collection should guide the design.
Consider What You Wear Most
If you wear necklaces every day, prioritize hanging space. If earrings make up most of your collection, a perforated surface or framed display may be more useful. For rings and small earrings, trays and dishes can provide quick access.
There is no need to give every category the same amount of space. Your organizer should reflect your actual habits.
Measure the Available Space
Think about where the organizer will live before choosing its size. A large wall display can make a statement, but a smaller organizer may work better above a compact dresser or inside a closet.
Leave enough surrounding space for comfortable access. You should be able to remove a necklace or pair of earrings without bumping into nearby objects.
Match the Organizer to Your Decor
DIY jewelry storage can be both practical and decorative. Natural wood creates a warm handmade feeling, while painted frames can introduce color. Neutral materials can blend quietly into a room, whereas colorful trays and accessories can become part of the decor.
Try to repeat one or two colors already present in the room. This simple trick can make a handmade organizer feel more intentional and coordinated.
Simple Materials for a Jewelry Organizer
You do not need a long list of specialized supplies to create useful jewelry storage. Many designs can be built around common craft and home-improvement materials.
- Wooden boards or narrow strips of wood
- Decorative picture frames
- Small hooks
- Wooden dowels or rods
- Small trays or decorative dishes
- Backing fabric or mesh
- Paint or stain
- Basic decorative hardware
The exact materials will depend on the design you choose. The important thing is to create secure hanging points and enough separation between jewelry pieces.
Pro Tip: Plan the arrangement before attaching hooks or rods permanently. Lay your jewelry out first and estimate how much space each category needs. This can prevent overcrowding and make the finished organizer much easier to use.
Tips for Organizing Necklaces Without the Mess
Necklaces can be among the most challenging accessories to store because chains can easily overlap and become tangled. Hanging them individually is often a simple way to improve visibility.
- Give each necklace its own hook whenever possible.
- Leave enough vertical space between rows.
- Place longer necklaces where they will not interfere with shorter ones.
- Keep frequently worn pieces toward the front or at eye level.
- Return each necklace to its assigned hook after wearing it.
A vertical wall organizer or wooden rack can work particularly well because each necklace has room to hang naturally. If your collection is large, organize pieces by length, color, or frequency of use.
Organizing Earrings, Rings, and Bracelets
Different jewelry types benefit from different storage methods. Earrings can be displayed on mesh, hooks, or small compartments. Rings are usually easier to manage in shallow dishes or divided trays. Bracelets can hang from rods or dedicated hooks.
Earrings
Keep matching earrings together and arrange them so pairs are easy to identify. A display that lets you see several pairs at once can make choosing accessories much faster.
Rings
Small decorative dishes are ideal for rings because they keep tiny pieces contained while allowing you to see the entire collection. If you own many rings, use separate sections for everyday pieces and occasional favorites.
Bracelets
Bracelets can be stored on horizontal rods, hooks, or small stands. Leave enough room for thicker or beaded designs so the display does not become crowded.
Make Your DIY Organizer Look Decorative
One of the best things about a DIY jewelry organizer is that it can contribute to the visual character of a room. Storage does not have to look purely functional.
Try adding a decorative frame, a complementary background, simple painted details, or attractive hardware. Even small changes can make a basic organizer feel more personal.
You can also arrange jewelry by color. Grouping colorful beads, metallic pieces, or coordinated accessories can make the organizer resemble a small piece of wall art.
Keep the Display Balanced
Avoid filling every available space simply because you can. A little empty space helps individual pieces stand out and keeps the display visually calm.
A Practical Jewelry Organization Routine
Once your DIY jewelry organizer is finished, maintaining it should be simple. Spend a few minutes occasionally returning pieces to their designated places. This small habit prevents clutter from building up again.
It can also help to review your collection from time to time. Move frequently worn pieces into the easiest-to-reach areas and relocate accessories you rarely use. Your organizer can evolve as your collection changes.
If a particular section repeatedly becomes messy, that is useful information. You may need more space, a different type of holder, or a simpler arrangement.
At a Glance
- Use frames for attractive wall displays.
- Choose wooden racks for flexible hanging storage.
- Use small dishes for rings and tiny accessories.
- Create separate zones for necklaces, earrings, and bracelets.
- Match materials and colors to your existing room decor.
Final Thoughts on DIY Jewelry Organizers
A thoughtful DIY jewelry organizer can turn everyday storage into a useful decorative feature. From framed displays and wooden racks to simple hooks and colorful dishes, there are many ways to keep accessories visible without sacrificing style.
The best design is not necessarily the most complicated one. Start with the jewelry you own, consider the space available, and choose a storage method that makes your daily routine easier. A few well-placed hooks or a simple handmade display can be enough to transform a cluttered collection into an organized and attractive arrangement.
Whether you are refreshing a bedroom, organizing a dressing area, or simply looking for a creative weekend project, these DIY jewelry organizer ideas offer plenty of inspiration. Choose one approach, personalize the materials and colors, and create a storage solution that feels like it belongs in your home.
Tags
DIY Jewelry Organizer Jewelry Storage Jewelry Organization DIY Storage Ideas Bedroom Organization DIY Home Decor Craft Ideas