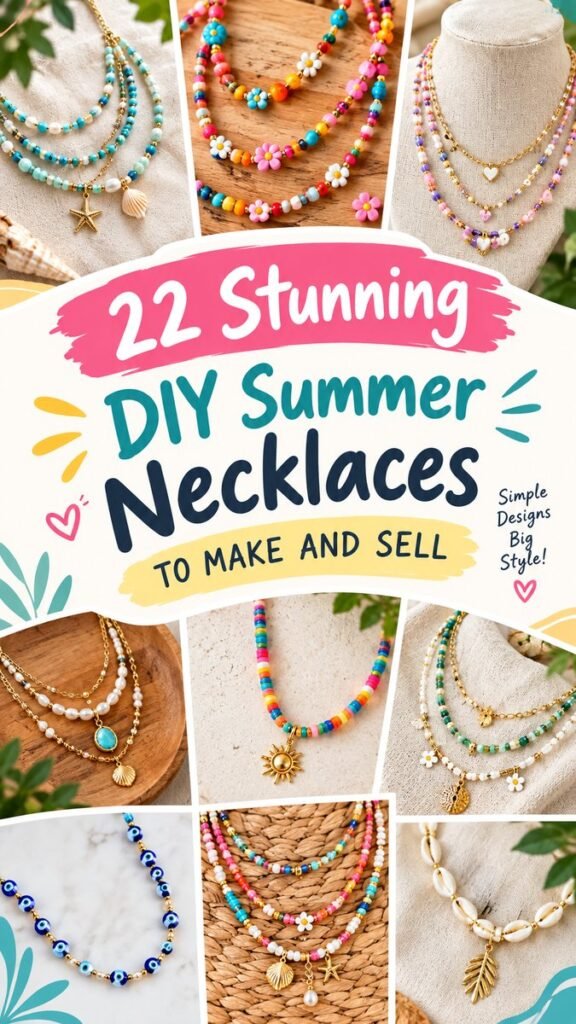
Summer is the perfect season for colorful accessories, and a handmade necklace can instantly turn a simple outfit into something special. These necklace DIY ideas bring together bright beads, pearls, shells, charms, flowers, layered chains, and playful color combinations to create jewelry that feels personal and fun. Whether you enjoy making accessories for yourself, preparing handmade gifts, or exploring creative pieces to sell, there are plenty of ways to turn a few basic jewelry supplies into eye-catching designs.
Handmade necklaces do not need complicated techniques to look impressive. The most appealing designs often come from thoughtful combinations of color, texture, charms, and bead size. Start with a simple structure, then add a few distinctive details that give the finished necklace its own personality.
Key Takeaways
- Use colorful beads to create cheerful summer necklace designs.
- Combine pearls, shells, charms, and chains for added texture.
- Layered necklaces can create a stylish look from simple components.
- Choose a consistent color palette before assembling your pieces.
- Simple handmade necklaces can work well as gifts or small craft projects.
- Thoughtful finishing details can make DIY jewelry look polished and professional.
What Makes a Great Necklace DIY Project?
A successful necklace DIY project balances creativity with wearability. The necklace should look interesting while still feeling comfortable and easy to style. The designs shown here demonstrate several approaches, from delicate layered necklaces to bold beaded strands and charm-filled pieces.
Color is one of the easiest ways to make a handmade necklace stand out. Turquoise, coral, pink, yellow, white, blue, green, and orange can instantly create a warm summer mood. Neutral beads can also be added to prevent brighter colors from becoming overwhelming.
Another important element is variety. Mixing round beads with small spacers, pearls, shells, flowers, hearts, stars, or other decorative charms creates visual movement. Even a simple string of beads can look much more intentional when different shapes and finishes are carefully arranged.
Colorful Beaded Necklace DIY Ideas
Beaded necklaces are among the easiest jewelry projects to customize. They allow you to experiment with different colors, patterns, lengths, and bead shapes without needing an elaborate design plan.
For a cheerful summer necklace, try combining several bright shades with a few neutral beads. For example, turquoise and white create a fresh coastal feeling, while pink, orange, and yellow create a playful warm-weather palette. Blue beads paired with white pearls can produce a softer beach-inspired appearance.
Choosing Your Beads
When selecting beads, consider more than color. Look at size, shape, surface texture, and finish. Tiny seed-style beads can provide delicate detail, while larger decorative beads become natural focal points.
- Small beads: Great for delicate necklaces and detailed patterns.
- Large beads: Useful for bold statement pieces.
- Pearls: Add softness and a classic touch.
- Shell-style pieces: Create an effortless summer or coastal feel.
- Flower beads: Bring a playful and feminine accent.
- Metal charms: Add shine and visual contrast.
Creating a Simple Pattern
A repeating pattern can make a necklace look professionally planned. You might alternate three small beads with one larger bead, repeat a color sequence, or place a charm at the center of the necklace.
If you prefer a more relaxed style, avoid strict repetition. Arrange beads in an intentionally irregular pattern instead. This works particularly well with colorful summer jewelry because the slight variation gives the necklace a handmade character.
Layered Necklace DIY for a Stylish Look
Layering is another strong idea for handmade jewelry. Instead of making one complicated necklace, create two or three simpler necklaces that work together. This makes it easier to change the overall look and gives you more flexibility when styling an outfit.
Start with a shorter necklace featuring a delicate chain or small beads. Add a medium-length strand with pearls, colorful beads, or charms. A longer necklace can then provide the final layer and include a more noticeable pendant or focal bead.
Pro Tip: When layering necklaces, vary both the length and visual weight. If every strand is the same length and thickness, the pieces can blend together. Different proportions help each necklace remain visible.
Summer Necklace DIY Materials to Keep on Hand
You do not need an enormous craft collection to begin making handmade necklaces. A small selection of versatile supplies can support many different designs.
- Beading cord or jewelry wire
- Colorful glass, acrylic, ceramic, or natural-style beads
- Pearls or pearl-style beads
- Small spacer beads
- Decorative charms
- Shell-inspired components
- Jewelry chains
- Jump rings
- Clasps
- Crimp beads or appropriate finishing components
- Jewelry pliers
- Scissors or jewelry cutters
Keep your supplies organized by color and type. Small containers or divided storage boxes make it easier to compare combinations before you start assembling a necklace.
How to Plan a Necklace DIY Design
Before cutting your cord or assembling your chain, spend a few minutes planning the design. This simple step can prevent unnecessary adjustments later.
1. Choose the Overall Style
Decide whether you want the finished necklace to feel delicate, colorful, boho, coastal, playful, elegant, or bold. Having a clear direction makes it easier to choose materials that belong together.
2. Pick a Color Palette
Select two or three main colors and then add one or two supporting shades. A limited palette usually looks more coordinated than using every color available.
3. Create a Focal Point
Choose one central feature that attracts attention. This could be a flower bead, shell, pearl, heart, star, pendant, or larger decorative bead. Place smaller elements around it so the design feels balanced.
4. Test the Arrangement
Lay the beads on a flat surface before stringing them. Move pieces around until the colors and sizes feel balanced. Taking a quick photo of the arrangement can also help you remember the design.
5. Assemble and Finish Carefully
Once you are happy with the layout, assemble the necklace according to the materials you have chosen. Pay particular attention to the clasp and connection points. A neat finish makes a handmade necklace more comfortable to wear and gives it a polished appearance.
Why This Matters
- A simple color plan keeps the necklace visually balanced.
- A central focal detail gives the eye somewhere to rest.
- Careful finishing helps a DIY piece feel more refined and wearable.
DIY Necklace Ideas With Charms
Charms are an easy way to give a handmade necklace a recognizable theme. A simple beaded strand can become much more distinctive when finished with a few carefully selected decorative pieces.
For a summer-inspired design, consider floral shapes, shells, stars, hearts, colorful drops, or sun-inspired details. The key is moderation. A necklace does not need dozens of charms to become interesting. One larger charm or a small group of coordinated charms can be enough.
Try matching the charm color with one of the main bead colors. Gold-toned accents can work beautifully with warm colors, while silver-toned details can complement cooler blue, green, and white combinations.
Pearl and Shell Necklace DIY Ideas
Pearls and shell-inspired elements naturally fit warm-weather jewelry. Their soft shapes and light colors pair especially well with colorful beads and delicate chains.
For a simple design, combine pearl-style beads with a few gold-toned spacers and one small charm. For something more playful, alternate pearls with colorful flower or round beads. A shell pendant can then provide a clear focal point.
These materials can also be used in layered designs. A short pearl necklace paired with a longer colorful strand creates contrast without requiring complicated construction.
How to Make Handmade Necklaces Look More Polished
The difference between a rushed craft project and a polished handmade accessory often comes down to small details. Consistent spacing, balanced color placement, clean connections, and an intentional focal point can dramatically improve the final result.
Try not to overcrowd the necklace. If your beads are large or highly decorative, allow them to stand out. If you are using tiny beads, you can introduce more color variation without making the design feel too heavy.
Important: Always consider comfort as well as appearance. A beautiful necklace should sit naturally, feel manageable to wear, and have secure finishing components. Good design combines visual appeal with practical use.
Necklace DIY Ideas for Gifts
Handmade necklaces can make thoughtful gifts because the design can be customized around someone’s favorite colors and style. A colorful beaded necklace may suit someone who enjoys playful accessories, while a pearl and chain combination can offer a more understated look.
Consider creating a small collection instead of a single piece. You could make one necklace with bright beads, one with neutral pearls, and another with layered charms. This gives the recipient options for different outfits and occasions.
Packaging can also enhance the experience. A simple jewelry card, small box, or fabric pouch keeps the necklace protected while giving the handmade gift a finished presentation.
Can You Make Necklace DIY Projects to Sell?
Handmade necklaces can also be developed into small craft collections. If you are considering selling your creations, focus on developing a recognizable style rather than making every piece completely different.
For example, you could build a collection around colorful summer beads, another around pearls and shells, or a third around layered charm necklaces. A consistent design direction can make your pieces easier to recognize.
Before offering a necklace for sale, check the finished piece carefully. Look for loose connections, sharp edges, uneven spacing, or components that could detach during normal use. Presentation matters too, so simple and tidy packaging can complement the handmade nature of the product.
Ideas for Building a Small Collection
- Create a few color families, such as turquoise and white, pink and orange, or blue and pearl.
- Repeat recognizable design elements across several necklaces.
- Offer different lengths so customers have styling options.
- Combine simple everyday designs with a few statement pieces.
- Photograph each necklace clearly against a clean background.
Easy Ways to Customize Your Necklace
One of the best things about necklace DIY projects is how easily they can be personalized. You can change the bead colors, swap charms, adjust the length, or create a completely different arrangement using the same supplies.
For a minimalist version, reduce the number of colors and use smaller beads. For a playful statement necklace, combine bright beads with larger decorative elements. For a coastal-inspired look, introduce white, aqua, natural tones, pearls, and shell details.
You can also make the same basic design in several color combinations. This is a simple way to experiment with style while keeping the construction familiar.
Quick Tips for Better DIY Jewelry
- Lay out all components before beginning assembly.
- Use odd-number groupings when arranging decorative elements if they look more balanced to your eye.
- Keep a few neutral beads available to soften bright colors.
- Use a larger focal bead or charm when the design needs more visual interest.
- Compare the necklace against different clothing colors before finalizing it.
- Store unfinished designs carefully so beads do not become mixed together.
- Check every connection point before wearing or gifting the finished piece.
At a Glance
- Bright beads create an instant summer feel.
- Pearls and shells add soft, timeless texture.
- Charms make simple necklaces more personal.
- Layering creates dimension without complicated construction.
- A thoughtful color palette keeps handmade jewelry cohesive.
Final Thoughts on Necklace DIY
Necklace DIY projects are a wonderful way to turn simple jewelry supplies into accessories that reflect your personality. The colorful designs in this collection show just how many directions you can take with beads, pearls, charms, shells, chains, and layered details.
You can keep your first project simple with a repeating bead pattern, or experiment with multiple strands and decorative focal points once you feel comfortable. The most important part is to enjoy the creative process and choose combinations that make you excited to wear the finished piece.
Whether you are making jewelry for yourself, preparing handmade gifts, or exploring ideas for a small craft collection, start with a manageable design and build from there. Save your favorite combinations, experiment with different colors, and let each necklace develop its own character.
Ready to create? Pick a few favorite beads, choose a summer-inspired color palette, add one memorable charm, and start designing a necklace that feels completely your own.