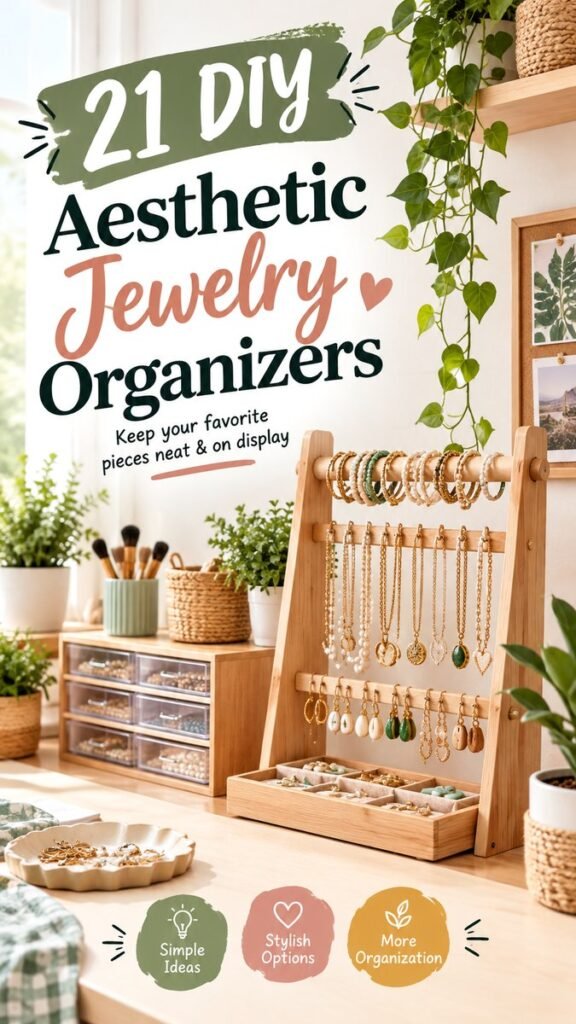
A beautiful jewelry collection deserves more than a cluttered drawer. A well-designed DIY jewelry organizer can turn everyday storage into part of your room decor while making necklaces, bracelets, earrings, and rings easier to see and reach. With a few thoughtful materials, you can create a jewelry display that feels personal, practical, and perfectly suited to your space.
Key Takeaways
- DIY jewelry organizers can combine useful storage with attractive home decor.
- Separate necklaces, earrings, bracelets, and rings to make everyday pieces easier to find.
- Wooden displays, trays, hooks, and small compartments offer flexible organization options.
- Natural textures and warm neutral tones create a calm, aesthetic jewelry station.
- Vertical storage can make excellent use of limited vanity or bedroom space.
- A personalized organizer can be adapted as your jewelry collection grows.
The inspiration here is all about creating an organized jewelry corner that looks intentional rather than purely functional. A warm wooden display, neatly arranged trays, decorative plants, and simple storage pieces create a relaxed atmosphere. The result is a setup where organization becomes part of the aesthetic.
Why DIY Jewelry Organizers Are Worth Making
Jewelry is small, delicate, and surprisingly easy to lose track of. Chains become tangled, earrings disappear into drawers, and favorite bracelets can end up buried beneath pieces you rarely wear. A dedicated organizer solves these everyday problems by giving each category a logical place.
Making your own organizer also gives you more freedom than choosing a standard storage box. You can decide how much hanging space you need, how many compartments are useful, and what materials complement your bedroom, dressing area, or craft room.
Important: The best jewelry organizer is not necessarily the largest one. It is the one that makes your most-used pieces visible, accessible, and easy to return to their proper place.
Make Storage Part of Your Decor
One of the biggest advantages of an aesthetic jewelry organizer is that it does not need to be hidden. A thoughtfully arranged display can become a decorative feature in its own right. Warm wood, woven textures, ceramic dishes, greenery, and neutral fabrics work particularly well together.
Instead of treating jewelry storage as an afterthought, think of it as a small styling opportunity. A wooden stand can become the focal point of a vanity, while a shallow tray can keep rings and smaller accessories together without taking over the surface.
21 DIY Jewelry Organizer Ideas to Try
There are countless ways to approach DIY jewelry storage. The following ideas focus on simple concepts that can be adjusted to suit different collections, spaces, and decorating styles.
1. Wooden Jewelry Display Stand
A simple wooden frame with horizontal bars can hold necklaces, bracelets, and earrings while keeping everything visible. Its vertical shape is especially useful when tabletop space is limited.
2. Tiered Jewelry Tray
Use shallow trays at different levels to create a compact jewelry station. Keep frequently worn pieces on the upper level and special-occasion accessories underneath.
3. Compartment Jewelry Box
Small compartments are ideal for rings, studs, charms, and other tiny pieces. Dividers help prevent everything from becoming one mixed collection.
4. Wall-Mounted Necklace Organizer
A narrow wooden board fitted with small hooks can transform an unused wall section into practical jewelry storage. Arrange hooks in even rows for a clean appearance.
5. Decorative Jewelry Ladder
A miniature ladder can provide several horizontal surfaces for hanging necklaces and bracelets. Its simple structure also adds visual interest to a bedroom or dressing corner.
6. Pegboard Jewelry Display
A small pegboard offers plenty of flexibility. Hooks, shelves, and holders can be rearranged whenever your collection changes, making this a practical long-term solution.
7. Hanging Hoop Organizer
Use a decorative hanging frame or hoop with small attachment points to display lightweight jewelry. This option can feel delicate and decorative while taking up very little space.
8. Jewelry Catchall Tray
A shallow tray is perfect for pieces you remove at the end of the day. Choose a tray with a soft interior or add a small fabric insert to give delicate items a comfortable resting place.
9. Small Ring Dish Collection
Instead of keeping every ring in one container, use several small dishes. Group them by style, color, or frequency of use for an organized display that doubles as decor.
10. Drawer Insert Organizer
If you prefer a clutter-free surface, create a custom insert for a drawer. Divide the interior into sections for earrings, rings, bracelets, and other small accessories.
11. Hanging Earring Display
A perforated panel or fine mesh surface can provide a convenient place for earrings. Keeping pairs visible makes it much easier to select accessories in the morning.
12. Minimalist Jewelry Bar
A single horizontal bar with evenly spaced hooks can create a sleek jewelry organizer. This works particularly well for necklaces and bracelets that you want to keep untangled.
13. Wooden Box With Dividers
Repurpose a simple wooden box by adding dividers to create custom compartments. Leave some sections larger for bracelets and reserve smaller sections for rings and earrings.
14. Fabric-Lined Jewelry Tray
A fabric-lined tray adds softness to a jewelry display. Neutral linen or cotton-inspired textures can complement natural wood and create the relaxed aesthetic seen in modern craft spaces.
15. Rotating Jewelry Stand
A rotating stand can make a larger collection easier to browse. Multiple sides provide additional storage without requiring a wide footprint on your vanity.
16. Jewelry Display Shelf
A narrow shelf can hold small trays, ring dishes, and decorative containers. Add hooks underneath to create two levels of storage from one compact area.
17. Freestanding Earring Rack
A small freestanding rack keeps earrings upright and visible. Choose a design with several rows so different styles can be separated without overcrowding.
18. Jewelry and Vanity Station
Combine several organizers into one cohesive station. A tray can hold rings, a vertical stand can display necklaces, and small containers can handle everyday accessories.
19. Natural Wood Jewelry Rack
Natural wood brings warmth to a jewelry display and pairs beautifully with neutral interiors. Keep the finish simple if you want the jewelry itself to remain the visual focus.
20. Decorative Catchall Station
Create a small area where jewelry can be placed temporarily before being returned to storage. Include a tray, dish, or small compartment box so loose pieces do not spread across the room.
21. Multi-Level Jewelry Organizer
Combine hanging bars, hooks, trays, and compartments in one display. This versatile approach works well when you own several types of jewelry and want everything in one convenient location.
Expert Insight
Think in terms of jewelry categories before choosing an organizer. Hanging pieces benefit from vertical storage, while rings and tiny earrings are easier to manage in shallow compartments. Matching the storage method to the jewelry makes the entire system easier to maintain.
How to Choose the Right DIY Jewelry Storage
The right organizer depends on the type of jewelry you own and the space available. Before starting a project, take a few minutes to look at your collection. Notice which pieces you wear most often and which ones tend to become tangled or misplaced.
Consider Your Available Space
A vertical organizer is a smart choice for a small bedroom, compact vanity, or crowded tabletop. Wall-mounted options can free up valuable surface area, while trays and boxes work well when you have a drawer or shelf available.
Match Storage to Your Jewelry
Long necklaces need hanging space, while rings and small earrings are better suited to compartments or dishes. Bracelets can work with either hooks or horizontal bars. If your collection contains many different pieces, a combination organizer may be the most practical solution.
Choose a Cohesive Color Palette
The aesthetic of the surrounding space can make a DIY jewelry organizer feel much more polished. Natural wood, cream, beige, muted green, soft terracotta, and other warm neutrals create an inviting look without competing with the jewelry.
Pro Tip: Leave a little breathing room between displayed pieces. An organizer often looks more elegant when it is not filled to maximum capacity, and open space makes individual accessories easier to see.
Materials for a Simple DIY Jewelry Organizer
You do not need an extensive supply list to create an attractive jewelry organizer. Depending on the design, useful materials can include wooden pieces, small trays, hooks, dividers, fabric, cord, adhesive, and decorative containers.
- Wooden boards or dowels for racks and stands
- Small hooks for necklaces and bracelets
- Shallow trays for rings and small accessories
- Small boxes or containers for compartments
- Soft fabric for lining trays and boxes
- Simple decorative elements to coordinate with your room
The goal is not to use every material at once. Start with the storage problem you want to solve, then choose materials that support that function while fitting your decorating style.
How to Keep Your Jewelry Organizer Looking Beautiful
Once your DIY jewelry organizer is finished, maintaining it is just as important as making it. A simple routine can prevent the display from becoming cluttered again.
Group Similar Pieces Together
Keep necklaces with necklaces, earrings with earrings, and rings in their own dedicated areas. Grouping similar pieces makes your collection easier to scan and reduces the time spent searching for something specific.
Keep Everyday Favorites Accessible
Place the jewelry you wear most frequently toward the front or in the easiest-to-reach section. Less frequently used pieces can be stored farther back or in separate compartments.
Avoid Overcrowding
When every hook and compartment is full, jewelry storage becomes harder to use. Leave enough room to remove one piece without disturbing everything around it.
Create a Cozy Jewelry Corner
A jewelry organizer can become part of a larger decorating arrangement. The visual inspiration of a warm, plant-filled room shows how storage pieces can sit comfortably alongside natural materials and decorative accessories.
Try placing your organizer near a mirror or vanity where you naturally get ready. Add a small plant, a ceramic dish, a woven container, or another simple decorative object nearby. The key is to keep the surrounding area balanced so the jewelry display feels intentional.
For a small space, avoid adding too many decorative objects. One or two complementary accents can be enough to create a polished corner without making the area feel crowded.
Make Your Organizer Work for You
The most successful DIY jewelry organizer is one that fits your actual habits. If you frequently wear necklaces, prioritize hanging space. If earrings are your biggest challenge, dedicate more room to small compartments or an earring display. If rings are constantly scattered across your vanity, make a ring dish or divided tray the center of your setup.
Do not feel limited to a single design. You can combine several ideas to create a storage system that feels completely personal. A wooden stand can handle necklaces and bracelets while a small tray takes care of rings and earrings.
Over time, your organizer can also evolve. Add another hook, rearrange compartments, or introduce a second tray when your collection changes. Flexible organization is often more useful than a rigid storage solution.
At a Glance
- Use vertical displays when surface space is limited.
- Choose compartments for small jewelry pieces.
- Keep frequently worn accessories within easy reach.
- Coordinate wood, trays, and textures with your existing decor.
- Leave open space so the organizer stays easy to use.
Conclusion
A DIY jewelry organizer is a simple way to bring order and personality to your everyday routine. Whether you choose a wooden display stand, a collection of small trays, a wall-mounted rack, or a combination of several storage ideas, the goal is the same: keep your favorite jewelry visible, accessible, and beautifully arranged.
Natural materials, warm colors, thoughtful compartments, and vertical storage can turn an ordinary storage solution into an attractive part of your home. Start with the jewelry that causes the most clutter, choose a design that fits your available space, and build from there.
Remember: Good organization should make your daily routine easier. When every piece has a place and your most-loved accessories are easy to see, getting ready becomes simpler and your space feels naturally more polished.
Tags
DIY Jewelry Organizer Jewelry Storage Jewelry Display Ideas Vanity Organization DIY Storage Ideas Aesthetic Organization Bedroom Organization Jewelry DIY