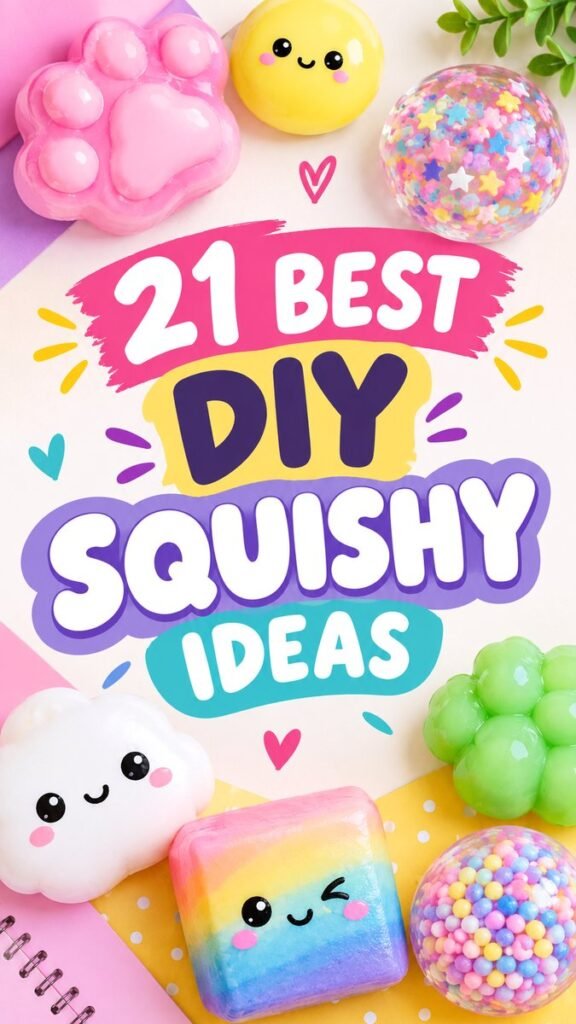
There is something irresistibly fun about a collection of colorful squishies. From cheerful paw shapes and cute smiley faces to rainbow blocks, fluffy clouds, glittery textures, and confetti-filled designs, squishies turn simple crafting into a playful creative project. These squishies DIY ideas are perfect for anyone who enjoys kawaii crafts, colorful handmade projects, and activities that encourage imagination. With a few basic craft supplies and plenty of creativity, you can experiment with different shapes, colors, decorations, and textures to create a collection that feels completely your own.
Key Takeaways
- Explore colorful DIY squishy ideas inspired by cute, playful shapes.
- Use pastel colors, bright accents, faces, sprinkles, and simple patterns to personalize each design.
- Mix different shapes and textures to make your handmade squishy collection more interesting.
- Keep designs simple when starting, then add details as your confidence grows.
- DIY squishies make a creative activity for craft days, gifts, collections, and imaginative play.
Why Squishies DIY Projects Are So Much Fun
DIY squishies combine creativity with the satisfaction of making something by hand. Unlike a craft that has to look exactly the same as a finished example, squishy projects leave plenty of room for experimentation. You can choose your favorite colors, change the expression, create a completely different shape, or add decorative details that match your personality.
The visual appeal is a huge part of the fun. Bright pinks, soft purples, sunny yellows, mint greens, turquoise, and rainbow shades immediately give handmade squishies a cheerful appearance. Cute faces can make an ordinary shape feel expressive, while tiny decorative elements can turn a simple project into something memorable.
Another advantage is that you can create a themed collection rather than stopping after one project. Imagine a group of pastel squishies featuring clouds, paws, fruit-inspired shapes, stars, rainbows, and colorful balls. Each design can have its own personality while still fitting into the same colorful craft theme.
Important: The best DIY squishies do not need complicated decorations. A simple shape, a cheerful color combination, and an expressive face can create a cute result. Focus on clean shapes and a fun color palette first, then add details gradually.
21 DIY Squishy Ideas to Try
Ready to build a colorful collection? These ideas are designed to inspire different shapes, styles, and decorative approaches. Use them as starting points and customize each one with your own favorite colors and details.
1. Kawaii Paw Squishy
A paw-shaped squishy is an easy way to create an instantly recognizable kawaii design. Try a soft pink, lavender, or pastel blue base and add a contrasting center pad. A simple face can make the design even more charming.
2. Smiley Round Squishy
Start with a basic round shape and let the face provide all the personality. A bright yellow base with large dark eyes, tiny cheeks, and a curved smile creates a cheerful design. Experiment with different expressions for a small collection of character squishies.
3. Confetti Ball Squishy
Colorful confetti-inspired details can make a transparent or brightly colored squishy look festive. Use a mixture of small shapes in pink, blue, yellow, purple, and white. The varied colors create visual interest without requiring an elaborate pattern.
4. Pastel Cloud Squishy
Cloud shapes work beautifully with soft pastel colors. White, baby blue, blush pink, or lavender can create a dreamy appearance. Add a tiny smile and rosy cheeks for a classic cute-craft finish.
5. Rainbow Squishy
Rainbow designs are perfect when you want plenty of color. Layer several shades across a simple rectangular, rounded, or cloud-like shape. A small face in the center can turn the rainbow into a playful character.
6. Sprinkle-Inspired Squishy
Give your squishy a sweet-looking appearance by decorating it with colorful sprinkle-style shapes. Keep the background simple so the tiny decorations remain the main feature. This idea is especially fun when using a pastel palette.
7. Glittery Pink Squishy
Pink is a natural choice for a cute squishy design. Add subtle glitter-style details, tiny decorative shapes, or a translucent effect to create extra visual sparkle. Keep the decoration balanced so the main shape remains easy to see.
8. Green Blob Character
Not every squishy needs a recognizable object shape. A simple rounded blob can become a fun character with two eyes and a tiny mouth. Try lime green, mint, or another cheerful shade for a fresh look.
9. Lavender Character Squishy
Lavender creates a soft and playful aesthetic that works especially well with cute faces. Pair it with white details, tiny pink cheeks, or small decorative dots. This is an easy design to personalize without making the project look busy.
10. Pink Character Cube
Try moving away from round shapes with a soft-looking cube or rounded rectangle. Add a cute face to the front and use different colors on each side. This gives your collection a fun geometric element.
11. Pastel Bead Squishy
Small colorful bead-style details can create a playful textured appearance. Mix several pastel shades rather than using just one color. A transparent-looking design can make the colors especially eye-catching.
12. Cute Face Collection
Instead of changing the shape, change the expression. Create happy, sleepy, surprised, winking, or smiling faces across several similar squishies. This makes a coordinated set feel much more personal.
13. Two-Tone Squishy
Choose two complementary colors and divide the design into sections. Pink and purple, yellow and turquoise, or blue and lavender can create attractive combinations. Simple color blocking is an excellent option for beginners.
14. Star Sprinkle Design
Tiny stars can instantly add a playful decorative element. Scatter them across a simple background or concentrate them around the edges. Combining stars with dots and tiny hearts can create a fun craft-inspired finish.
15. Heart-Shaped Squishy
A heart shape is simple, recognizable, and easy to customize. Try a bright pink or soft purple base, then add a cute expression or small decorative accents. A heart collection could also use different colors for every piece.
16. Mini Fruit-Inspired Squishy
Use fruit as inspiration for cheerful color combinations. Bright yellow, green, pink, orange, and red can create playful fruit-like characters. Keep the shapes rounded and add small faces for a kawaii effect.
17. Rainbow Confetti Block
Combine a rounded block shape with layered rainbow colors and tiny confetti details. This design works especially well when the colors blend softly rather than appearing overly harsh.
18. Minimal White Squishy
For a calmer design, begin with white or cream and use only a few colorful details. Small eyes, rosy cheeks, and a simple smile can provide enough personality without adding lots of decoration.
19. Bright Green Paw Design
Give the classic paw shape a fresh twist by using green instead of traditional pink or purple. A vivid color makes the shape stand out, while small face details can give it a friendly character.
20. Pastel Mix-and-Match Set
Create several small squishies using the same pastel palette. Each piece can have a different shape, such as a cloud, paw, ball, heart, or rounded block. The matching colors make the collection look coordinated.
21. Personalized Character Squishy
The final idea is to create a character entirely from your imagination. Choose the shape, colors, expression, and decorations yourself. Give it a name, create a matching set, or design several characters with different personalities.
Why This Matters
A successful DIY squishy is more about thoughtful design than complicated decoration. Start with a recognizable shape and a limited palette, then add one or two details that create personality.
- Choose two to four main colors for a cohesive look.
- Use expressions and tiny accents to make each piece feel unique.
- Leave enough open space so decorative details do not overwhelm the design.
How to Choose a Color Palette
Color is one of the easiest ways to make DIY squishies look polished. The colorful examples that inspire this style work because they combine bright shades with softer pastel backgrounds. You can use the same approach for your own projects.
Pastel pink, lavender, baby blue, mint green, soft yellow, and peach create a gentle kawaii palette. If you want something more energetic, increase the contrast with brighter turquoise, purple, yellow, and pink. A mostly neutral design can also work beautifully when you add just one vivid accent color.
When making several squishies, repeat a few colors throughout the collection. This simple trick makes completely different shapes look like they belong together.
Adding Cute Details Without Overdoing It
Small details can completely change the personality of a handmade squishy. Simple eyes and a tiny mouth are often enough to create a recognizable character. Rosy cheeks, dots, stars, hearts, sprinkles, and tiny decorative marks can be added afterward.
Think about visual balance when decorating. If the base is already bright and patterned, keep the face simple. If the base is a single color, you can use more decorative accents. This approach helps the finished design look intentional rather than crowded.
Pro Tip: Photograph or display your squishies against a simple background. A clean surface makes bright colors, cute faces, and small decorative details stand out much more clearly.
Tips for Planning a DIY Squishy Collection
If you want to make more than one project, planning a small theme can make the process easier. You might choose a pastel collection, a rainbow collection, a cute animal collection, or a group based around different expressions.
- Pick a theme: Decide whether your collection will focus on colors, shapes, characters, or a combination.
- Repeat colors: Use a few shades across multiple designs for a coordinated appearance.
- Vary the shapes: Combine round, square, cloud, paw, heart, and blob-inspired forms.
- Change expressions: Different faces can make similar designs feel completely different.
- Keep experimenting: Test unusual color combinations and decorative patterns to find your favorite style.
Creative Ways to Use Your Squishies DIY Ideas
DIY squishies can be more than individual craft projects. They can become part of a colorful handmade collection or a creative activity for an afternoon with friends and family. Display several finished designs together in a small craft area, organize them by color, or create a themed group where every character has its own expression.
They can also provide inspiration for other kawaii crafts. A cute face designed for a squishy could inspire a notebook decoration, greeting card, sticker concept, painted craft project, or handmade room accent. Once you have a favorite character style, there are plenty of ways to carry that visual idea into other creative projects.
For a craft session, consider preparing several shape ideas before beginning. Sketching simple outlines first can help you decide which designs work best together. You can also create a small color chart using the shades you plan to repeat throughout the collection.
Making Your Designs Pinterest-Worthy
If you enjoy sharing craft ideas online, presentation can make a big difference. Bright colors naturally attract attention, but a thoughtful composition helps viewers understand the idea quickly. Group several finished squishy designs together, use a clean background, and make the most interesting pieces the visual focus.
For Pinterest-inspired content, vertical compositions work especially well. Keep the main idea easy to understand at a glance and avoid covering the craft details with too much text. A clear phrase such as “DIY Squishy Ideas” can immediately communicate the purpose of the collection while colorful examples provide visual inspiration.
Good lighting also helps. Soft, even light can show off glossy surfaces and pastel colors while reducing distracting shadows. Simple decorative elements such as colorful paper, small dots, stars, or craft supplies can add personality without taking attention away from the squishies.
At a Glance
- Use bright or pastel colors for an instantly playful look.
- Try paws, clouds, hearts, balls, blobs, cubes, and character shapes.
- Add simple faces to give handmade designs personality.
- Mix confetti, stars, dots, sprinkles, and rainbow details for extra charm.
- Build a coordinated collection by repeating a few favorite colors.
Conclusion
Squishies DIY projects are a wonderful way to turn simple creative ideas into colorful, character-filled crafts. Whether you prefer soft pastel clouds, cheerful smiley faces, bright rainbow blocks, adorable paws, or playful confetti designs, there is plenty of room to make each project your own. The most appealing designs often start with simple shapes and a clear color palette, then become special through small personalized details.
Start with one easy shape, experiment with your favorite colors, and gradually build a collection of unique handmade characters. Try different expressions, combine unexpected shades, and explore new decorative patterns as you gain confidence. Most importantly, have fun with the process. Your squishies do not need to look identical to an inspiration piece to be successful. The best DIY projects reflect your own creativity.
Whether you are planning a colorful craft afternoon, looking for cute handmade project inspiration, or simply collecting ideas for your next creative session, these squishies DIY concepts offer plenty of possibilities. Pick your favorite design, gather your supplies, and start creating something bright, playful, and completely your own.