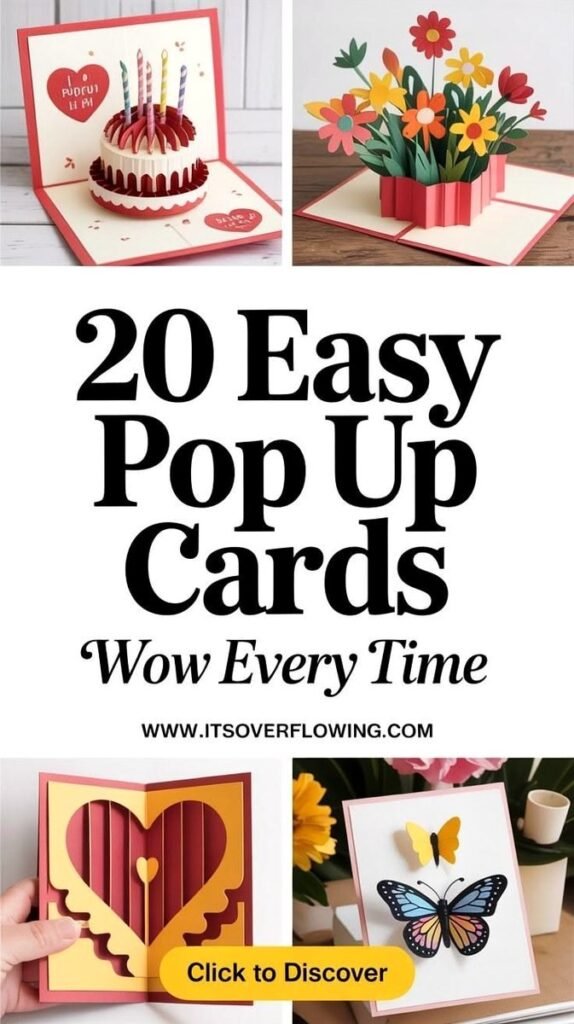
Pop up cards DIY projects are a wonderful way to turn a simple piece of paper into a memorable handmade surprise. With a few folds, cuts, colorful paper, and a little creativity, an ordinary card can open into a beautiful three-dimensional design. The ideas featured here show just how much personality a handmade pop up card can have, from a cheerful birthday cake and bright flower bouquet to a decorative heart and colorful butterfly.
Key Takeaways
- Pop up cards DIY projects can create impressive 3D effects with basic paper-crafting techniques.
- Birthday cakes, flowers, hearts, and butterflies are versatile designs for many occasions.
- Layered paper pieces can add depth, movement, and visual interest to a handmade card.
- Simple color combinations can make a card look polished without requiring complicated supplies.
- Personal messages and small decorative details make each card feel more meaningful.
Whether you are making a birthday card, a thank-you note, an anniversary surprise, or simply a thoughtful handmade greeting, pop up cards offer an opportunity to create something that feels personal. The best part is that you do not need an elaborate craft room to get started. Basic cardstock, scissors, adhesive, and decorative paper can be enough to create a charming result.
Why Pop Up Cards DIY Projects Are So Special
A handmade card already carries a personal touch, but a pop up design adds an element of surprise. The recipient opens the card and suddenly sees a shape or scene rising from the center. That small moment of discovery makes the card more interactive than a traditional flat greeting card.
The examples shown in this collection demonstrate several ways to create that effect. A birthday cake can stand upright when the card opens, while a flower bouquet can appear to grow from the center. Other designs use layered shapes to create hearts, butterflies, and decorative patterns.
The most effective pop up cards do not need complicated mechanisms. A strong central shape, thoughtful paper layering, and clean folds can create a surprisingly impressive 3D effect.
20 Pop Up Card DIY Ideas to Try
There are countless ways to interpret a pop up card. You can keep the design minimal with one raised element or build a small paper scene filled with multiple layers. Here are creative directions inspired by the colorful designs featured in this collection.
1. Birthday Cake Pop Up Card
A birthday cake is one of the most recognizable designs for a handmade pop up card. Create a simple tiered cake from cardstock and attach it to the interior folds so it rises when the card opens. Add candles, frosting details, or small paper decorations for extra character.
2. Colorful Flower Bouquet Card
Turn a greeting card into a cheerful paper bouquet by combining flower shapes with green stems and leaves. Use several flower sizes to create depth. Bright shades of yellow, orange, pink, red, and green can give the finished card a playful spring-inspired appearance.
3. Heart Pop Up Card
A layered heart design works beautifully for birthdays, anniversaries, friendship cards, or simply letting someone know you care. Try cutting several hearts in complementary colors and arranging them so the center becomes the main focal point.
4. Butterfly Pop Up Card
Butterflies are ideal for creating a light and decorative card. A large butterfly can become the central element, while smaller butterflies or floral shapes can decorate the surrounding space. Use contrasting paper colors to make the wings stand out.
5. Layered Flower Garden
Instead of making one bouquet, create a miniature paper garden. Place flowers at different heights so the design has several layers. This approach is especially useful when you want the card to feel full and dimensional without adding heavy embellishments.
6. Birthday Candle Card
Build a row of colorful candles across a raised cake or decorative panel. Striped paper can mimic candle patterns, while tiny flame shapes add a festive finishing touch. This is a fun variation when you want a birthday card with plenty of color.
7. Floral Heart Design
Combine two classic motifs by placing flowers around or inside a raised heart. Small leaves and petals can soften the edges and give the card a garden-inspired feel.
8. Spring Garden Pop Up
Use flowers, leaves, stems, and simple greenery to create a miniature spring scene. Layering the pieces at different depths can make the garden appear to extend toward the recipient when the card is opened.
9. Simple 3D Flower Card
For a beginner-friendly project, start with one large flower. Fold or layer the petals to give them dimension, then mount the flower onto a simple pop up structure. A clean design can look just as attractive as a more elaborate card.
10. Colorful Layered Bouquet
Make a fuller arrangement by combining flowers with different petal shapes. Keep the stems and leaves in similar tones while varying the flower colors. This creates visual variety without making the composition feel chaotic.
11. Minimal Heart Surprise
A simple heart can create a beautiful pop up effect without many materials. Choose one main color for the heart and a contrasting card base. Add a small paper accent in the center for a subtle finishing detail.
12. Floral Birthday Greeting
Combine a short birthday message with a raised flower arrangement. Keeping the greeting area uncluttered allows the three-dimensional design to remain the visual focus.
13. Butterfly Garden Card
Create a layered garden with butterflies hovering above flowers. Use different sizes to suggest distance and movement. This design works particularly well with soft or bright paper colors.
14. Paper Flower Basket Effect
Arrange flowers inside a raised paper structure that resembles a small basket or planter. This gives the card a cozy handmade appearance and provides plenty of room for experimenting with paper textures.
15. Rainbow Color Pop Up
For a cheerful design, arrange flowers or geometric shapes in a rainbow-inspired color sequence. A controlled palette can make even a playful card look cohesive and thoughtfully designed.
16. Layered Floral Frame
Instead of placing the main decoration in the center, create a raised frame around the inside of the card. Add flowers, leaves, or small shapes along the frame to draw attention toward the message.
17. Folded Paper Bouquet
Experiment with folded paper leaves and flowers to create a bouquet that opens outward. This approach can produce a dramatic effect while still relying on simple shapes.
18. Celebration Card With Decorative Details
Use small stars, dots, hearts, or confetti shapes to surround a central birthday or celebration element. These tiny additions can make a simple card feel festive without overwhelming the main design.
19. Nature Inspired Pop Up Card
Leaves, flowers, butterflies, and other simple nature-inspired shapes can be combined into a fresh handmade scene. Choose two or three main colors and repeat them throughout the design for a coordinated appearance.
20. Personalized 3D Greeting Card
Take any of these concepts and adapt it to the recipient. Add their favorite colors, a handwritten message, or a shape connected to a special memory. Personalization is what transforms a craft project into a meaningful keepsake.
Why This Matters
A pop up card is more than a paper craft. The three-dimensional construction gives the recipient a small interactive experience, while the handmade details show time and thought.
- Keep one main element as the focal point.
- Use repeated colors to make multiple layers feel connected.
- Test every fold before adding decorative pieces.
Supplies for Easy Pop Up Cards DIY
You can create many simple pop up cards with inexpensive craft materials. The exact supplies depend on the design, but a basic collection is enough for experimenting with different structures.
- Cardstock or sturdy colored paper
- Scissors or a precision craft cutter
- Ruler for measuring clean folds
- Pencil for marking cutting and folding lines
- Paper adhesive or glue
- Colored paper for flowers, hearts, butterflies, and decorations
- Markers or pens for personal messages
Choose paper that is sturdy enough to hold its shape but still easy to fold. Using cardstock for the card base and lighter decorative paper for smaller details can make construction easier.
How to Make a Basic Pop Up Card
The basic process is surprisingly approachable. Start with a folded card base and decide which element you want to rise when the card opens. A simple platform, tab, or folded strip can provide the support needed for a raised decoration.
- Fold a sheet of cardstock in half to create the card base.
- Mark the area where the pop up mechanism will be placed.
- Make carefully measured cuts or folds to create supporting tabs.
- Fold the tabs inward and check that they move smoothly.
- Cut the decorative element separately.
- Attach the decoration to the pop up tabs.
- Open and close the card slowly to check the movement.
- Add the final message and decorative details.
Pro Tip: Always test the mechanism before gluing the decorative pieces permanently. This simple step makes it much easier to correct folds, adjust spacing, and prevent the card from catching when it closes.
Tips for Cleaner and More Creative Results
Plan the Composition First
Before cutting your paper, decide what should be the first thing the recipient notices. If you are making a flower bouquet, the flowers should remain the focal point. If you are creating a birthday cake, give the cake enough space to open properly.
Keep Your Folds Precise
Clean folds make a major difference in paper crafts. Use a ruler to guide straight folds and avoid rushing through the construction. Precise folding helps the card open and close more smoothly.
Choose a Coordinated Color Palette
The colorful designs in this style of card work because the colors complement one another while still creating contrast. Pick a few main colors and repeat them throughout the flowers, leaves, borders, or decorative accents.
Add Details Without Overcrowding
Small details can make handmade cards more expressive, but too many embellishments can make the design difficult to read. Give the main pop up element enough empty space so it remains visually clear.
Ideas for Personalizing Your Pop Up Cards
Personalization is one of the easiest ways to make a DIY greeting card memorable. Think about the recipient before choosing your colors and central design. A flower-loving friend might appreciate a colorful bouquet, while a birthday celebration naturally lends itself to a cake and candles.
You can also personalize the message inside the card. A short handwritten note can complement the visual design without taking attention away from the pop up feature. For a more polished appearance, coordinate the writing color with one of the main colors used in the paper design.
Another option is to combine several simple motifs. A birthday cake can sit beneath a small flower arrangement, or butterflies can surround a heart. Combining familiar shapes gives you plenty of creative freedom without requiring a complicated mechanism.
When to Make a Pop Up Card
Pop up cards are useful for far more than birthdays. Their flexible designs make them suitable for many everyday occasions and celebrations.
- Birthdays: Create a cake, candles, balloons, flowers, or colorful celebration scene.
- Anniversaries: Try layered hearts, flowers, or a personalized message.
- Thank-you cards: A raised bouquet can add a warm and cheerful touch.
- Friendship cards: Use bright colors, hearts, butterflies, or playful shapes.
- Spring occasions: Build a garden scene with flowers, leaves, and butterflies.
- Just because: Make a small handmade surprise simply to brighten someone’s day.
Making DIY Paper Crafts More Enjoyable
One of the biggest advantages of pop up cards is the freedom to experiment. You can begin with a very simple design and gradually introduce more layers as you become comfortable with the folding technique.
Do not worry about making the first card perfect. Paper crafting is often about testing an idea, discovering how the folds work, and adjusting the design. Keeping a few scrap pieces nearby allows you to test colors, shapes, and mechanisms before using your favorite cardstock.
A good beginner strategy is to master one reliable pop up mechanism first. Once you understand how the folded structure moves, you can reuse it with cakes, flowers, hearts, butterflies, and many other decorative shapes.
At a Glance
- Start with sturdy cardstock and simple folds.
- Choose one clear focal point for the card.
- Test the pop up mechanism before permanent assembly.
- Use coordinated colors for a polished handmade look.
- Personalize the message and decorative elements for the recipient.
Conclusion
Pop up cards DIY projects combine simple paper crafting with a delightful element of surprise. The colorful cake, flower bouquet, heart, and butterfly concepts show how a few carefully arranged paper pieces can become an eye-catching handmade greeting. Whether you are completely new to paper crafts or already enjoy making handmade cards, these ideas provide plenty of room to experiment.
Start with one simple design, practice the folds, and then make it your own with colors, messages, flowers, hearts, or other favorite shapes. The goal is not complicated construction. It is creating a card that opens with a little surprise and communicates genuine thought.
With a small collection of paper supplies and a willingness to experiment, you can turn ordinary cardstock into colorful 3D creations for birthdays, celebrations, thank-you notes, and everyday moments. Save these pop up card ideas for your next creative afternoon and let your imagination shape the next design.
Tags
Pop Up Cards DIY DIY Greeting Cards Paper Crafts 3D Card Ideas Handmade Cards Easy Paper Crafts DIY Birthday Cards Creative Card Making