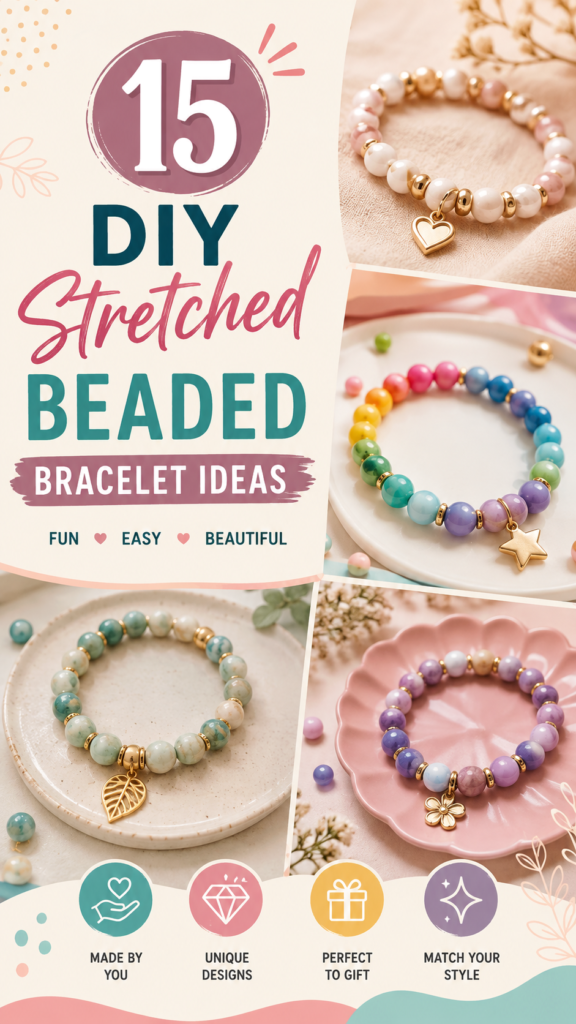
If you love handmade jewelry, colorful beads, and simple craft projects, DIY bracelet designs are a fun way to turn a handful of beads and stretchy cord into something personal and stylish. Stretched beaded bracelets are especially appealing because they are easy to customize, comfortable to wear, and suitable for many different skill levels. From soft pearl combinations with gold accents to bright rainbow-inspired patterns and calming green or purple palettes, there are countless ways to create a bracelet that feels uniquely yours.
Whether you are making jewelry for yourself, preparing a thoughtful handmade gift, or simply looking for an enjoyable weekend craft, these DIY bracelet ideas offer plenty of inspiration. The key is to experiment with color, texture, bead placement, charms, and small decorative details until you find a combination you love.
Key Takeaways
- Stretched beaded bracelets are simple to personalize and style.
- Mixing bead colors and finishes can create completely different looks.
- Pearls, gold-toned spacers, and charms add an elegant finishing touch.
- Rainbow and pastel combinations are great for playful handmade jewelry.
- Simple gemstone-style bead palettes can create a natural, relaxed appearance.
- Planning the bead arrangement before stringing makes the final bracelet easier to balance.
Why DIY Bracelet Designs Are So Fun to Make
One of the best things about making your own bracelets is the freedom to choose every visible detail. Instead of searching for one accessory that perfectly matches your outfit or personality, you can build the design yourself. A simple change in bead color can transform the entire mood of a bracelet, while a small charm can give an otherwise classic design a playful focal point.
Stretched bracelets are particularly approachable because they do not require a traditional clasp. The flexible construction allows the bracelet to slip comfortably over the hand, creating a clean and uncomplicated finish. This makes the style useful for beginners who want to explore jewelry making without starting with complicated hardware.
Important: The most successful DIY bracelet designs usually balance color, spacing, and proportion. You do not need dozens of different bead types. A thoughtfully chosen combination of a few colors and accents can look more polished than an overcrowded design.
15 DIY Stretched Beaded Bracelet Ideas to Try
The inspiration comes from several distinct jewelry styles, ranging from elegant pearl bracelets to colorful statement designs. Use these ideas as starting points, then adjust the colors, bead sizes, and charms to create your own version.
1. Classic Pearl and Gold Bracelet
For an elegant everyday accessory, combine creamy pearl-style beads with small gold-toned spacer beads. Keep the arrangement mostly symmetrical and place a delicate charm at the center. This combination has a timeless appearance and works beautifully when you want a bracelet that feels refined without being overly complicated.
2. Colorful Rainbow Beaded Bracelet
Bring energy to your jewelry collection with a bracelet inspired by the colors of the rainbow. Arrange beads from warm shades such as yellow, orange, and pink into cooler blues, greens, and purples. A multicolor bracelet can be bright and cheerful while still looking coordinated when the colors transition gradually around the circle.
3. Green and Natural-Toned Bracelet
Green beads paired with cream, brown, or muted neutral tones create a nature-inspired aesthetic. Add a few metallic spacers to separate groups of beads and introduce subtle contrast. This is a lovely direction for anyone who prefers earthy jewelry designs rather than highly saturated colors.
4. Soft Pink and Pearl Bracelet
Soft pink beads can be paired with white or cream accents for a delicate, feminine look. Alternating different bead finishes adds visual interest without requiring a complicated pattern. A small decorative charm can provide the finishing detail while keeping the overall design light and wearable.
5. Purple Pastel Bracelet
Pastel purple, lavender, and soft blue beads create a calming color palette. Try arranging shades from light to dark or alternating them in a repeating sequence. Gold-toned spacers can warm up the cooler colors and make the finished bracelet feel more polished.
6. Minimalist Neutral Bracelet
If bold colors are not your style, choose a restrained palette of white, beige, blush, and soft metallic tones. A minimalist bracelet can look sophisticated while still being incredibly simple to make. The secret is consistency, so choose beads with complementary finishes and avoid adding too many competing details.
7. Charm-Focused Bracelet
Sometimes one charm is enough to turn a basic strand of beads into a personalized accessory. Start with a simple bead pattern and reserve the center position for a decorative pendant. Floral, geometric, heart-inspired, or other everyday motifs can become the visual focal point of the bracelet.
8. Gold Accent Beaded Bracelet
Metallic spacer beads can make ordinary bead combinations look more sophisticated. Place small gold-toned accents between larger beads at regular intervals. This technique is especially effective with neutral, pastel, green, or pink palettes.
9. Mixed-Color Statement Bracelet
For a more playful result, combine several favorite colors rather than following a strict palette. To keep the bracelet visually balanced, repeat colors around the design instead of placing every shade in one area. This creates a lively accessory without making the arrangement look random.
10. Monochromatic Bracelet
Choose several shades from the same color family for a coordinated look. A bracelet made with pale blue, medium blue, and deeper blue beads can feel sophisticated while still having plenty of dimension. The same technique works with pink, green, purple, or neutral tones.
11. Pearl and Spacer Pattern
Create a repeating pattern using larger pearl-style beads and smaller metallic spacers. This approach is simple enough for beginners but produces a structured finished design. Keep the spacing consistent for a classic jewelry-making effect.
12. Color-Gradient Bracelet
A gradient bracelet transitions gradually from one color to another. You could move from pink into purple, blue into green, or warm yellow into orange and pink. Arrange the beads on a flat surface before stringing them so you can adjust the transition until it looks smooth.
13. Beaded Friendship Bracelet
DIY bracelets make thoughtful friendship gifts because they can be customized around favorite colors or shared styles. Consider making two coordinating designs rather than identical bracelets. One can feature a person’s favorite colors while the other uses a complementary palette.
14. Personalized Letter Bead Bracelet
Letter beads can turn a basic bracelet into a more personal accessory. Spell out a short word, nickname, initials, or a simple positive message, then surround the letters with coordinating beads. The example style of incorporating letter beads shows how typography can become part of the jewelry itself.
15. Elegant Everyday Bracelet
For a versatile design, combine soft neutral beads, subtle metallic accents, and one understated charm. This style can transition easily between casual outfits and more polished looks. Keep the color palette restrained and let the bead shapes and small details provide the interest.
Expert Insight
Before cutting your stretchy cord, arrange all your beads in the exact order you want them to appear. This simple step makes it much easier to compare colors, identify gaps, and create a balanced pattern.
- Use repetition when you want a neat, coordinated appearance.
- Use contrasting colors when you want a playful statement piece.
- Place your favorite charm or special bead where it will naturally become the focal point.
How to Plan Your DIY Beaded Bracelet
A little planning can make the creative process much easier. Start by deciding what kind of bracelet you want. Think about whether it should feel elegant, colorful, natural, playful, minimalist, or personalized. Once you have a general direction, select beads that support that mood.
Choose a Color Palette
Pick two to five main colors and consider adding one metallic or neutral accent. A limited palette helps the bracelet look intentional. If you are making a rainbow bracelet, use the color progression itself as the organizing principle.
Mix Bead Sizes Carefully
Combining larger beads with smaller spacers can add depth to a bracelet. However, using too many different sizes may make the design feel visually busy. A simple combination of one primary bead size and one smaller accent size is often enough.
Decide Where the Focal Point Goes
If you are adding a charm, pendant, or letter beads, decide on their placement before stringing. A centered focal point creates a symmetrical appearance, while an offset charm can produce a more relaxed style.
Tips for Making Stretched Beaded Bracelets
Once your design is planned, string the beads carefully and keep the arrangement organized. Stretchy jewelry cord is flexible, but the finished bracelet still benefits from thoughtful construction.
- Lay out your pattern first. This helps you spot color combinations that do not work before assembly.
- Leave enough cord for finishing. Having a little extra makes tying and securing the bracelet easier.
- Check the fit before finishing. The bracelet should be comfortable without feeling excessively loose.
- Keep your focal point centered when desired. Symmetry can make a handmade bracelet look especially polished.
- Inspect the finished bracelet. Make sure the connection is secure before wearing or gifting it.
Pro Tip: When experimenting with a new DIY bracelet design, photograph your bead arrangement before stringing it. If you want to recreate the design later, the photo becomes a quick visual reference for the color order and placement.
How to Make Your Bracelet Feel More Personal
The most memorable handmade jewelry often includes a detail that means something to the person wearing it. That could be a favorite color, a meaningful word, a special charm, or simply a combination of colors that matches their personality.
For a personalized gift, consider choosing a palette based on the recipient’s usual style. Someone who prefers understated accessories may enjoy pearl, cream, and gold combinations, while someone with a playful wardrobe might appreciate bright rainbow beads. The beauty of DIY jewelry is that personalization does not require complicated techniques.
Creative Ways to Style Your DIY Bracelets
A single handmade bracelet can be worn alone for a subtle look or combined with other complementary bracelets for a layered effect. When stacking pieces, vary the bead colors, textures, or sizes slightly so each bracelet remains visible.
You can also coordinate your bracelet with other handmade accessories. Matching colors across earrings, necklaces, hair accessories, or small gifts can create a cohesive handmade collection. Neutral bracelets are particularly easy to combine with brighter accessories.
DIY Bracelet Ideas for Gifts and Craft Projects
Handmade bracelets are a practical choice for creative gifts because they can be customized without requiring a large project setup. Make several designs using different color palettes and choose the one that best fits each recipient.
They can also be enjoyable projects for craft afternoons, creative gatherings, or personal jewelry collections. Setting out several bead colors and charms encourages experimentation, and each person can create a design that reflects their individual taste.
At a Glance
- Choose a clear color palette before stringing.
- Use gold-toned spacers for extra definition and contrast.
- Add charms to create an eye-catching focal point.
- Try pearls, pastels, rainbow colors, or earthy tones for different moods.
- Personalize designs with letter beads or favorite colors.
Conclusion
DIY bracelet designs are a wonderful way to combine creativity, color, and personal style in a small handmade project. Stretched beaded bracelets offer an especially flexible starting point, allowing you to experiment with pearl-style beads, bright colors, soft pastels, natural tones, metallic spacers, charms, and personalized letter beads.
The best part is that there is no single right way to create one. Start with a color combination you love, arrange the beads until the pattern feels balanced, and add one or two details that make the design your own. Whether you prefer an elegant pearl bracelet, a cheerful rainbow pattern, or a calm pastel design, a little creativity can turn simple beads into an accessory you will be excited to wear or give as a gift.
Save your favorite DIY bracelet ideas, gather your beads, and start experimenting with your next handmade design. Your perfect bracelet may be only a few beads away.