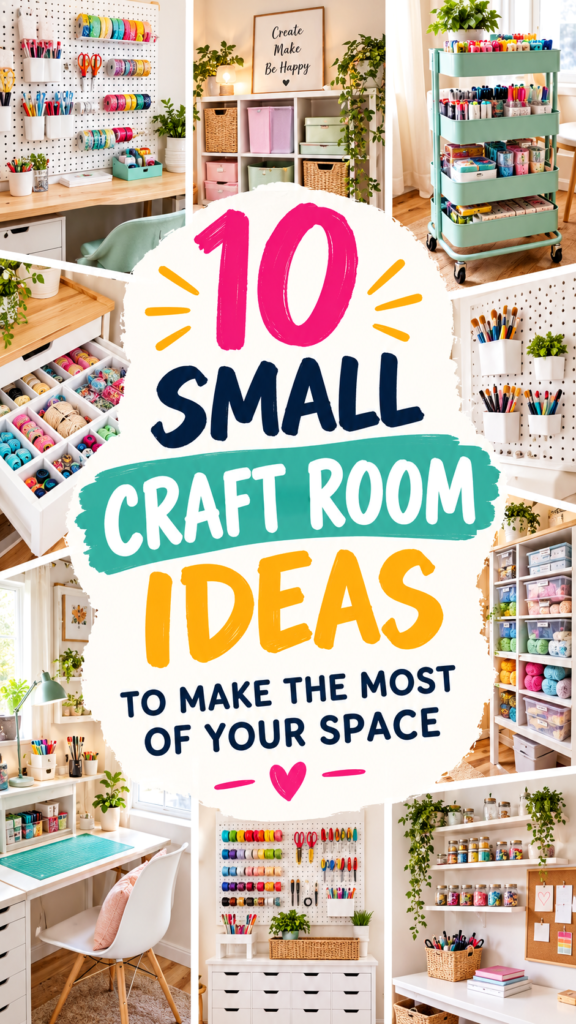
Small craft spaces become much easier to manage when every skein, tool, and unfinished project has a home. A crochet craft storage basket is a practical way to bring handmade texture into a craft room while keeping supplies contained and easy to reach. This original pattern creates a sturdy rectangular basket with a simple single crochet fabric, firm base, clean edges, and an open top for quick access.
The design is intentionally uncomplicated, making it approachable for confident beginners while still giving experienced crocheters plenty of room to personalize. Use one basket for yarn, another for fabric scraps, crochet hooks, notions, or works in progress. Choose a neutral shade for a calm studio or several coordinating colors to create cheerful craft-room storage.
Key Takeaways
- A practical crochet craft storage basket designed for yarn, tools, fabric, and small supplies.
- Worked primarily with single crochet for a dense, supportive fabric.
- Suggested bulky yarn and a 6 mm crochet hook create a substantial basket suitable for everyday organization.
- The rectangular base provides useful shelf-friendly proportions for compact craft rooms.
- The pattern can be customized by changing the base dimensions, basket height, or color sequence.
- Confident beginners can practice foundation chains, single crochet, working around a rectangle, and clean finishing.
Crochet Craft Storage Basket Project Description
This crochet craft storage basket is designed as a soft but structured organizer for a home craft room. Its rectangular shape fits naturally on shelves, beside a desk, under a worktable, or inside an open storage unit. The dense crochet fabric helps the basket hold its shape while keeping the construction simple enough to make without complicated shaping.
The finished basket measures approximately 10 1/4 inches long by 7 inches wide and 3 1/2 inches tall, excluding any optional folded cuff. In metric measurements, that is approximately 26 cm long by 18 cm wide and 9 cm tall. These measurements are approximate because yarn thickness, personal tension, and blocking can affect the final dimensions.
The suggested version uses a sturdy bulky yarn, preferably cotton or a cotton-rich blend. Cotton gives the basket a pleasing weight and helps it resist stretching. A washable acrylic blend can also work if you prefer lighter storage or have leftover yarn that you want to use.
Crochet Construction and Stitch Analysis
The most practical construction for this style of craft-room organizer is a flat rectangular base followed by joined rounds worked around the outside edge. This avoids complicated separate panels and creates a continuous basket body with minimal seaming.
The base begins as a rectangle worked in rows of single crochet. Once the rectangle reaches the desired size, stitches are worked around all four sides. The first round establishes the basket walls, while the following rounds are worked without increases so the sides rise vertically.
Single crochet is particularly useful for storage baskets because it produces a relatively dense fabric. Compared with an open lace stitch, it leaves smaller gaps and gives the basket more body. A slightly smaller hook could be used if your fabric feels too loose, although changing the hook will also affect the finished dimensions.
The suggested color arrangement is intentionally flexible. A solid basket has a clean, minimalist appearance, while alternating rounds can create horizontal stripes. You can also reserve a contrasting shade for the top edge for a simple decorative finish.
Why Single Crochet Works Well for Craft Storage
Single crochet gives the basket a compact texture that supports everyday items without requiring additional structural stitches. The stitch is also easy to count, which makes the rectangular base straightforward to customize.
For an even more rigid basket, you can work with a tighter tension or add a removable insert made from sturdy fabric or plastic canvas. For a softer organizer, choose a cotton-acrylic blend and use the recommended hook size without intentionally tightening your tension.
Free Crochet Craft Storage Basket Pattern
Original project: Compact Rectangle Craft Basket
This original interpretation uses a rectangular single crochet base and eight rounds of single crochet walls to create a practical organizer for yarn, crochet tools, fabric scraps, stationery, and other craft supplies. The construction, measurements, yarn quantity, hook size, and gauge below are suggested specifications rather than claims about an unseen original pattern.
| Specification | Recommendation |
|---|---|
| Skill Level | Confident beginner |
| Finished Size | Approx. 10 1/4 x 7 x 3 1/2 in / 26 x 18 x 9 cm |
| Yarn | Bulky #5 cotton or cotton-rich yarn |
| Yarn Quantity | Approx. 400 to 450 yd / 366 to 411 m |
| Hook | 6 mm / US J-10 |
| Gauge | 9 sc x 9 rows = 4 x 4 in / 10 x 10 cm |
| Terminology | US crochet terminology |
Materials
- Bulky #5 yarn, approximately 400 to 450 yards / 366 to 411 meters.
- 6 mm / US J-10 crochet hook, or size needed to achieve gauge.
- Yarn needle with a large eye.
- Sharp scissors.
- Locking stitch marker or scrap yarn for marking the first stitch of each round.
- Optional: measuring tape and blocking mat.
Terminology and Abbreviations
- ch: chain
- sc: single crochet
- sl st: slip stitch
- st: stitch
- sts: stitches
- rep: repeat
- RS: right side
- WS: wrong side
UK equivalent: US single crochet is called double crochet in UK terminology. The instructions below use US terminology only.
Gauge
Work single crochet back and forth until your swatch measures approximately 9 sc by 9 rows in 4 inches / 10 cm. Gauge is especially useful if you want the basket to fit a particular shelf or cubby.
If your swatch has more than 9 stitches across 4 inches, your tension is tighter than the suggested gauge and the finished basket may be smaller. Move up one hook size if necessary. If you have fewer than 9 stitches, move down one hook size. Always consider the fabric itself as well as the numbers. A basket needs enough firmness to support its contents.
Special Stitch and Construction Notes
No complicated special stitch is required. The pattern uses standard single crochet throughout the main basket.
Turning chain: The chain 1 at the beginning of each base row does not count as a stitch.
Joined basket rounds: Chain 1 at the beginning of each wall round does not count as a stitch. Join each round with a slip stitch to the first single crochet of the round.
Round marker: Place a marker in the first single crochet of every wall round if you find it difficult to identify the joining point.
Part 1: Crochet the Rectangular Base
Foundation: Chain 24.
- Row 1: Sc in the 2nd ch from hook and in each ch across. Turn. 23 sc.
- Row 2: Ch 1, sc in each st across. Turn. 23 sc.
- Row 3: Ch 1, sc in each st across. Turn. 23 sc.
- Row 4: Ch 1, sc in each st across. Turn. 23 sc.
- Row 5: Ch 1, sc in each st across. Turn. 23 sc.
- Row 6: Ch 1, sc in each st across. Turn. 23 sc.
- Row 7: Ch 1, sc in each st across. Turn. 23 sc.
- Row 8: Ch 1, sc in each st across. Turn. 23 sc.
- Row 9: Ch 1, sc in each st across. Turn. 23 sc.
- Row 10: Ch 1, sc in each st across. Turn. 23 sc.
- Row 11: Ch 1, sc in each st across. Turn. 23 sc.
- Row 12: Ch 1, sc in each st across. Turn. 23 sc.
- Row 13: Ch 1, sc in each st across. Turn. 23 sc.
- Row 14: Ch 1, sc in each st across. Turn. 23 sc.
- Row 15: Ch 1, sc in each st across. Turn. 23 sc.
- Row 16: Ch 1, sc in each st across. Turn. 23 sc.
The finished base should measure approximately 10 1/4 inches / 26 cm long by 7 inches / 18 cm wide.
Part 2: Establish the Basket Walls
Do not turn after the final base row. You will now work around all four sides of the rectangle. The base has 23 stitches along each long side and 16 row ends along each short side, creating a total of 78 stitches around the perimeter.
- Wall Round 1: Ch 1. Sc in each of the 23 sts across the long edge. Work 16 sc evenly along the first short edge, placing approximately one sc into each row end. Sc in each of the 23 sts along the opposite long edge. Work 16 sc evenly along the final short edge. Join with a sl st to the first sc. 78 sc.
Before continuing, gently straighten the rectangle and check that the corners lie flat. The first wall round may feel slightly firm. This is expected and helps establish the basket shape.
Part 3: Build the Basket Sides
- Wall Round 2: Ch 1, sc in each st around. Join with a sl st to the first sc. 78 sc.
- Wall Round 3: Ch 1, sc in each st around. Join with a sl st to the first sc. 78 sc.
- Wall Round 4: Ch 1, sc in each st around. Join with a sl st to the first sc. 78 sc.
- Wall Round 5: Ch 1, sc in each st around. Join with a sl st to the first sc. 78 sc.
- Wall Round 6: Ch 1, sc in each st around. Join with a sl st to the first sc. 78 sc.
- Wall Round 7: Ch 1, sc in each st around. Join with a sl st to the first sc. 78 sc.
- Wall Round 8: Ch 1, sc in each st around. Join with a sl st to the first sc. 78 sc.
After Round 8, the basket walls should measure approximately 3 1/2 inches / 9 cm from the top of the base. If you prefer a taller basket, continue adding complete rounds of 78 sc until the desired height is reached.
Part 4: Optional Contrasting Top Edge
For a simple decorative finish, change to a contrasting color before the final round.
- Top Edge Round: Join the new color with a slip stitch at the first stitch of the previous round. Ch 1, sc in each of the 78 sts around. Join with a sl st to the first sc. 78 sc.
Fasten off and leave a tail approximately 6 inches / 15 cm long for weaving in. If you prefer a single-color basket, simply treat Wall Round 8 as the final round.
Part 5: Fasten Off and Weave In Ends
Cut the yarn, leaving a 6-inch / 15 cm tail. Pull the yarn through the final loop. Thread the tail onto a yarn needle and weave it securely through several stitches on the wrong side of the basket. Change direction and weave through the fabric again before trimming the excess.
Secure every color-change tail separately. Avoid leaving long loose strands inside the basket because craft tools can catch on them.
Optional Folded Cuff
For a softer, more decorative storage basket, fold the upper 1 to 1 1/2 inches / 2.5 to 4 cm outward. The dense single crochet fabric should hold a gentle cuff after light blocking. If you want a permanent cuff, tack it discreetly at the side seams with matching yarn and a yarn needle.
Do not sew the cuff so tightly that it pulls the top edge inward. The basket should remain open enough for easy access to its contents.
Customization and Size Adjustment Guide
One of the advantages of this crochet craft storage basket is how easily the dimensions can be changed. The base determines the length and width, while the number of wall rounds determines the height.
Adjusting the Length
The starting chain controls the long dimension of the base. The sample begins with 24 chains and produces 23 single crochet stitches across each long side.
To make the basket longer, add chains to the foundation. Each additional chain adds approximately one stitch to the long side at the suggested gauge. Keep in mind that the actual change depends on your personal tension.
Adjusting the Width
The number of base rows controls the short dimension. The sample uses 16 rows. Add or remove complete rows before beginning the wall round to create a deeper or shallower basket.
When changing the number of rows, remember that the number of stitches placed along each short edge must match the number of row ends. If you make 18 base rows, for example, use 18 sc along each short edge during the first wall round.
Adjusting the Height
The easiest adjustment is simply adding or removing wall rounds. Each additional round increases the height by approximately 4/9 inch, or about 1.1 cm, at the suggested gauge.
For a shallow tray, stop after four wall rounds. For a medium organizer, use eight rounds. For a taller yarn basket, continue for 12 or more rounds and check the stability of the sides as you work.
Sizing Reminder: If the basket needs to fit inside a particular shelf, measure the available opening first. Allow a little clearance on every side rather than designing the crochet measurements to exactly match the shelf dimensions.
Color Customization
- Use one neutral color for a minimalist craft-room organizer.
- Alternate two colors every two rounds for soft horizontal stripes.
- Use one main shade and a contrasting final round for a simple border.
- Work the base in a darker color if the basket will hold supplies that may shed fibers or dust.
- Use coordinated colors for a set of baskets assigned to different craft categories.
Common Mistakes and Troubleshooting
The Base Is Curling
A small amount of curling during the early rows can happen when your tension is tight. If the rectangle remains visibly curled after several rows, check your stitch count and tension. Make sure every row contains exactly 23 sc in the standard version.
The Basket Flares Outward
If the walls become wider toward the top, you may accidentally be adding stitches at the joining point. Remember that the beginning chain does not count as a stitch. Work one sc into each actual stitch around and join to the first sc.
The Basket Pulls Inward
If the upper opening becomes smaller, check whether you are skipping stitches. Count the first complete wall round carefully. The standard version should contain 78 stitches around the perimeter.
The Corners Look Uneven
When working the first wall round, distribute the short-edge stitches evenly. The sample uses 16 sc along each short side because the base contains 16 rows. Putting too many stitches into one area can create a wave, while too few can cause the corner to pull inward.
The Fabric Is Too Soft
Try a smaller hook, firmer tension, or a yarn with more cotton content. If the basket still lacks enough body for your intended supplies, add a removable lining or structural insert after completing the crochet shell.
Finishing, Blocking, and Care
Blocking is optional for this project, but gentle shaping can improve the finished appearance. Lightly dampen the basket, reshape the base into a clean rectangle, and allow it to dry completely. Avoid aggressive stretching because the basket is intended to retain a firm structure.
To keep the base flat, place the basket on a protected level surface while drying. Check the corners and side walls periodically and gently square them with your hands.
For care, follow the washing instructions recommended for your yarn. Cotton baskets can often tolerate gentle washing, but the exact method depends on the fiber blend. Avoid high heat unless the yarn label specifically permits it, since heat can alter the shape and size.
If the basket is used for crochet hooks, scissors, needles, or other sharp tools, keep those objects positioned so their points do not catch against the crochet fabric. For very small craft supplies, a fabric pouch or inner container can prevent pieces from becoming lodged between stitches.
Ideas for Using the Finished Basket
- Store yarn balls and small crochet projects.
- Organize crochet hooks, stitch markers, measuring tapes, and notions.
- Keep fabric scraps together for patchwork or sewing projects.
- Hold embroidery supplies, ribbons, and trims.
- Use one basket for unfinished projects and another for completed pieces.
- Place the basket beside a craft desk for frequently used tools.
- Make several matching baskets for a coordinated craft-room storage system.
At a Glance
- Best yarn choice: Bulky #5 cotton or a sturdy cotton-rich blend.
- Skill level: Confident beginner.
- Key technique: Single crochet worked in rows and then joined rounds around a rectangular base.
- Size adjustment: Change the foundation length, base row count, or number of wall rounds.
- Finishing: Weave in ends, gently shape the basket, and optionally add a contrasting top edge or folded cuff.
Final Thoughts on This Crochet Craft Storage Basket
A handmade organizer can make a small creative workspace feel more intentional without sacrificing useful storage. This crochet craft storage basket combines a dense single crochet texture with a simple rectangular construction, making it practical for everyday craft supplies and easy to adapt to different shelves, desks, and storage areas.
Before beginning, choose a yarn with enough structure for the job, make a small gauge swatch if the finished dimensions matter, and read the complete pattern through once. Keep your stitch counts consistent, especially when establishing the first wall round around the rectangular base.
From there, personalize the basket to suit your space. Experiment with color changes, add a folded cuff, make a taller version for yarn, or create a shallow version for tools and notions. With the same basic construction, you can build a coordinated collection of handmade storage pieces while using up useful yarn in your stash.
The result is a simple, useful piece of crochet craft storage that brings handmade texture to the workspace while helping keep creative supplies organized and accessible.
Tags
Crochet Craft Storage
Crochet Basket Pattern
Free Crochet Pattern
Crochet Storage Basket
Easy Crochet Project
Craft Room Organization
Crochet Home Decor